PLAID SHIRT FOR WOMEN/MEN
Even though I already have a tailored shirt blog post, I decided it was time to update it. I have learned more quick and efficient tips and will include them in this new post.This pattern is a Kwik Sew K3555 collared shirt. The instructions below are for a basic long sleeve with a tailored placket and cuff, lined yoke, collar and stand, and front button band. The instructions are for a women's right side button band, but the instructions could be reversed for a men's left side button band.
NOTE: For this Kwik Sew pattern, all seam allowances are either 1/4" or 3/8". Pay attention to all instructions.
We are working on plaid fabric for this project Here are some articles that are helpful when selecting plaid fabric and a pattern style.
Plaid Shirt Article #1
Plaid Shirt Article #2
Plaid Shirt Article #3
Plaid Shirt Article #4
Prepare your fabric by preshrinking it and then pressing it to get the wrinkles out. Also press the pattern pieces so they are nice and smooth.
Here are some basic tips when cutting and sewing your classic plaid shirt:
- professional cutting influences a professional garment
- have good shears, cut with nice, long strokes--do not use rotary cutter
- be alert and awake
- save all your scraps
- cut out a single layer at a time
- choose a dominant line and use that same line for your center back, center yoke, and front band
- mark all right side pieces of cut fabric with a piece of tape
- do not use flannel--it creeps
- match everything horizontally and vertically when possible
PREPARING THE PATTERN PIECES
For the front, back and yoke pieces, draw horizontal lines across the pattern. This will help cut out accurately on grain. There are 3 lines for the front piece.
There are 2 lines for the back piece and 1 line for the yoke piece.
PREPARING THE PLAID FABRIC
Check entire plaid fabric on both sides to look for flaws. If there are flaws, identify them with masking tape. That way you can cut around these areas.
Also identify the top of your fabric on the right side with an arrow. This will keep all your pattern pieces going the same direction.
Lay out your fabric single layer right side up. Double check that the horizontal and vertical plaid lines are perpendicular to each other. It is helpful to lay out the fabric on a cloth table. This grips the fabric so that it will not slip around. With a long ruler, check the horizontal plaid lines to make sure they are straight and perpendicular to the vertical lines. You want the fabric to be absolutely straight. You may also use a square ruler to see that your vertical and horizontal lines are 90 degrees square. Only prepare the fabric area for the current pattern you plan to cut out.
Choose the dominant line that you would like to have for center back, center yoke, and button band. This particular plaid is uneven. I have chosen to go between the thin blue vertical lines. The pin indicates where the center is between the two blue lines.
CUTTING OUT--BACK, YOKE, and CENTER FRONT--MUST DO IN THIS ORDER
With fabric right side up, mark center of dominant line and place back pattern right side up, with fold line on the center of the dominant line. At least in three places, check the horizontal lines on both edges of the pattern to make sure these lines are perpendicular to the vertical lines.
Cut out the back piece, but do not cut on the center back fold line. You may want to put objects on the center back line so that you do not accidentally cut there.
Now side one of the back is cut out.
Roll the cut back piece on the fold, matching the horizontal and vertical plaid lines. When all lines match up, pin in place and cut the other half of the shirt back.
Shirt back is now cut out. Congratulations! 😊
Identify the center of the dominant plaid you have chosen. Since this yoke pattern piece is a full pattern, I have folded it in half.
Place yoke pattern right side up on lengthwise grain, with center back matching the center of the dominant plaid line.
Pin yoke in place. Make sure the horizontal lines go straight across.
Cut out the first side of the yoke. Since the bottom of the yoke is a straight edge, cut along the bottom straight edge on a plaid line or precisely parallel to a plaid line.
Then fold yoke in half at center back, right on dominant plaid line. Match up horizontal and vertical plaid lines and pin in place. Cut out rest of yoke. You will cut out the yoke lining later.
Get plaid fabric on grain again, right side up. Place front pattern piece right side up. Start by lining up the front vertical line. DO NOT PIN IN PLACE YET. You still need to match the side seam with the back piece and the shoulder with the yoke piece.
To match both vertical and horizontal plaid lines, place the cut back piece on top of the front pattern, with side seams lining up.

Then place the yoke above, matching the shoulder seam with the front pattern.Then move front shirt pattern so that the horizontal lines will match at the side seams. Also check to make sure that the vertical seams match at the shoulder of the yoke. Also make sure that the front vertical edge is parallel with a vertical plaid line.
The shoulder and side seam need to match the plaid lines accurately. Do not worry about matching the hem edge.
Because my plaid fabric is uneven, not every vertical line will match. Notice that the outside thin blue lines match at the shoulder.
Also make sure that the front vertical edge is parallel with a vertical plaid line.
Peel back the yoke and back pieces so that you can see the front pattern piece.
Cut out shirt front.
Remove all pattern pieces.
Now flip shirt front pattern right side down and match up horizontal and vertical lines to cut out the second shirt front. Pin in place.
Notice once again that because this is an uneven plaid, not all the vertical lines match each other. Cut out second front shirt. This will give you a right front and a left front.
Matching horizontally at the side seam.
Now it is time to cut out the front button band. You want to make sure that the center of the button band is the dominant vertical plaid line, or choose another dominant line. I have chosen the center of the wide white stripe. The button band will be 2 1/4" wide. Begin by marking the dominant vertical plaid line. Then measure 1 1/8" out from that center mark on both sides and mark. This will be the width of your 2 1/4" wide button band. The band will need to match the horizontal plaid lines with the shirt front.
Once again, check to make sure that the horizontal lines of the button band will match the horizontal lines of the shirt front. As you cut out the button band, make it an inch longer at the top and bottom.
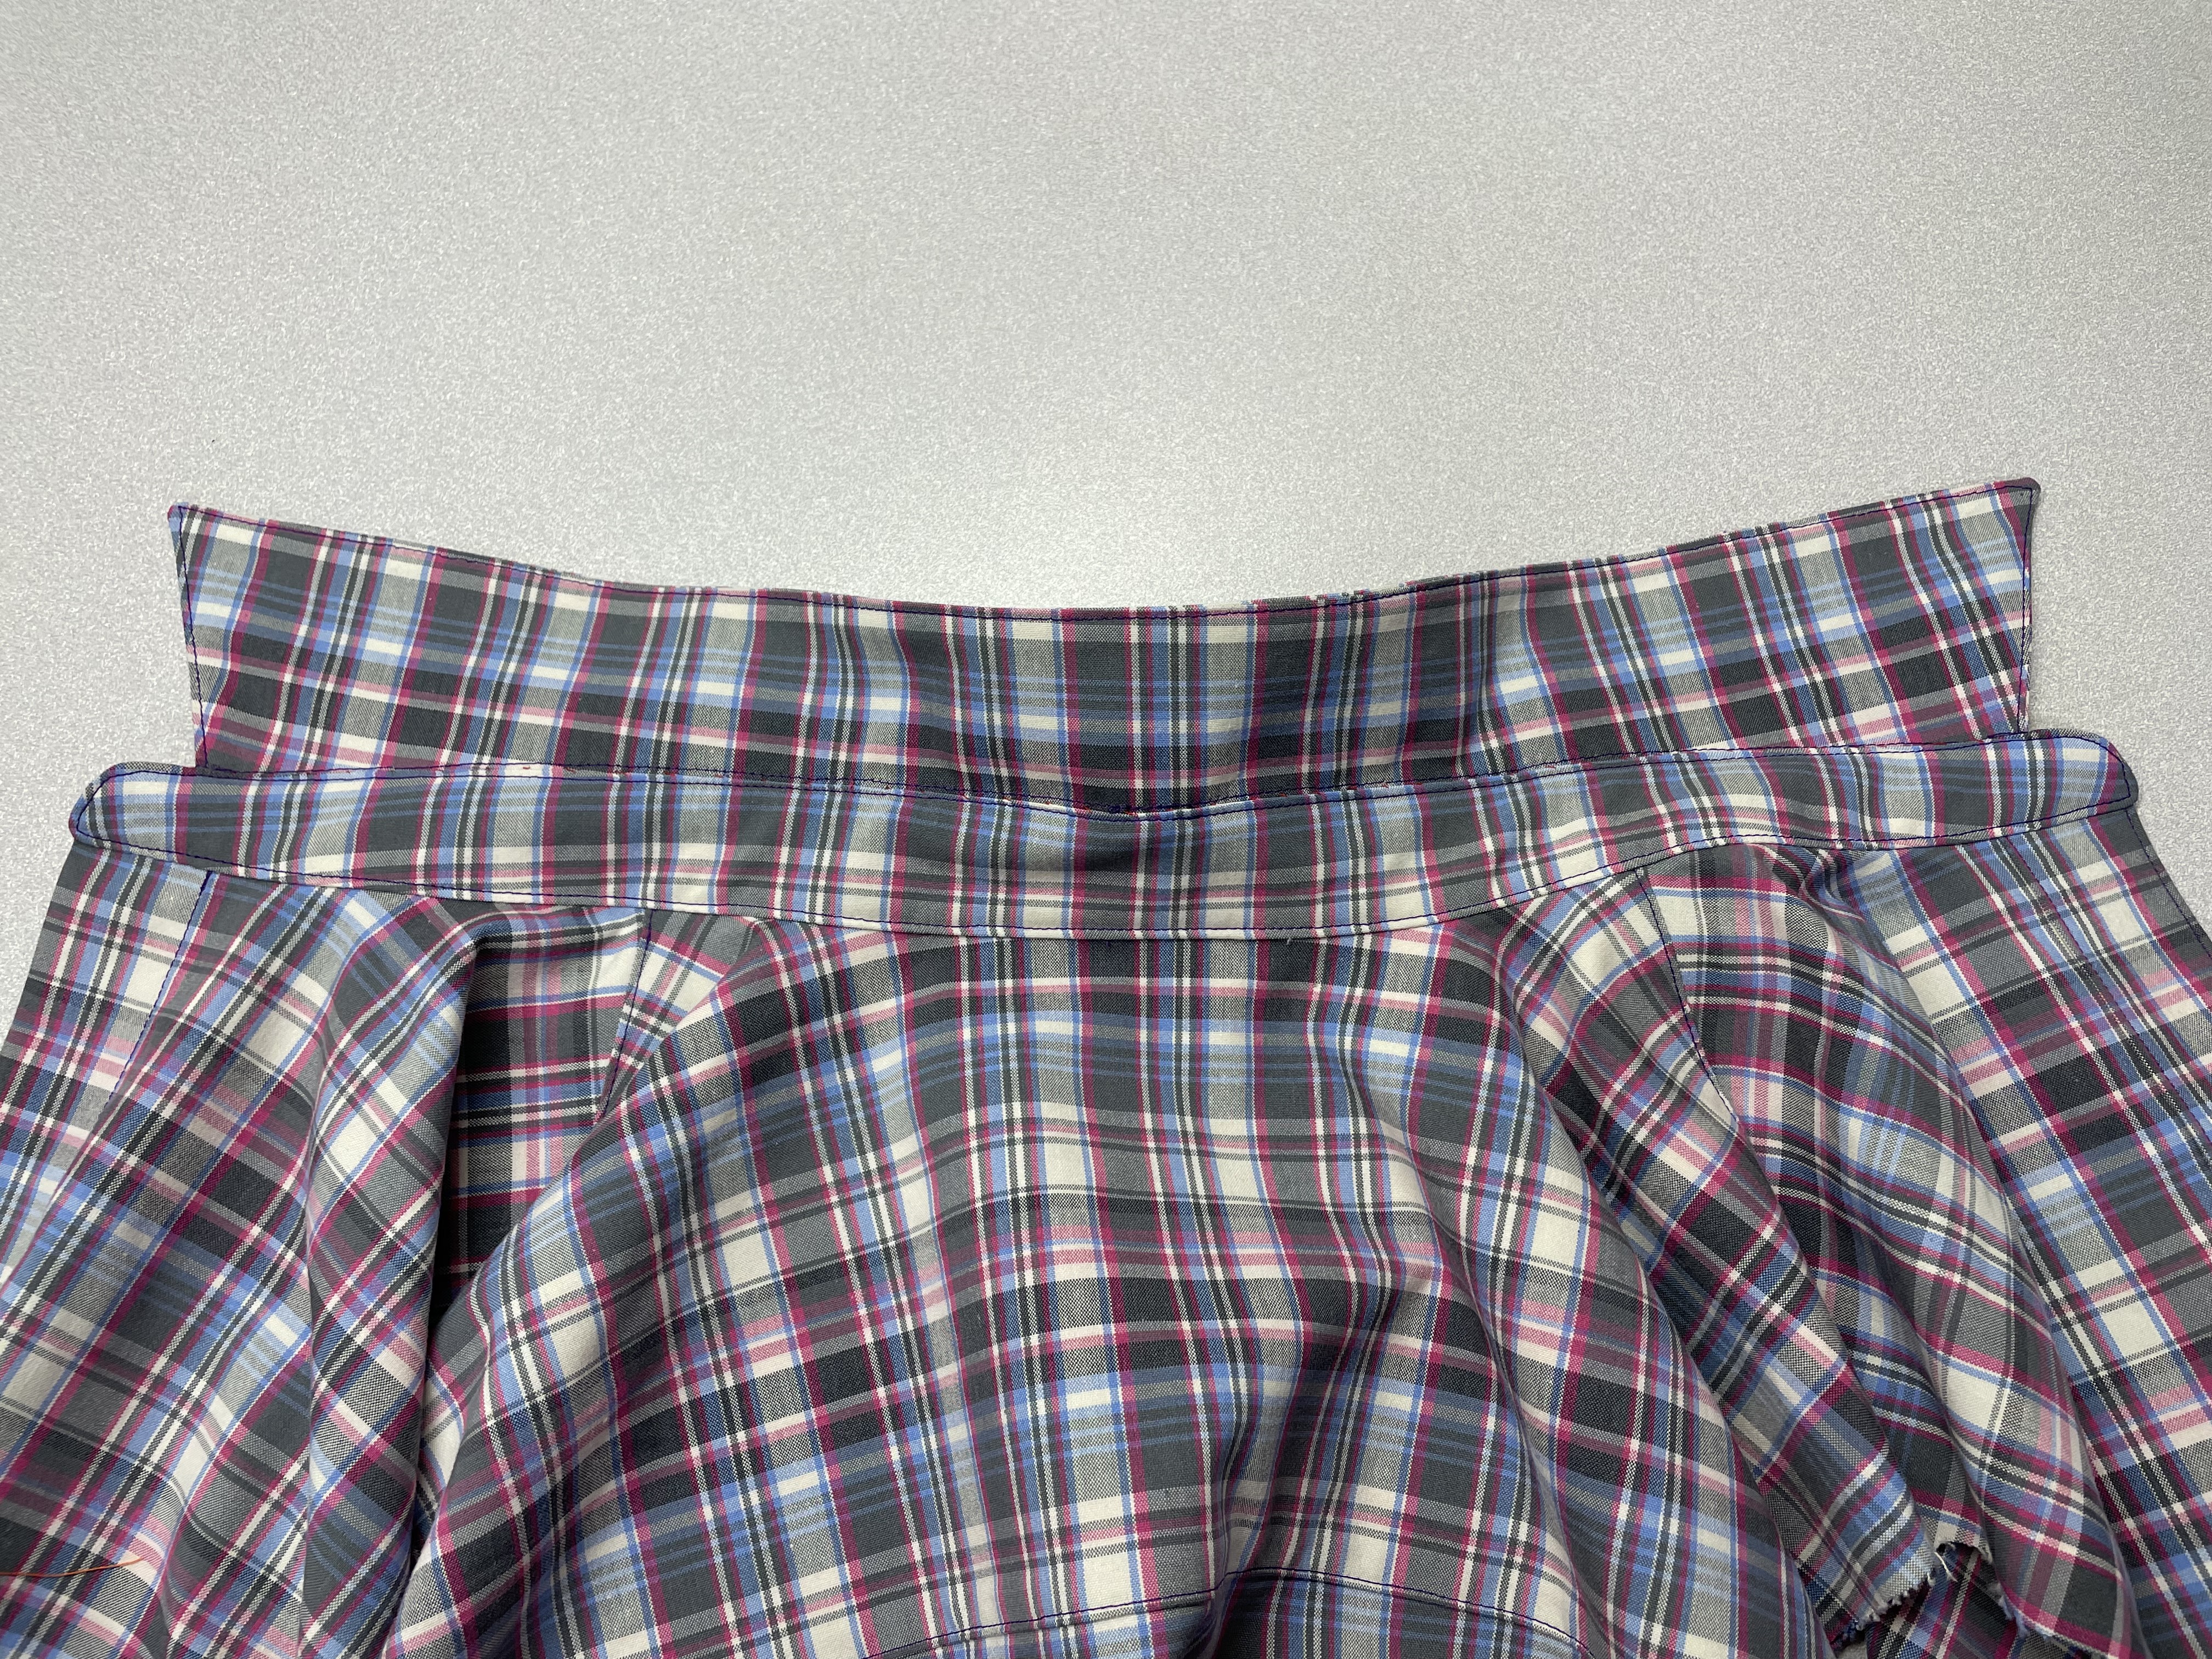
Here is a picture of the centered button band, matching up to the shirt front.
TIP: As you cut out all your pieces, put a piece of tape on all the right fabric sides.
TRANSFER PATTERN MARKINGS
Before taking pattern pieces off, be sure to transfer pattern markings. For the shirt front center front and fold lines, snip into the edge of the fabric. Notches can also be transferred with snips. (SNIPS ARE NO LONGER THAN 1/8" LONG.)
Snip markings at neckline.
When marking the pockets, use tailor tacks.
Stitch through each pocket corner for the correct size.
Pull top layer fabric back and pull threads at least 1". Cut in the center of the threads.
Now there will be thread markings on each shirt front in case you want to sew on two pockets.
PATCH POCKET ON LEFT FRONT
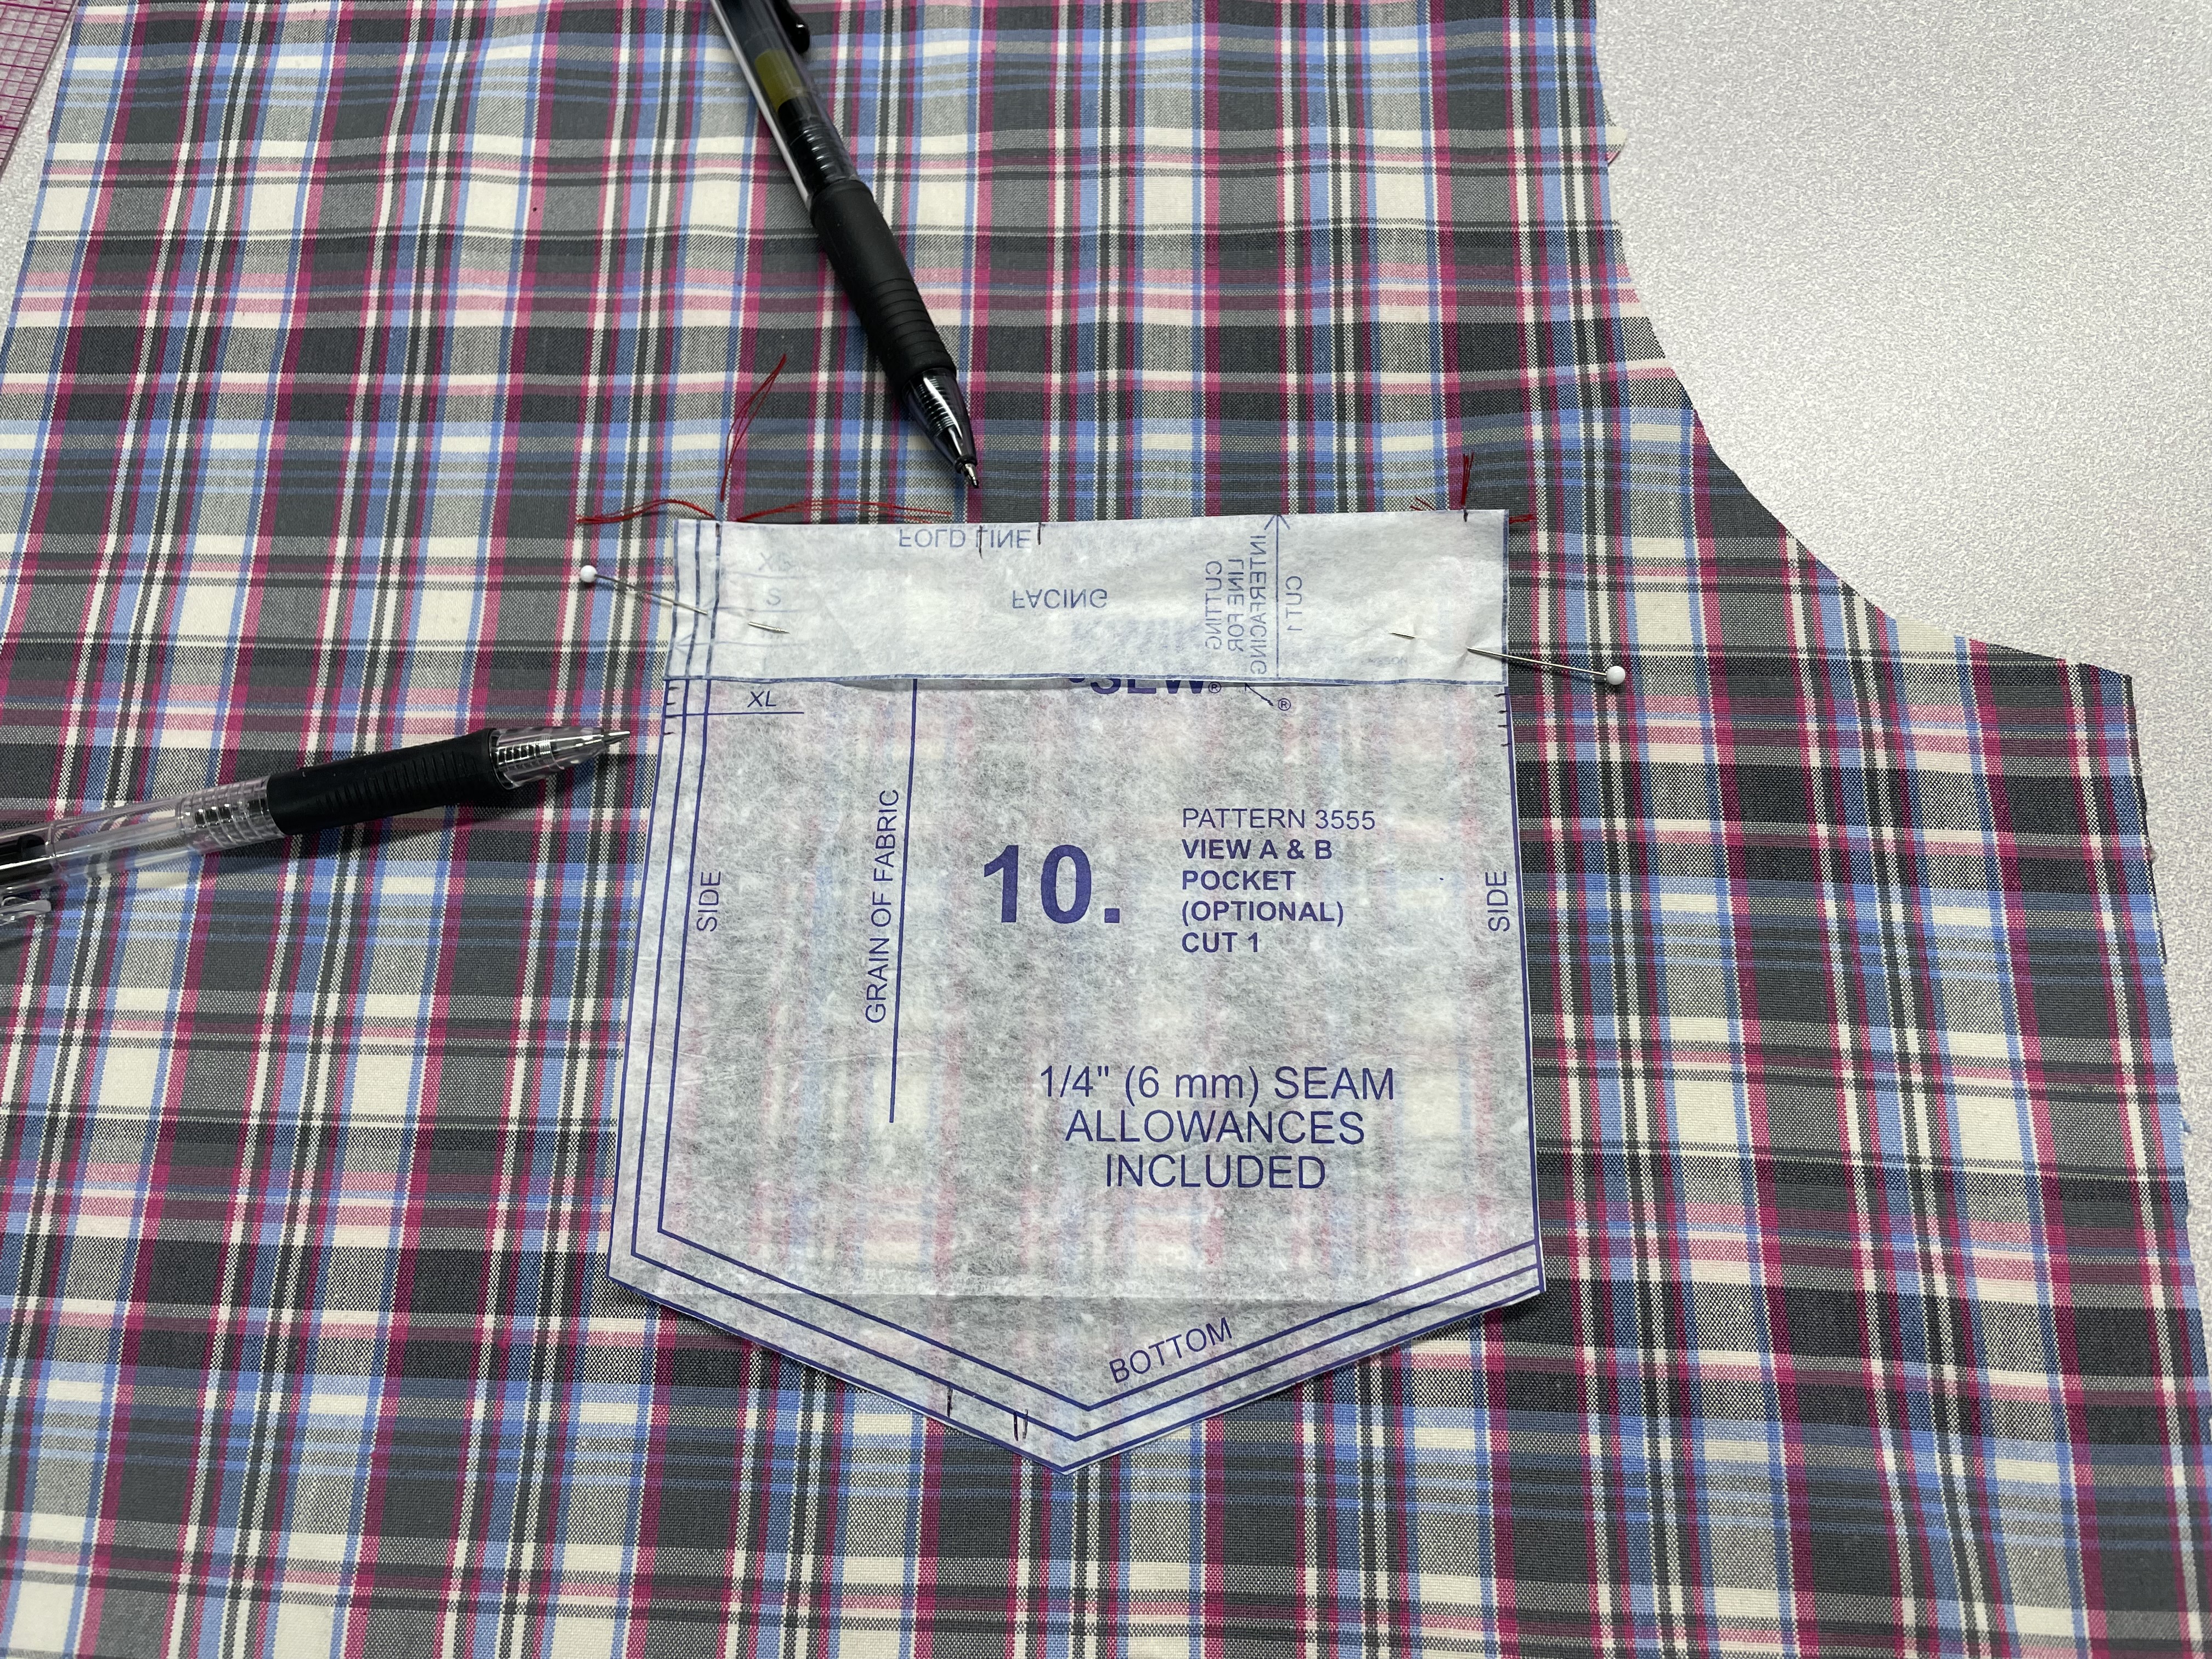
Place shirt front right side up. Notice where the tailor tack markings are for the pocket placement.
Place the pocket pattern on top of the tailor tack markings, matching up on the fold line. Mark where the sides of the pocket pattern are on the plaid lines.
Identify the same plaid lines on plaid fabric and cut out pocket sides.
Match the plaid lines horizontally and vertically.
Fold the pattern and fabric pocket in half to cut the bottom accurately.
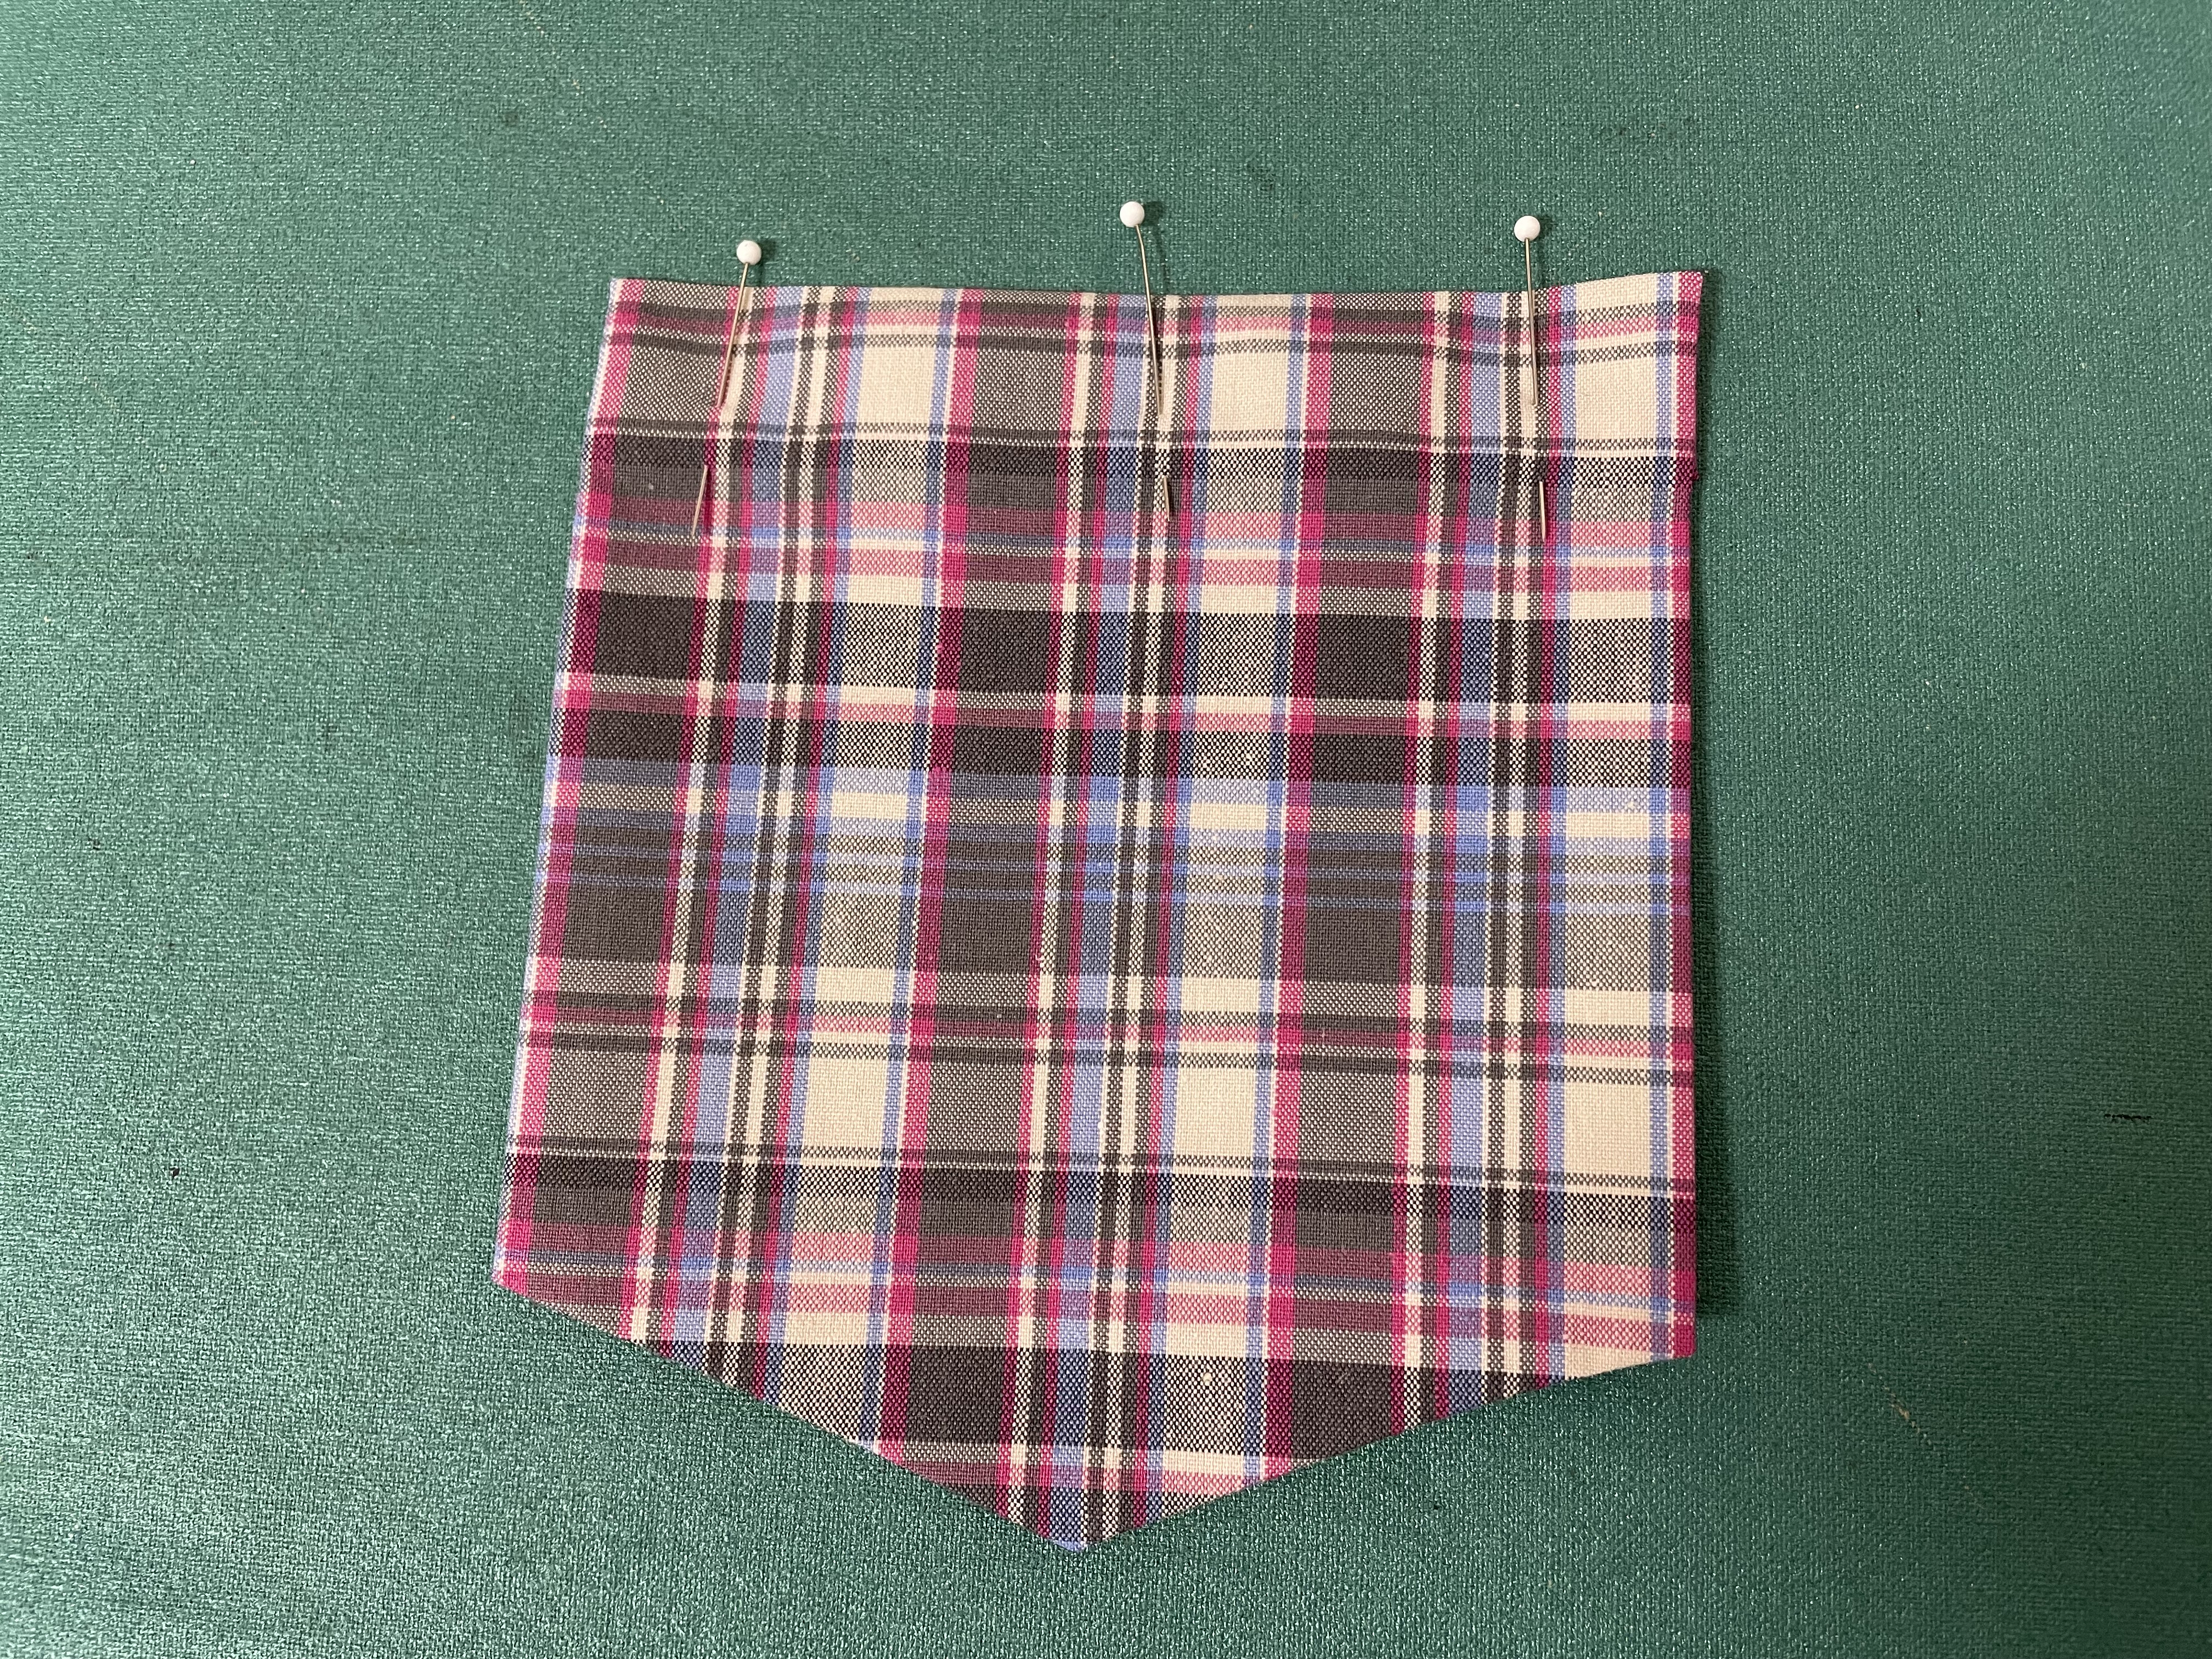
Finish cutting out pocket.
Snip side of pocket on fold line.
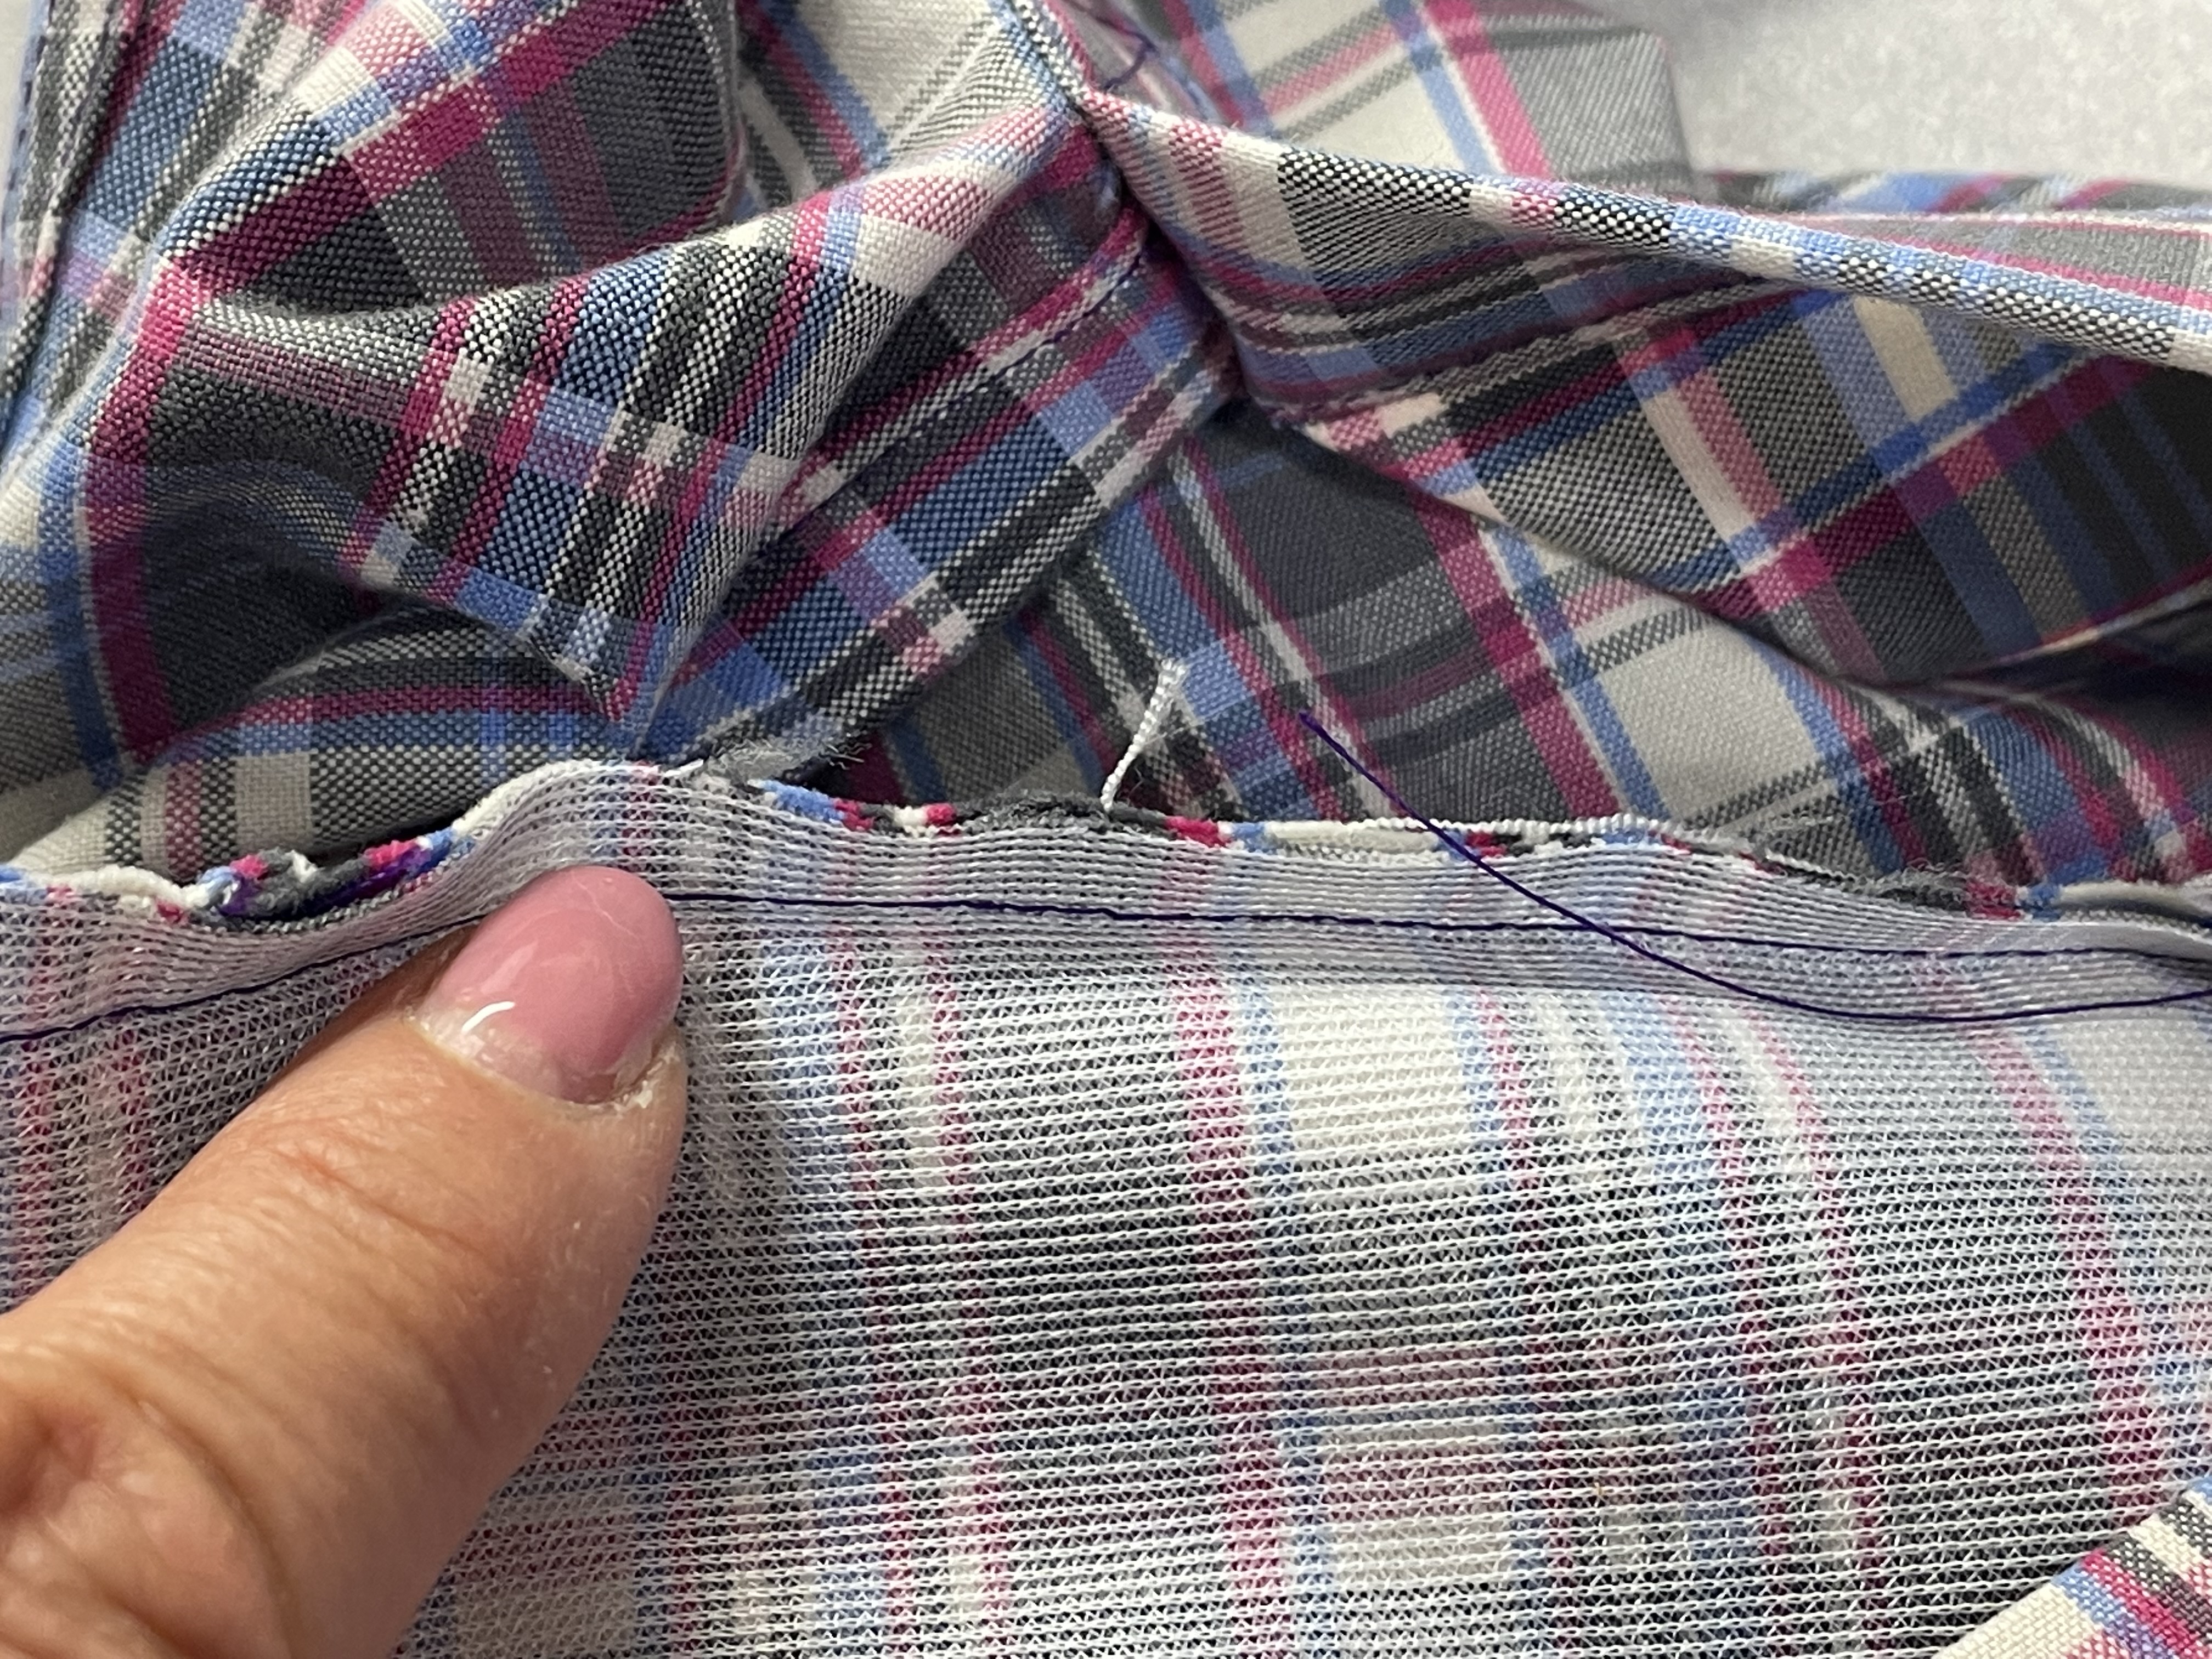
With pockets wrong side up, press top to wrong side on fold line.
Press under top raw edge 1/4".
Place pin on fold lines of pocket. Fold right sides together on fold line and pin in place.
Stitch on outside edge of fold, 1/4" seam allowance. (5/8" if your pattern indicates.)
Trim off corners of pocket seams.
Use turning tool to push out pocket corners.
Press pocket sides to wrong side 1/4".
Using seam gauge, press under bottom "V" of pocket. Put a pin to mark where the center of the pocket is.
Repress pocket folds.
Fold pocket in half to make sure the pocket is symmetrical.
Turn pocket right side up and check to make sure vertical plaid lines are straight on the pocket sides. Pin hem into place.
Stitch across bottom of pocket hem on right side of plaid, following parallel to a plaid line. You may leave thread tails on end of stitches to pull threads to the pocket back and tie knots instead of backstitching.
Pull threads to pocket back and tie them in a double knot.
Place shirt front right side up. Place pocket on shirt front, lining up to the tailor tack markings and matching up vertical and horizontal plaid lines. Pin in place.
Hand baste pocket to shirt.
To sew reinforced triangle corners, begin with the pocket upside down, beginning at the corner of the hem. Stitch up to the top fold, about 1/4" in from the side fold.
Finished pocket, edgestitched on three sides. Pull thread tails to the wrong side.
Tie the thread tails in double knots and clip.
FRONT BAND
Cut a piece of fusible interfacing 2" wide and the length of the button band. (It is called the button band, but it really is the buttonhole side.) Prepare your button band by pressing it and making sure that the vertical and horizontal lines are truly perpendicular to each other.
You can check this by using a clear ruler. If you fuse the interfacing on with the fabric crooked, you will not be able to fix it.
Turn the button band wrong side up and center the interfacing on the band. With a warm iron, press on the interfacing. Begin in the middle and move the iron to the band top and then to the bottom.
On men's shirts, the buttonholes (and button band) are on the left side. On women's shirts, the buttonholes (and button band) are on the right side. On the buttonholes side, cut off 2 3/8". (On your pattern, check to make sure that you are leaving 1/4" left on beyond the fold line marking.)
Cut this piece off and save. You will not use this as your button band. Since I am making a women's shirt, I have cut fabric off on the right shirt front. Do the opposite for the men's shirt.
Place right shirt front wrong side up.
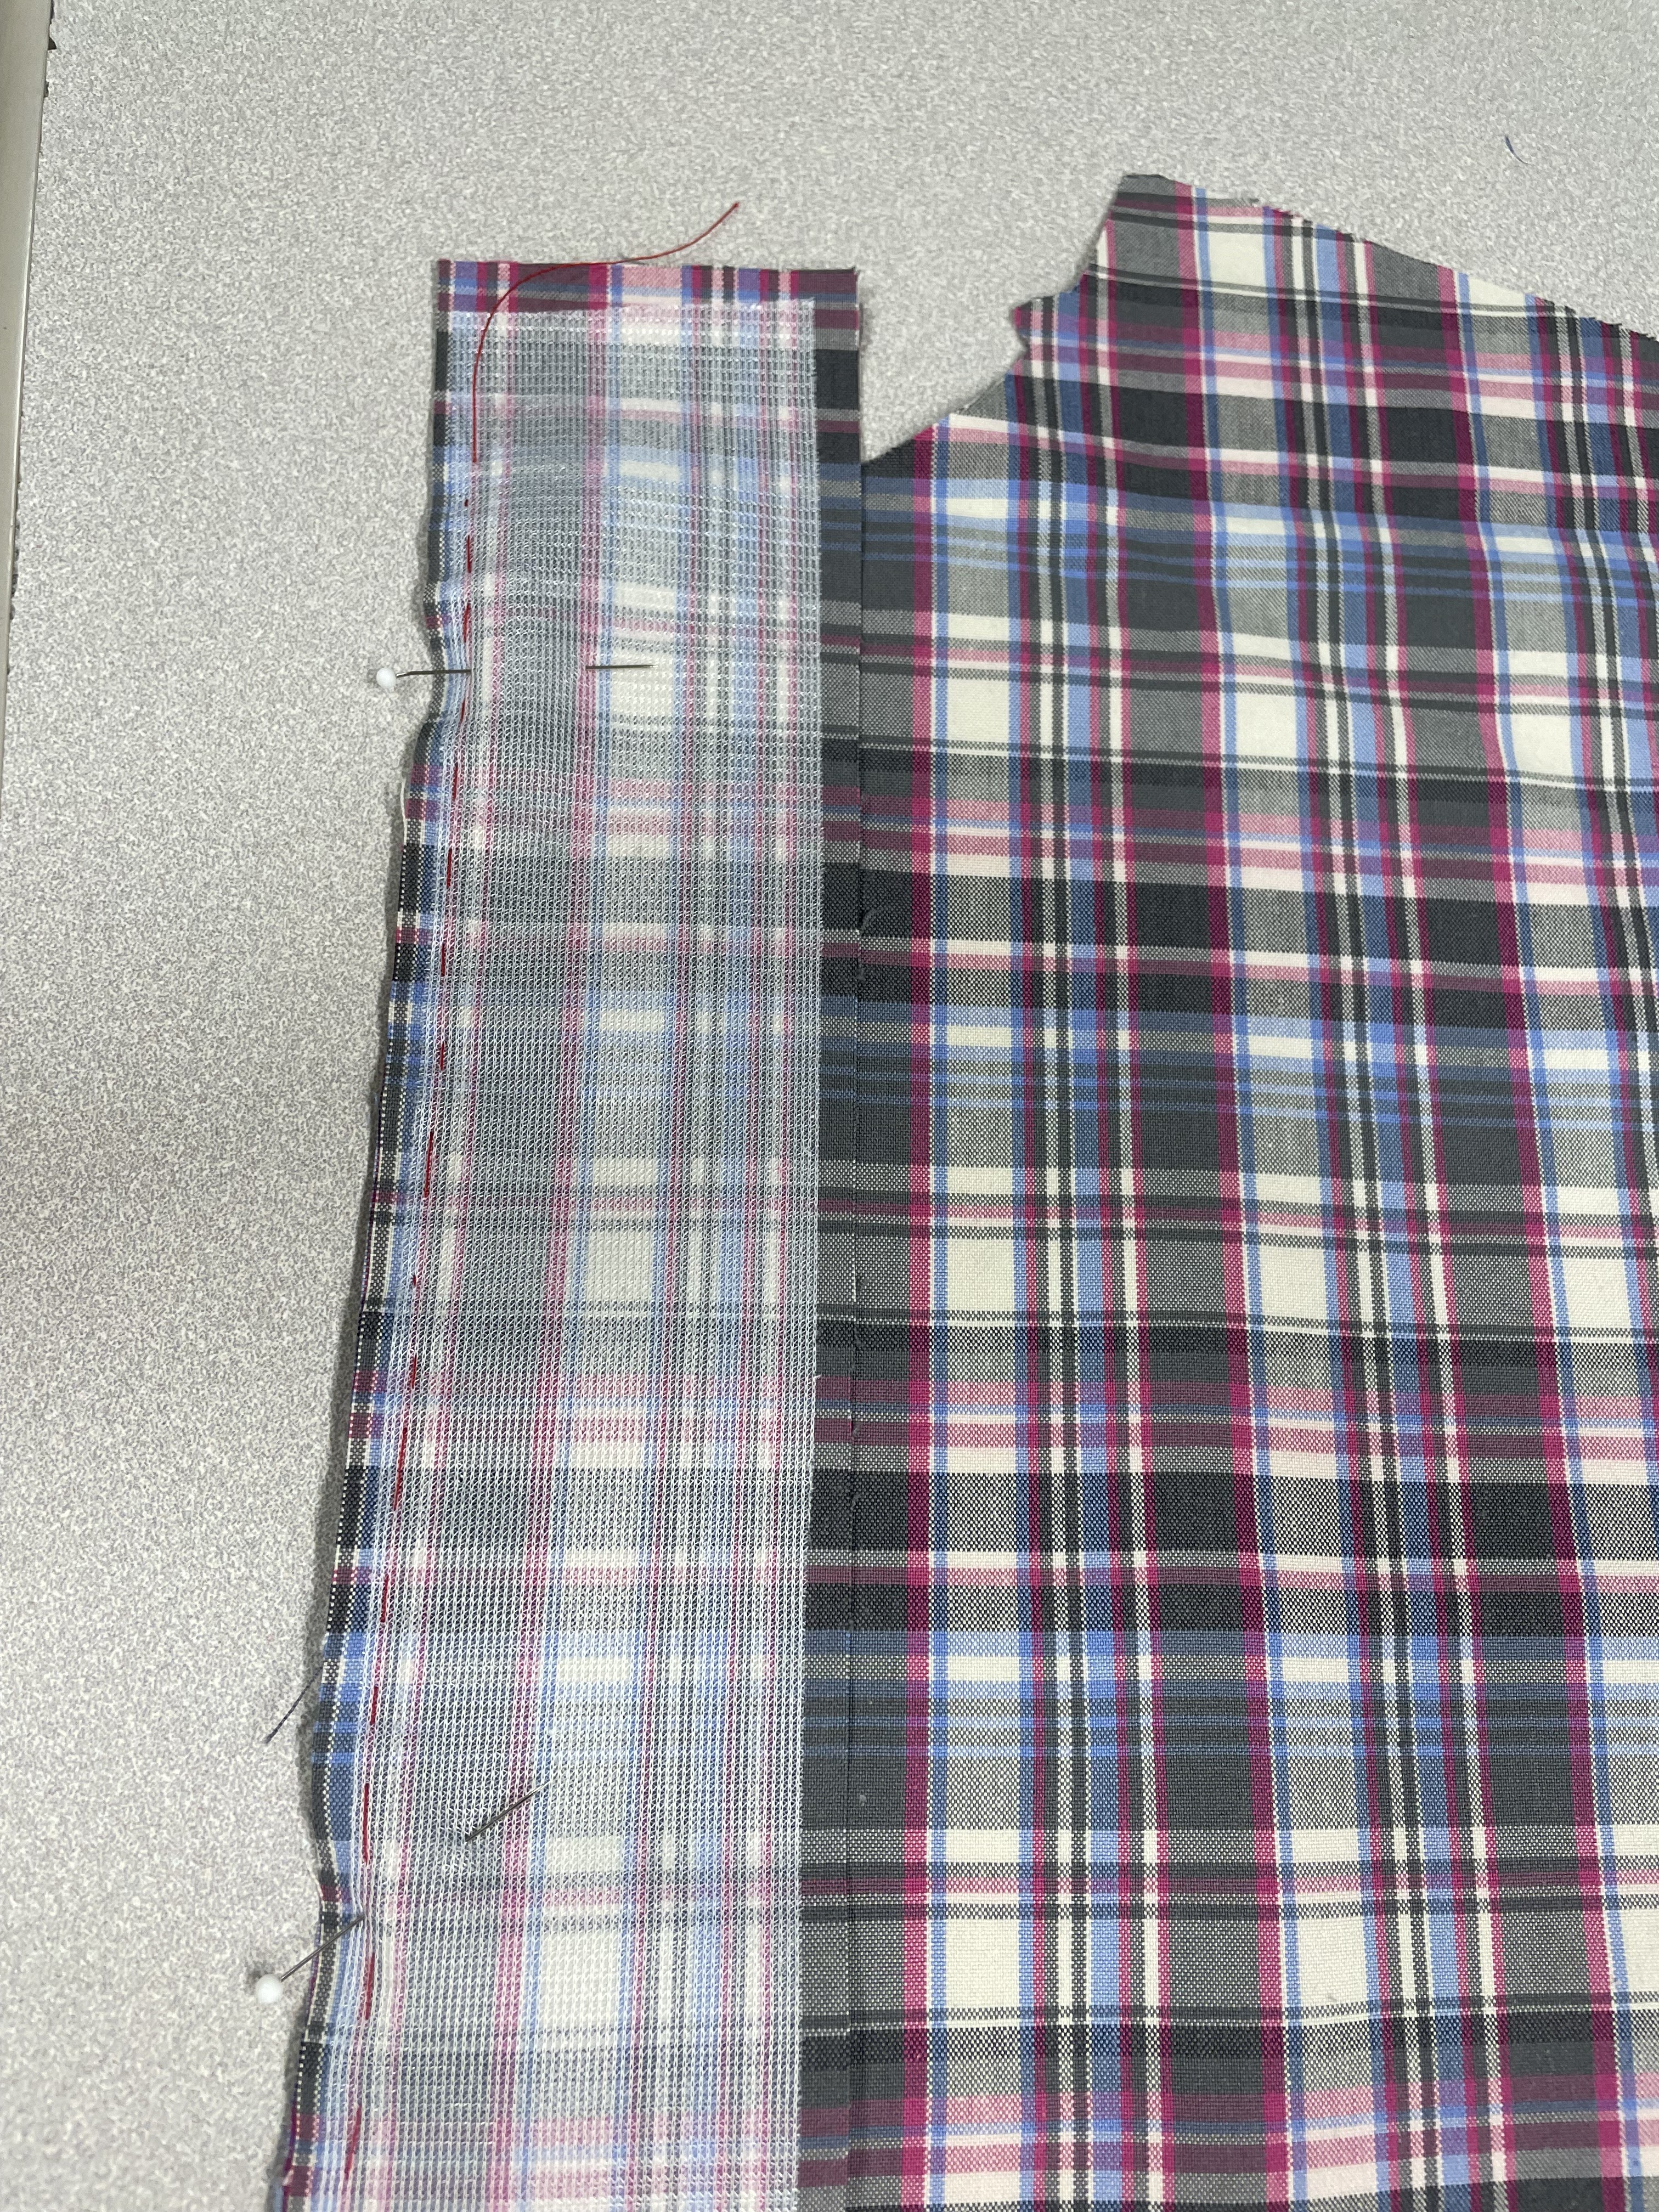
Place button band right side down on wrong side of shirt front (the shirt front with the 2 3/8" cut off).
Secure band to shirt with lots of pins.
As you pin, to make sure that your horizontal lines are matching up, fold back the fabric 1/4" and check that your lines are matching up.
With a single thread and a hand needle, baste the band to the shirt front. Be careful to not let your fabric layers shift.
With button band side up, stitch band to shirt front, stitching 3/8" seam allowance. Be careful and not let your fabric shift. Using a walking foot is very helpful.
When finished, take out basting stitch.
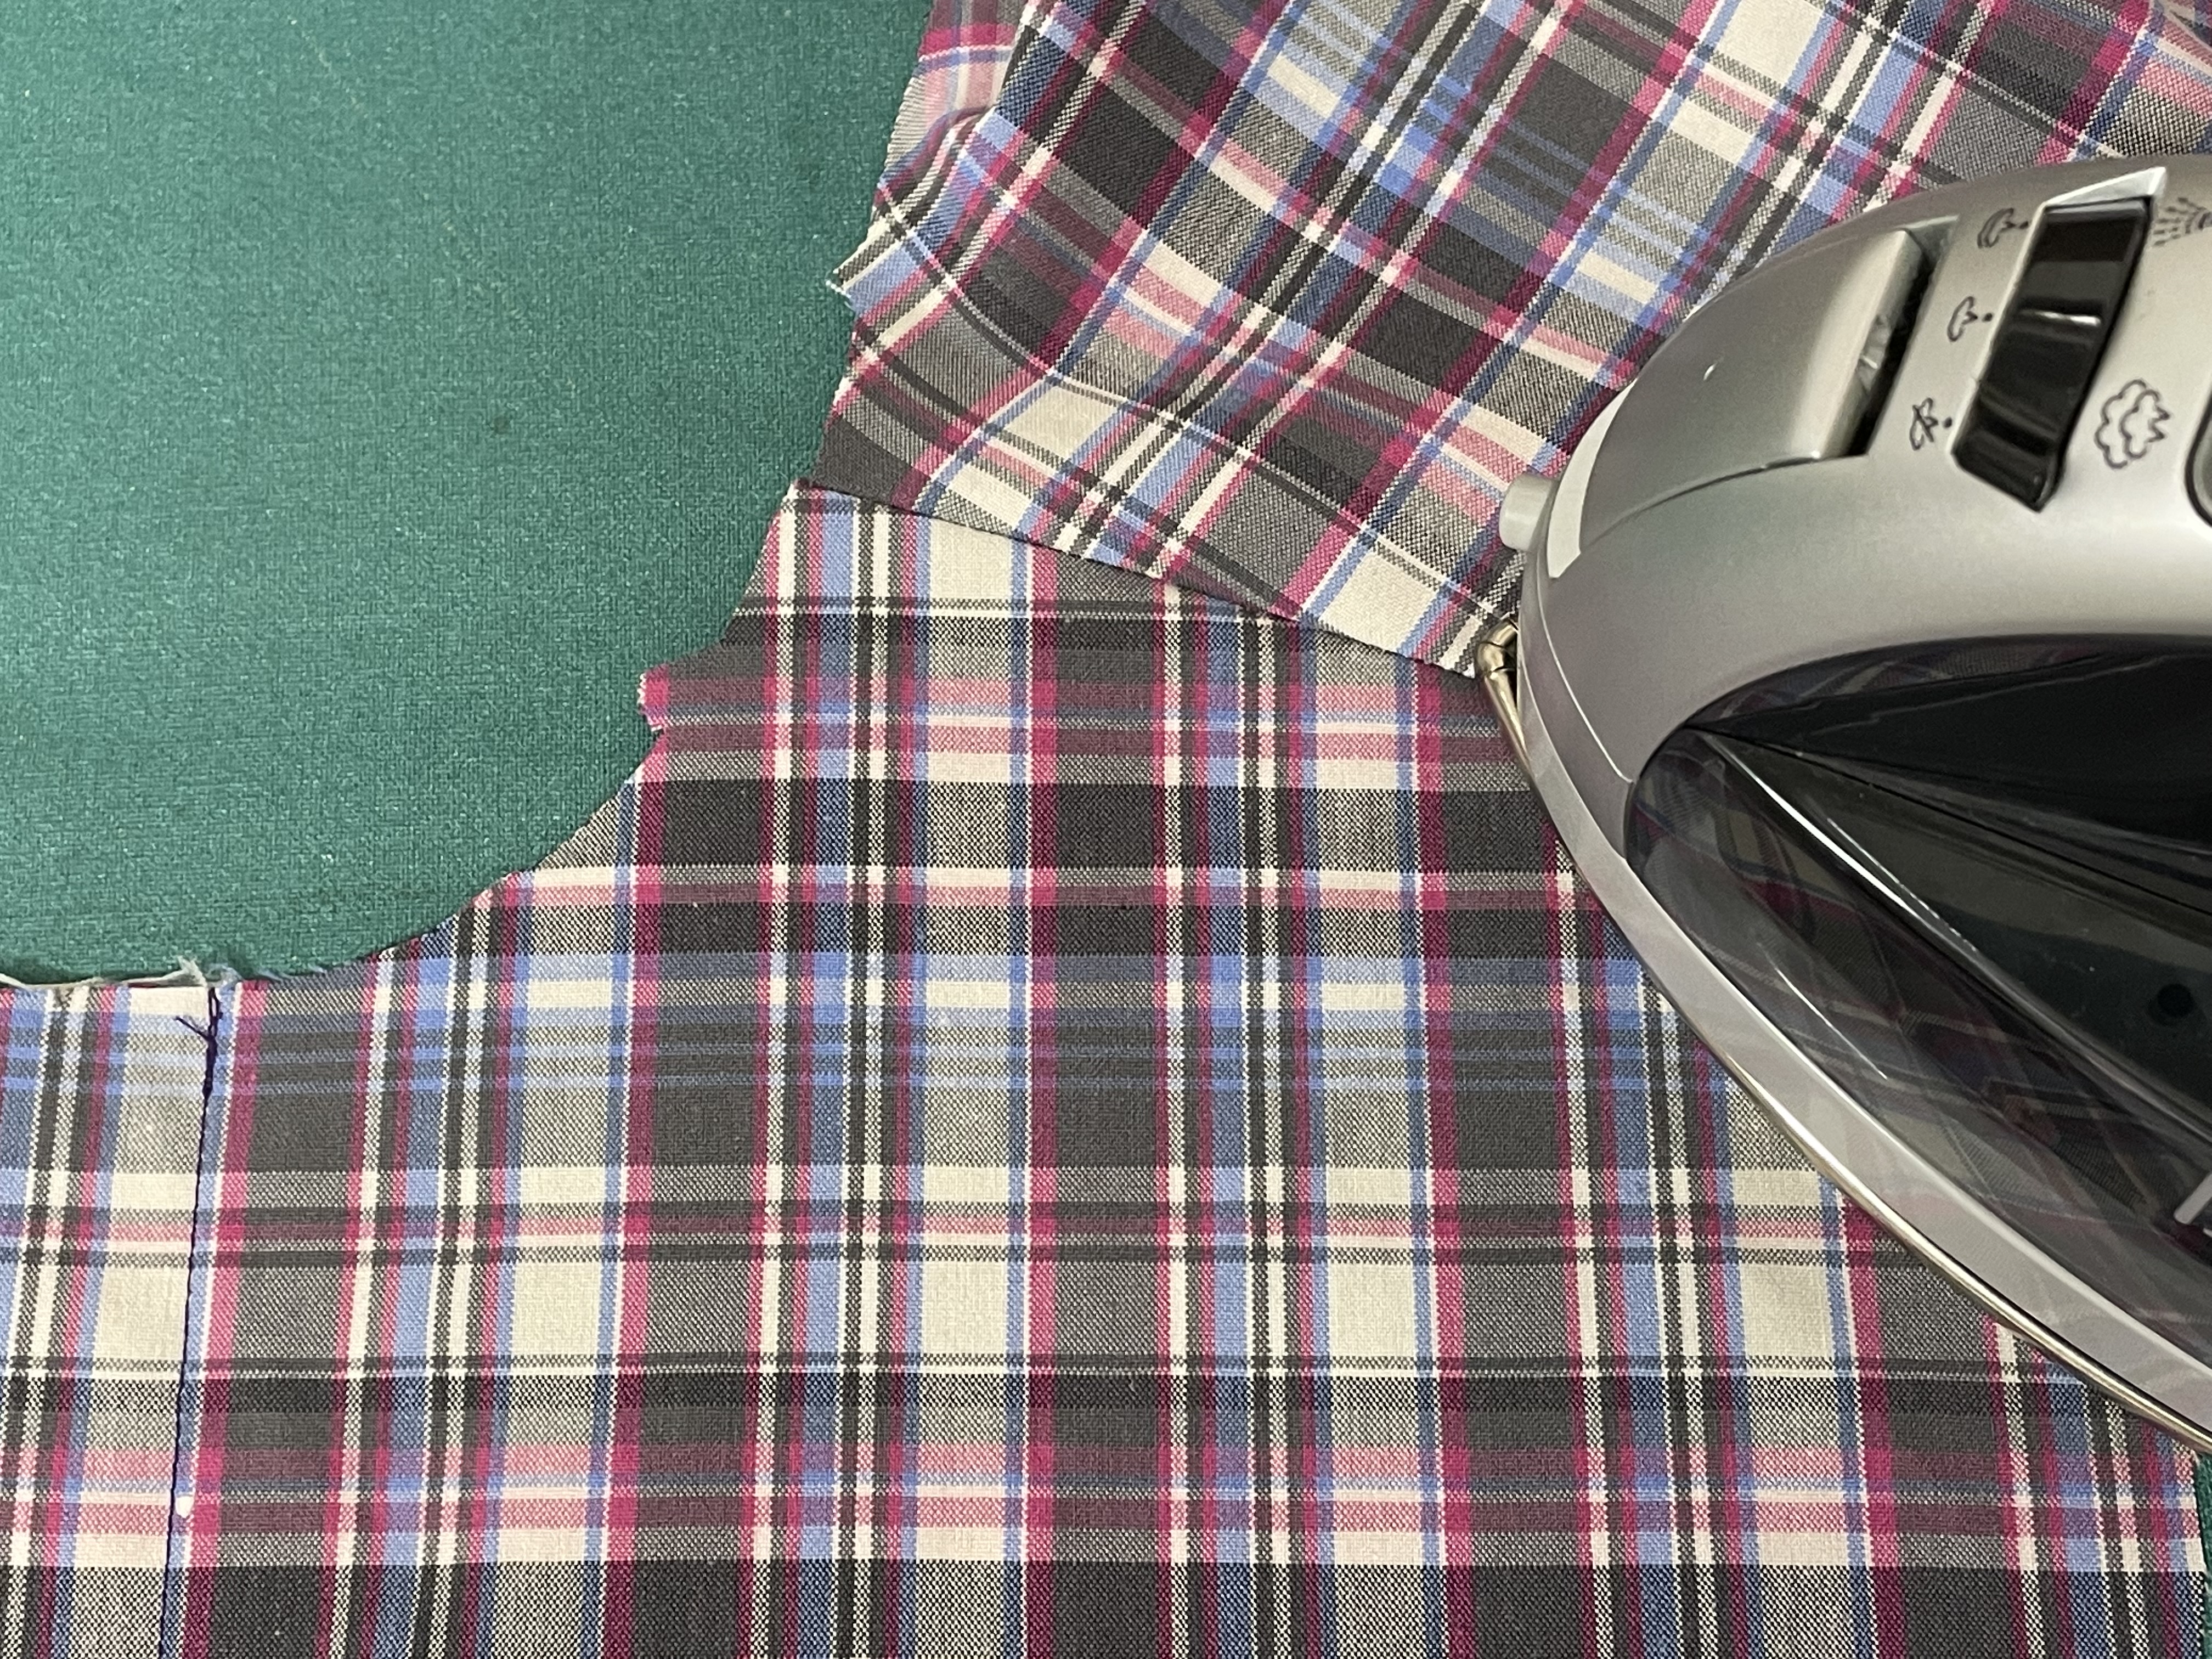
Press seam flat to meld stitches, and then press seam allowance towards band.
Trim seam allowance on shirt side to grade seam allowance.
Turn shirt right side up and press seam again.
Then turn shirt front wrong side up, with the band flipped to the right side. You will be pressing on the edge, with just 1/16" of the band showing on the wrong side. Press edge.
Check on the right side of the button band to make sure that you are either on a plaid line or parallel to a plaid line. You want this band to be perfectly on grain.
Once this is finished, measure from the pressed edge to your center line and add a pin. Write down that amount.
Then measure that same amount on the other side of the center and place another pin. This second pin marking will become your other fold line.
Open up the button band and press under on the pin mark, keeping your fold even all the way down the band.
With shirt right side up, match up the button band with the shirt horizontal plaid lines. Pin band to shirt.
Hand baste band to shirt front.
Using a walking foot will help prevent the plaid fabric layers from shifting. This is like having a feed dog on top of the fabric.
Make sure that the arm of the walking foot is over the needle clamp screw.
When topstitching the button band, always stitch in the same direction to prevent the fabric from shifting.
You may do a single topstitching on both sides of the button band or do a double topstitching on both sides.
After topstitching is finished, remove the basting stitches.
On the non-band side of the shirt (the button side), turn your shirt wrong side up. Press on the fold line, keeping the plaid line straight.
Then open the fold and press under half the amount.
Then fold both layers and press once again, keeping the horizontal plaid lines straight.
Pin down the double fold.
Turn the shirt to the right side. To determine where to topstitch, check where the fold ends on the wrong side of the shirt. Come in from there 1/8" - 3/16" and place a pin as a marker. This is where you will topstitch.
Topstitch from the top to the bottom, staying parallel to a plaid line. One stitching is enough.
Here is the completed topstitching.
Turn shirt wrong side up. Trip off the extra band at the neckline.
Trim off the extra at the hem area.
YOKE
Cut out the yoke lining. It does not need to match plaid lines. I chose to match the plaid lines because it is easier to cut out matching the plaid lines. The yoke lining may also be a different fabric entirely.
Place shirt back right side up and check the grainline at the top edge. If the two corners do not match up, fold the shirt in half.
After folding the shirt in half, trim off any extra so that the grainline is the same for both halves.
For clarification, I will call the yoke that faces the world the "upper yoke" and the yoke that faces the body the "yoke lining." With shirt back right side up, place upper yoke right side up just above the shirt to make sure the vertical lines match up.
Place upper yoke on top of shirt back, with right sides together, matching top raw edges. Pin together, making sure that the vertical lines match up.
Using the walking foot, stitch 1/4" seam, stitching on upper yoke side and keeping stitching parallel with plaid lines.
Finished yoke seam. Flip shirt back to wrong side.
With shirt back wrong side up, pin yoke lining piece right side down on top of back and pin raw edges together.
Flip shirt around so that the upper yoke is on top. Stitch yoke lining to shirt, following upper yoke stitching line.
Press yoke stitching flat, melding stitches into fabric.
With shirt back wrong side up, press seam allowance towards yoke.
With shirt back right side up, press yoke seam again, making sure there are no fabric tucks.
With shirt back wrong side up press second yoke seam to do the same.
Place shirt back right side up. Then place shirt fronts right side down on top of upper yoke, matching shoulders at raw edges. The yoke lining should be out of the way.
Pin shoulders, making sure that vertical lines are matching where the stitching line is. Since this seam will be at an angle, the plaid lines may not match at the cutting edge.
Sew shoulders seams. Because these seams are slanted, stitch directionally from the neck to the armhole to prevent stretching.
With shirt right side up, press shoulder seam towards yoke.
Place shirt right side up.
Roll up shirt back up into a "sausage roll" on top of the upper yoke piece.
Also roll up both shirt fronts and place on top of yoke.
Wrap yoke lining around folded shirt, matching up yoke shoulders.
Pin yoke shoulders. The vertical plaid lines may or may not match, depending on how you cut the yoke lining. The yoke lining will not be seen on the right side of the shirt.
With upper yoke seam towards you, stitch on same stitching, so that yoke lining is stitched at the shoulder.
Repeat this same process for the other yoke lining shoulder seam. Stitch directionally from neck to armhole.
Pull out both fronts from the neck opening.
Place shirt right side up and press yoke shoulder seams again. All raw edges in the yoke are now enclosed.
Edgestitch yoke shoulder seams. back yoke seam.
Also edgestitch back yoke seam.
Great job on the yokes. Now it is beginning to look like a real shirt.
STAYSTITCH THE NECKLINE
Pin the two yokes together at the back neck.
Staystitch neckline 3/16" from the edge (do 1/2" if your seam allowance is 5/8"). Start at center back and stitch to center front. Then flip shirt around and stitch other neckline side from center back to center front. Be careful to not let the bias grainline stretch.
COLLAR AND STAND
Some shirt patterns have only one collar pattern and you will cut out two. My pattern has both an upper collar and an under collar so I will cut one of each. Notice that the under collar is slightly smaller than the upper collar.
You want the center back of the collar and collar stand to match the same dominant plaid line as the shirt and yoke center back. You will cut out the upper collar and outside stand first. Place your fabric right side up and get it on grain.
The larger point of the collar point is towards the bottom, so that the collar is placed the same direction as the shirt. Notice I labeled my collar patterns "TOP" with an arrow towards the top of the fabric. This is especially important when you have an uneven plaid.Line up the center fold on the center of the dominant plaid line. Pin in place and make sure that the horizontal and vertical lines are perpendicular to each other.
Cut out the first side.
Flip the cut side over and pin in place, matching the horizontal and vertical plaid lines.
Collar and stand cut out.
Place cut collar stand down on top of fabric and cut out second collar stand.Second side cut out.
Cut out interfacing for upper collar and outside stand. I am using this medium weight interfacing. It is so light that I do not need to trim off some of the seam allowance.
Fold interfacing in half and cut out one for upper collar and one for collar stand.
Press interfacing to wrong side of upper collar and collar stand.
Check upper collar end points. Make sure that the plaid lines are exactly the same vertically. (Remember that this is an uneven plaid.)
Check the horizontal plaid lines as well.
Check the horizontal plaid lines on the outside collar stand. Trim if necessary.
Measure and mark pivot corners of collar by measuring in 1/4" from cut edges.
If you do not have a separate under collar pattern, fold under collar in half and trim off 1/8" on front edges.
Pin upper collar to under collar with right sides together.
Sew collars together with 1/4" seam allowance. When you get to 1/2" from corner point, change stitch length to 1.5. Continue stitching to almost the corner marking. With needle in down position, raise presser foot and turn fabric diagonally. Stitch two tiny stitches diagonally. Then turn fabric again and continue stitching. After 1/2" out from the first corner, return stitch length to normal. Continue stitching to opposite collar corner and repeat process. Watch the following video for great tips from Threads Magazine.
After stitching collar, trim off excess fabric at corners.
Press seams flat and then press seams open over point pressing tool.
Turn collar right side out and push out corners with point turning tool.
To pull out corners out more gently, thread hand needle with double strand thread. Insert needle into collar corner.
While holding on threads, pull gently to nudge fabric out of corner. Do to both sides to make them both equal shape.
Check both corners of upper collar to make sure that they are the same shape and that the plaid lines match up.

Press collar on seams. Roll upper collar slightly to the under collar side.
Once again check upper collar points.
Topstitch on upper collar side. If you did double stitching on the button band, do the same to the collar.
Trim off cut edges so that upper and under collar match.
Fold collar in half and check to make sure collar halves are the same size.
Place upper collar right side up and collar stand with interfacing right side up. Check to make sure that the vertical plaid lines match up.

The following method is taken from the "Shirtmaking" book by David Coffin. It is a great technique to prevent bulk at the front of the collar stand.
For clarification, we will call the interfaced collar stand the OUTSIDE STAND and the collar stand facing the INSIDE STAND.
With shirt right side up, pin outside stand to neckline, matching center back and front markings.
The stand should extend beyond the shirt 1/4" for this pattern. (5/8" for 5/8" seam allowance pattern.)
Transfer pins to the shirt back side.
The stand should extend beyond the shirt 1/4" for this pattern. (5/8" for 5/8" seam allowance pattern.)

With shirt side up, start stitching from center back and stitch just to end of shirt front.
Leave thread tails and do not backstitch.
The thread tails will mark where the end of the fronts are.
Flip shirt around to still have shirt side up. Stitch from center back to the opposite shirt end.
Pin inside stand to shirt neckline, matching center back and shirt fronts.
At the front of the inside stand, offset the inside stand from the outside stand by 1/8". (This will allow the inside stand to roll towards the neck more smoothly.)
With the outside collar stand facing up, stitch through all the layers, following your previous stitching, stitching from center back to the front.
End the stitching exactly at the end of the shirt front and leave thread tails.
Flip the shirt around and stitch again from center back to the front of the shirt.
The collar stand pattern may not indicate where the CF marking is. To mark this on the button band, put a pin in the center of the band.
Add a ruler parallel to the plaid line, next to the pin marking and up into the collar stand. The CF of the collar stand is where the ruler is.
Place a pin as a marker where the ruler is on the collar stand.
It is helpful to make a stitching template. Do this by first tracing the front of the collar stand pattern. Then draw in the seam allowance.
Cut on the stitching line. This is your finished template.
Place the template on the shirt front to mark where the CF is.
Place template on wrong side of collar stand and mark stitching line up to the CF marking.
Mark both collar stand fronts.
Fold the shirt front under twice to get it out of the way of the collar stands.
Pin the outside stand to the inside stand.
Do the same for the opposite collar stand front. Fold shirt front out of the way.
Pin the outside stand to the inside stand.
Stitch collar stand from CF down to where the thread tail markings are.
Once you reach the corner, keep needle down and pivot.
Stitch for 1" along the bottom stitching line.
Do the same for the opposite collar stand front. Stitch collar stand from CF down to where the thread tail markings are.
Once you reach the corner, keep needle down and pivot.
Stitch for 1" along the bottom stitching line.
Check both collar stand fronts to make sure the stitching is the same shape. Fix if necessary.
Clip on the CF down to the stitching on both collar stand fronts.
Trim bulk off the collar stand fronts. If your fabric ravels a lot, be careful not to trim too much off. It is better to have the bulk than to have your collar stand fall apart after the first washing.
Turn the collar stands to the right side.
Grade neck seam allowance.
Press collar stands towards the top.
Here are the two finished collar stand fronts.
Turn shirt right side up and mark the center back.
Then turn the shirt wrong side up so that the inside stand is towards you.
Mark the center back of the collar.
Pin upper collar to the inside stand, matching center backs and center fronts. Pin through both collar layers but only the inside stand, not the outside stand.
Stitch from center back to center front, 1/4" seam allowance. Keep the outside stand out of the way.
Stitch all the way to the center front mark and then backstitch.
Then flip the shirt around and repeat step, stitching from center back to the opposite center front, and backstitch.
Here is the collar sewn to the inside collar stand. Now it is time to finish the outside stand.
Grade seam allowances.
Press collar seam allowance towards the collar stand.
Fold under raw edges of outside stand to match seam line. Pin in place. It is best to do this over a pressing ham. Then slipstitch opening, only stitching through the seam allowance, not up into the collar.
Slipstitch the opening.
Edgestitch around all four edges of collar stand. I like to begin at CB of the collar stand to hide where the stitches overlap. When finished, I pull the thread tails to the inside stand and then with a hand needle I pull them between the fabric layers.
Collar stand with finished edgestitching on all four sides.
Up-close view of the curved front of the collar stand.
Wrap the collar and collar stand around a tailors ham and pin in place. Press collar and let fabric cool. This will help the collar start to have a "memory" so that is will curve around the neck. When storing the shirt, fold the shoulders nicely so as to not disturb the collar and stand.
Great job!!! You've completed the most challenging part of the tailored shirt.
CUT OUT SLEEVES
Lay fabric right side up. Get fabric on grain.
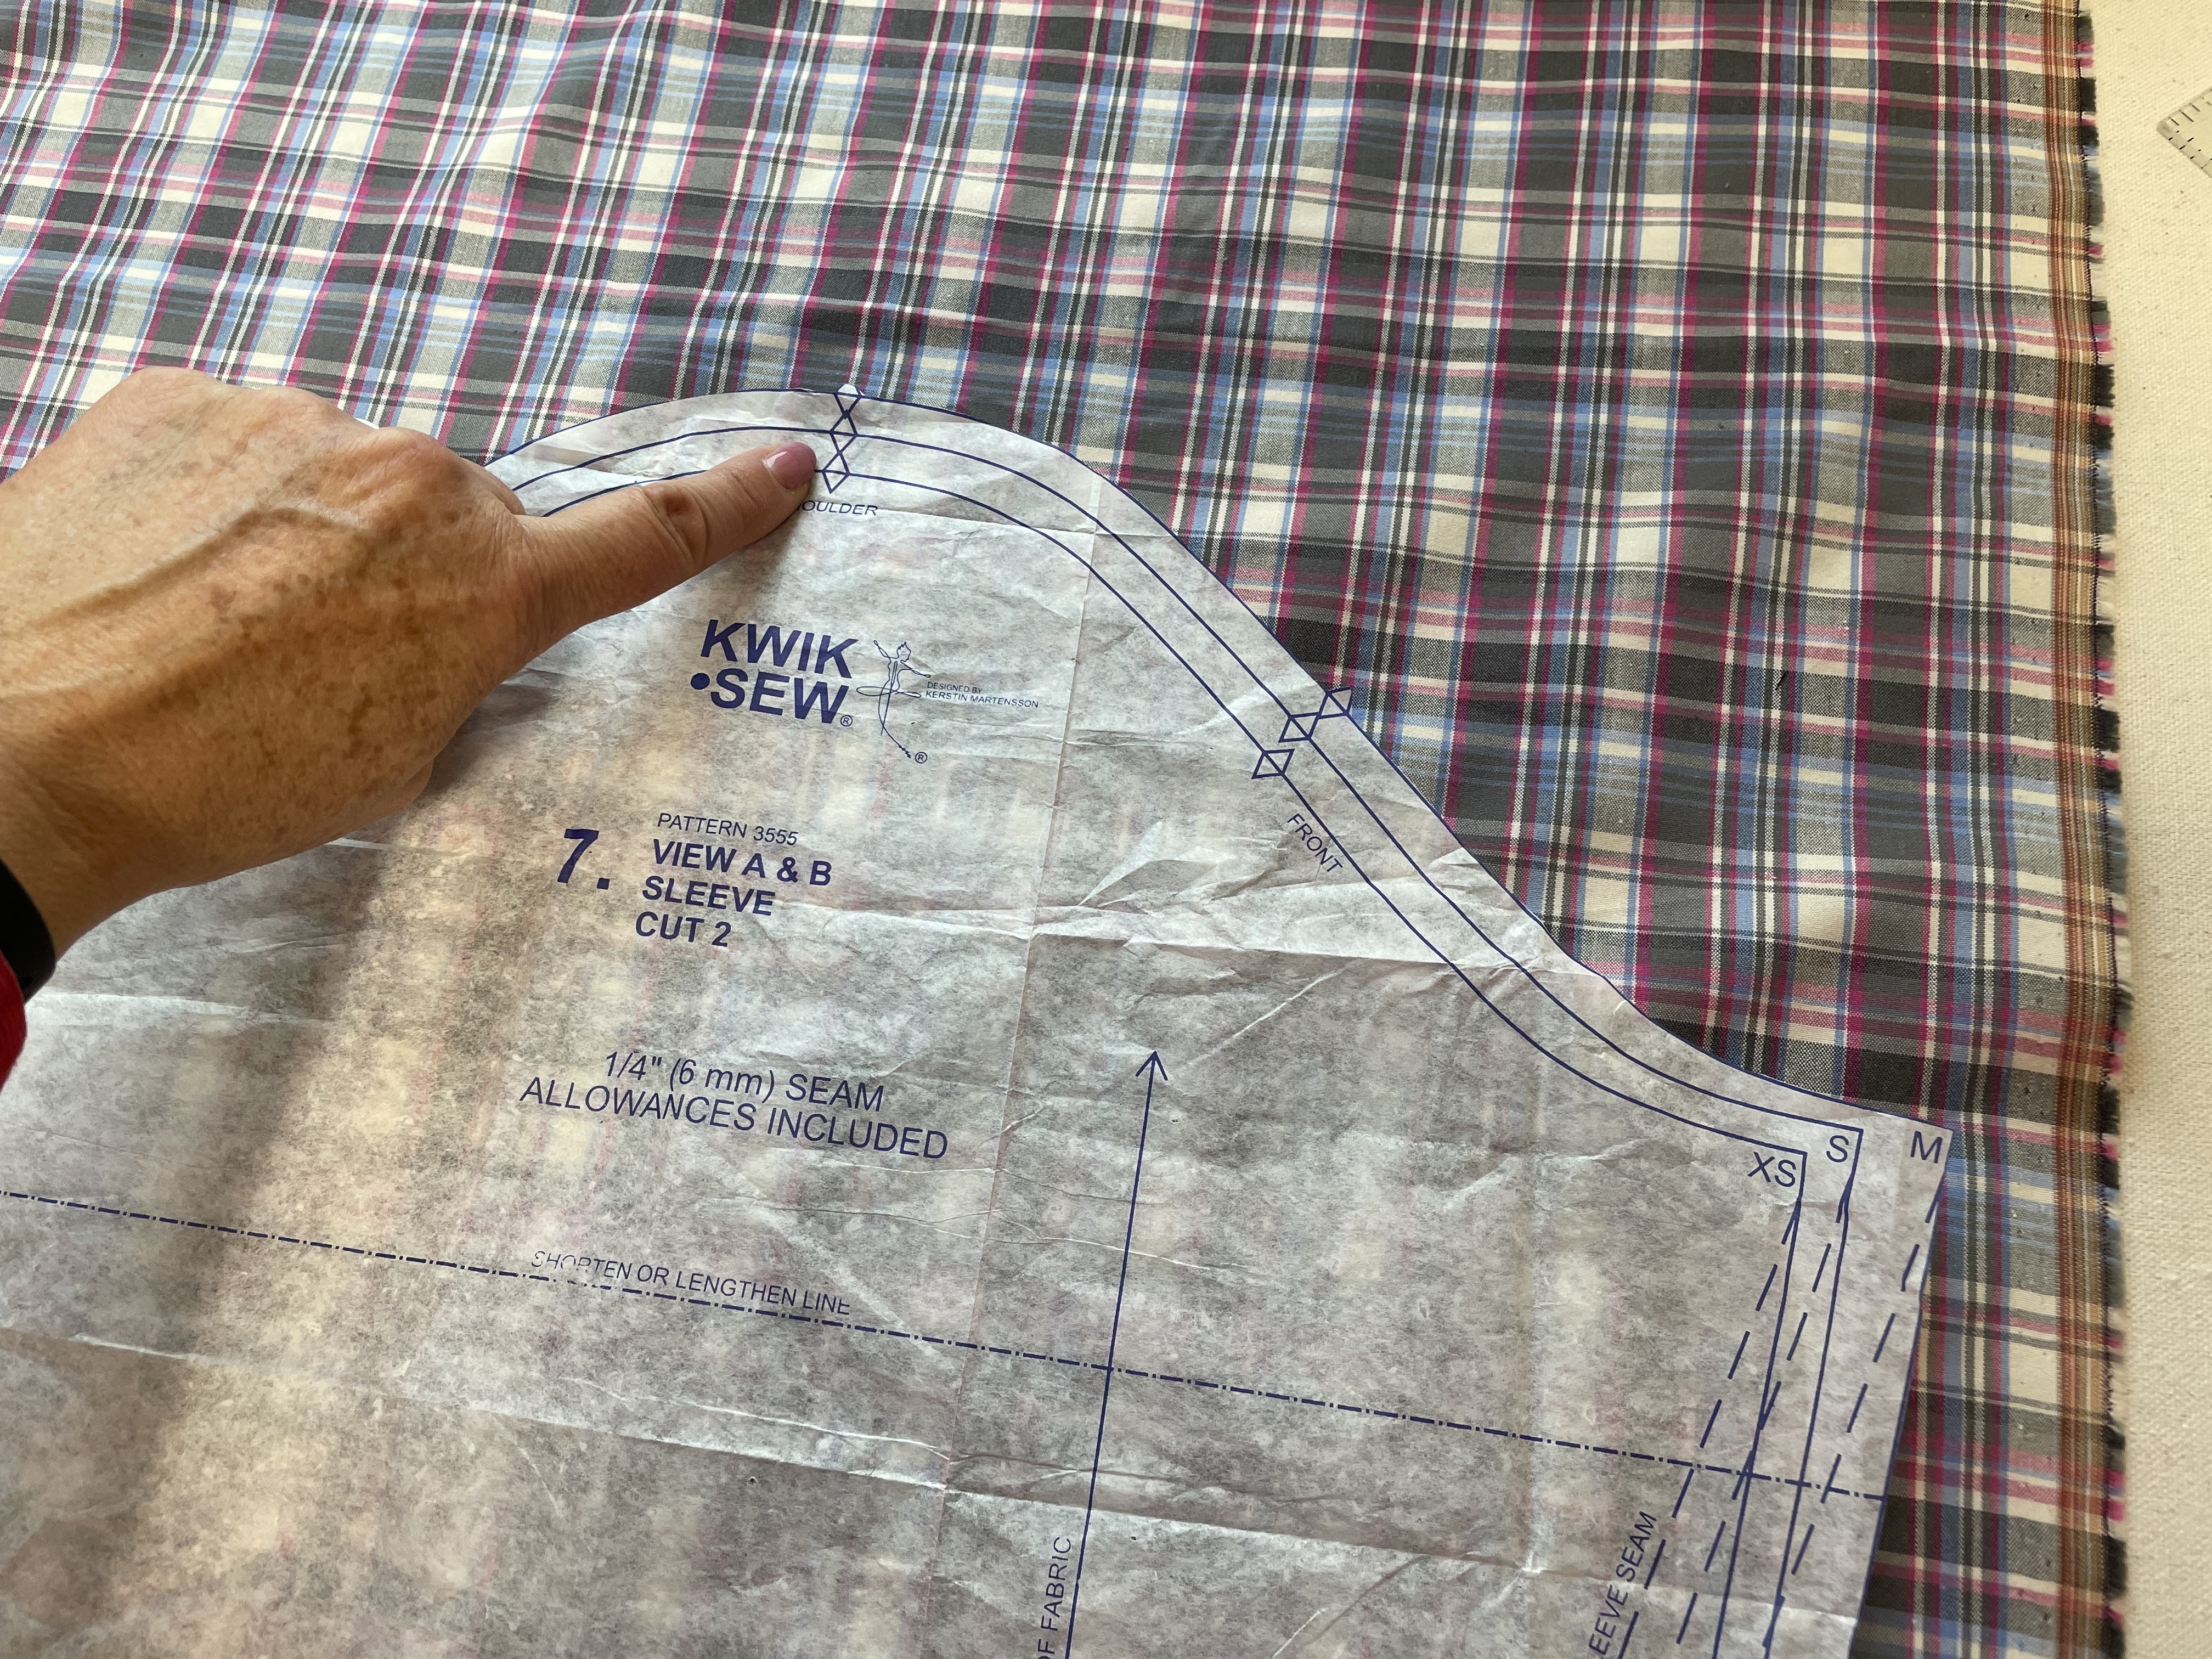
Place sleeve pattern right side up. Draw three horizontal lines perpendicular to the grainline.
Decide what vertical dominant line you want for the center of the sleeve. If you don't have enough fabric to make both sleeves a mirror image, don't worry about this.
The horizontal plaid line to match up on the sleeve side seam will be the same as the shirt front and back side seams. Place shirt front side on top of sleeve pattern and pin. Notice that the CF of the shirt front is parallel to the sleeve pattern grainline. Match up horizontal plaid lines.
Center pattern vertically and horizontally and pin in place. Check the horizontal lines on the pattern on both sides of the sleeve pattern to make sure they line up with the horizontal plaid lines.
After sleeve is cut out, flip sleeve pattern right side down. Match up the horizontal and vertical plaid lines. Pin in place. If you don't have enough fabric to do this, just make sure that the second sleeve is on grain.
Cut out other shirt sleeve. Label right side of both sleeves to indicate LEFT and RIGHT sleeves.
Snip markings on bottom of sleeve, including the slit opening. DO NOT CUT THE SLIP OPENING UP TO THE TOP OF SLIT.
TAILORED SLEEVE PLACKET
You are required to match the sleeve placket horizontally with the sleeve. If you want an extra challenge, also match the vertical plaid lines. It's not that hard. Here is how to do both. DO THE RIGHT SLEEVE FIRST.
If you would like to print the placket patterns, click the links below.
Since I am making a women's shirt, I folded the placket pattern on the women's line. The men's placket would be longer.
Place the placket pattern on top of the pattern and sleeve. Center the stitching lines over the sleeve placket mark. Snip to mark the center line and the two stitching lines.
To match horizontal plaid lines, place placket pattern on edge of bottom of sleeve. Mark on the sides of the placket pattern where there are matching plaids on both sides.
To match vertically (optional), fold the placket pattern on the stitching lines.
Pin the placket with the stitching box over the slit opening.
Mark where the top of the placket tower matches plaid lines.
Prepare some plaid fabric on grain, right side up. Place placket pattern RIGHT side up, matching vertical (optional) and horizontal plaid lines with shirt sleeve.
Pin pattern in place.
Cut out right placket.
Make a snip on the cutting line of the stitch box.
Label the right side of the plaid placket.
Now place left sleeve right side up. Place left placket pattern on top. Line up the cut line of the stitch box with the slit opening on the sleeve.
Mark the same horizontal plaid lines on pattern.
If you want to also match the plaids vertically, old the pattern on the stitching lines.
Line up the pattern cutting line with the sleeve slip opening. See where the placket tower lines up on the plaid fabric. Mark on pattern.
Prepare some plaid fabric on grain, right side up. Place placket pattern LEFT side up, matching vertical (optional) and horizontal plaid lines with shirt sleeve.
If matching vertically, make sure that your markings on the placket tower match up with the vertical plaid lines.
Cut out left sleeve placket.
With right side up, label both left and right plackets.
Press in sides 1/4" and press. Be sure to stay parallel to the vertical plaid lines.
Now press on the other fold line of the tower. Follow the lines on the placket pattern.
Here is what it will look like pressed.
Flip the fabric tower to the wrong side. Fold one side of the tower down and press. (See placket pattern markings for guidance.)
Now fold the other half of the tower down and pin in place. Press.
Now check the right side of the tower. Make sure that the top point is in the center of the tower. Also make sure that the two sides come to the point at the same place horizontally.
Now do the same for the left placket.
Turn the plackets to the wrong side. Transfer the stitch box markings.
With right sleeve WRONG side up, place placket RIGHT side down, matching the placket cutting line with the sleeve cutting line. Also match up horizontal lines. Notice that the tower of the placket is towards the center of the sleeve.
Pin placket in place and sew on stitching line with a 1.5 stitch length.Cut between the stitching lines and cut out diagonally to corners.
Press seam allowance towards under placket.
Press other seam allowance towards placket overlap "Tower".
Turn placket to right side and press placket seams again.
Open up placket to sleeve right side and press top of stitch box flat.
Turn under placket slightly over stitching line, matching horizontal plaid lines.
Press.
Pin in place and edgestitch under placket from bottom to top.
Now fold upper placket over and press. Match horizontal and vertical plaid lines and pin in place.
Edgestitch upper placket and stitch towards tower area. Choose method of topstitching: "X" or "rectangle."
Make sure that the horizontal stitching in the tower area is stitched 1/8" above the top of the stitch box, which will prevent the raw edges from slipping out.
Here is the "X" style, stitched continuously, OR
This is the "rectangle" method.
Pull the needle thread to the wrong side.
Tie a double knot and pull threads between the fabric layers with a hand needle.
Do the same with the left shirt sleeve and placket.
PREPARING SLEEVES AND CUFFS
Make sure that the tuck markings are located on each sleeve bottom.
Pin sleeve pleats in place, with pleats going the same direction as the placket.
Make sure that the tucks for each sleeve are even width apart and the same distance from the placket.
Baste sleeve plackets slightly less than 1/4" from edge. (1/2" for a 5/8" SA.)
CUFFS--CUTTING OUT
Cuffs will match each other horizontally. Cut out the cuffs before sewing the side seams so that you can match the vertical plaids easier. Add 1" to the button side of the cuff pattern to make the cuff larger. This is because we have added the sleeve placket to the sleeve.
To make the plaids match vertically, see below. The cuffs will need to be cut out individually to match each sleeve. In the picture below, the right sleeve is shown RIGHT side up, from the upper placket to the cut edge. Add the cuff pattern below, RIGHT side up, with the buttonhole side under the upper placket. The pattern extends 1/4" beyond the placket for the 1/4" seam allowance (5/8" for a 5/8" SA pattern.) Pin the sleeve to the cuff pattern.
Indicate marks on the cuff pattern the plaid lines you want to match.
Get some extra plaid fabric and decide where you would like the bottom of the finished cuff to be. I have folded the plaid under to indicate where I would like the bottom of the cuff fold to be. Mark with a pin or snip.
Open up cuff pattern and plaid fabric. Match plaid markings on pattern to fabric. Pin on and cut out cuff.
Repeat for left cuff. Turn pattern over and pin to left sleeve. Mark on pattern the vertical plaid lines to match up.
Horizontal plaid lines will match the right cuff. Place pattern to match the vertical plaid markings on pattern. Pin and cut out.
Label both cuffs.
Cut out interfacing for both cuffs. My pattern indicated to cut the interfacing to the line by the arrow.
Press interfacing to wrong side of cuffs.
SEWING SLEEVES TO SHIRT
Fold sleeve in half to make sure that the horizontal plaid lines match up. Trim if necessary.
Match up the two fronts in the underarm on the side seams and also the two backs. Trim off if they don't match up.
Pin right side of sleeve to right side of shirt, match single and double notches.
With 3/8" seam allowance (or 5/8"), stitch sleeve to armscye, with sleeve side up.
Press seam allowance towards shirt.
Serge raw edges of armscye.
Also press on right side to prevent fabric tucks.
Edgestitch shirt, next to the sleeve, through the seam allowance.
Finished edgestitching.
Note: The cuffs will continue after the side seams are finished.
SIDE SEAMS--ALTERNATIVEFLAT FELL SEAMS
(NOTE: If you want to do this method and your seam allowances are 5/8", first trim off 1/4" on the side edges , including the sleeves.) If you are using the Kwik Sew pattern, the seam allowance will be 3/8". Only trim off loose threads along the raw edges to make it more clean.
Place the shirt front to the shirt back, WRONG sides together, with the shirt back towards you. Offset the raw edges 1/4" so that the shirt front extends out. Make sure that your horizontal plaid lines match up.
Pin in place.
Press under the shirt front raw edges 1/4" over the shirt back raw edges and pin in place.
Roll the edges over again just to check that your horizontal plaid lines will still match up.
Stitch 1/4" from the fold, using either the walking foot, OR
the patchwork foot, which has the 1/4" guidebar.
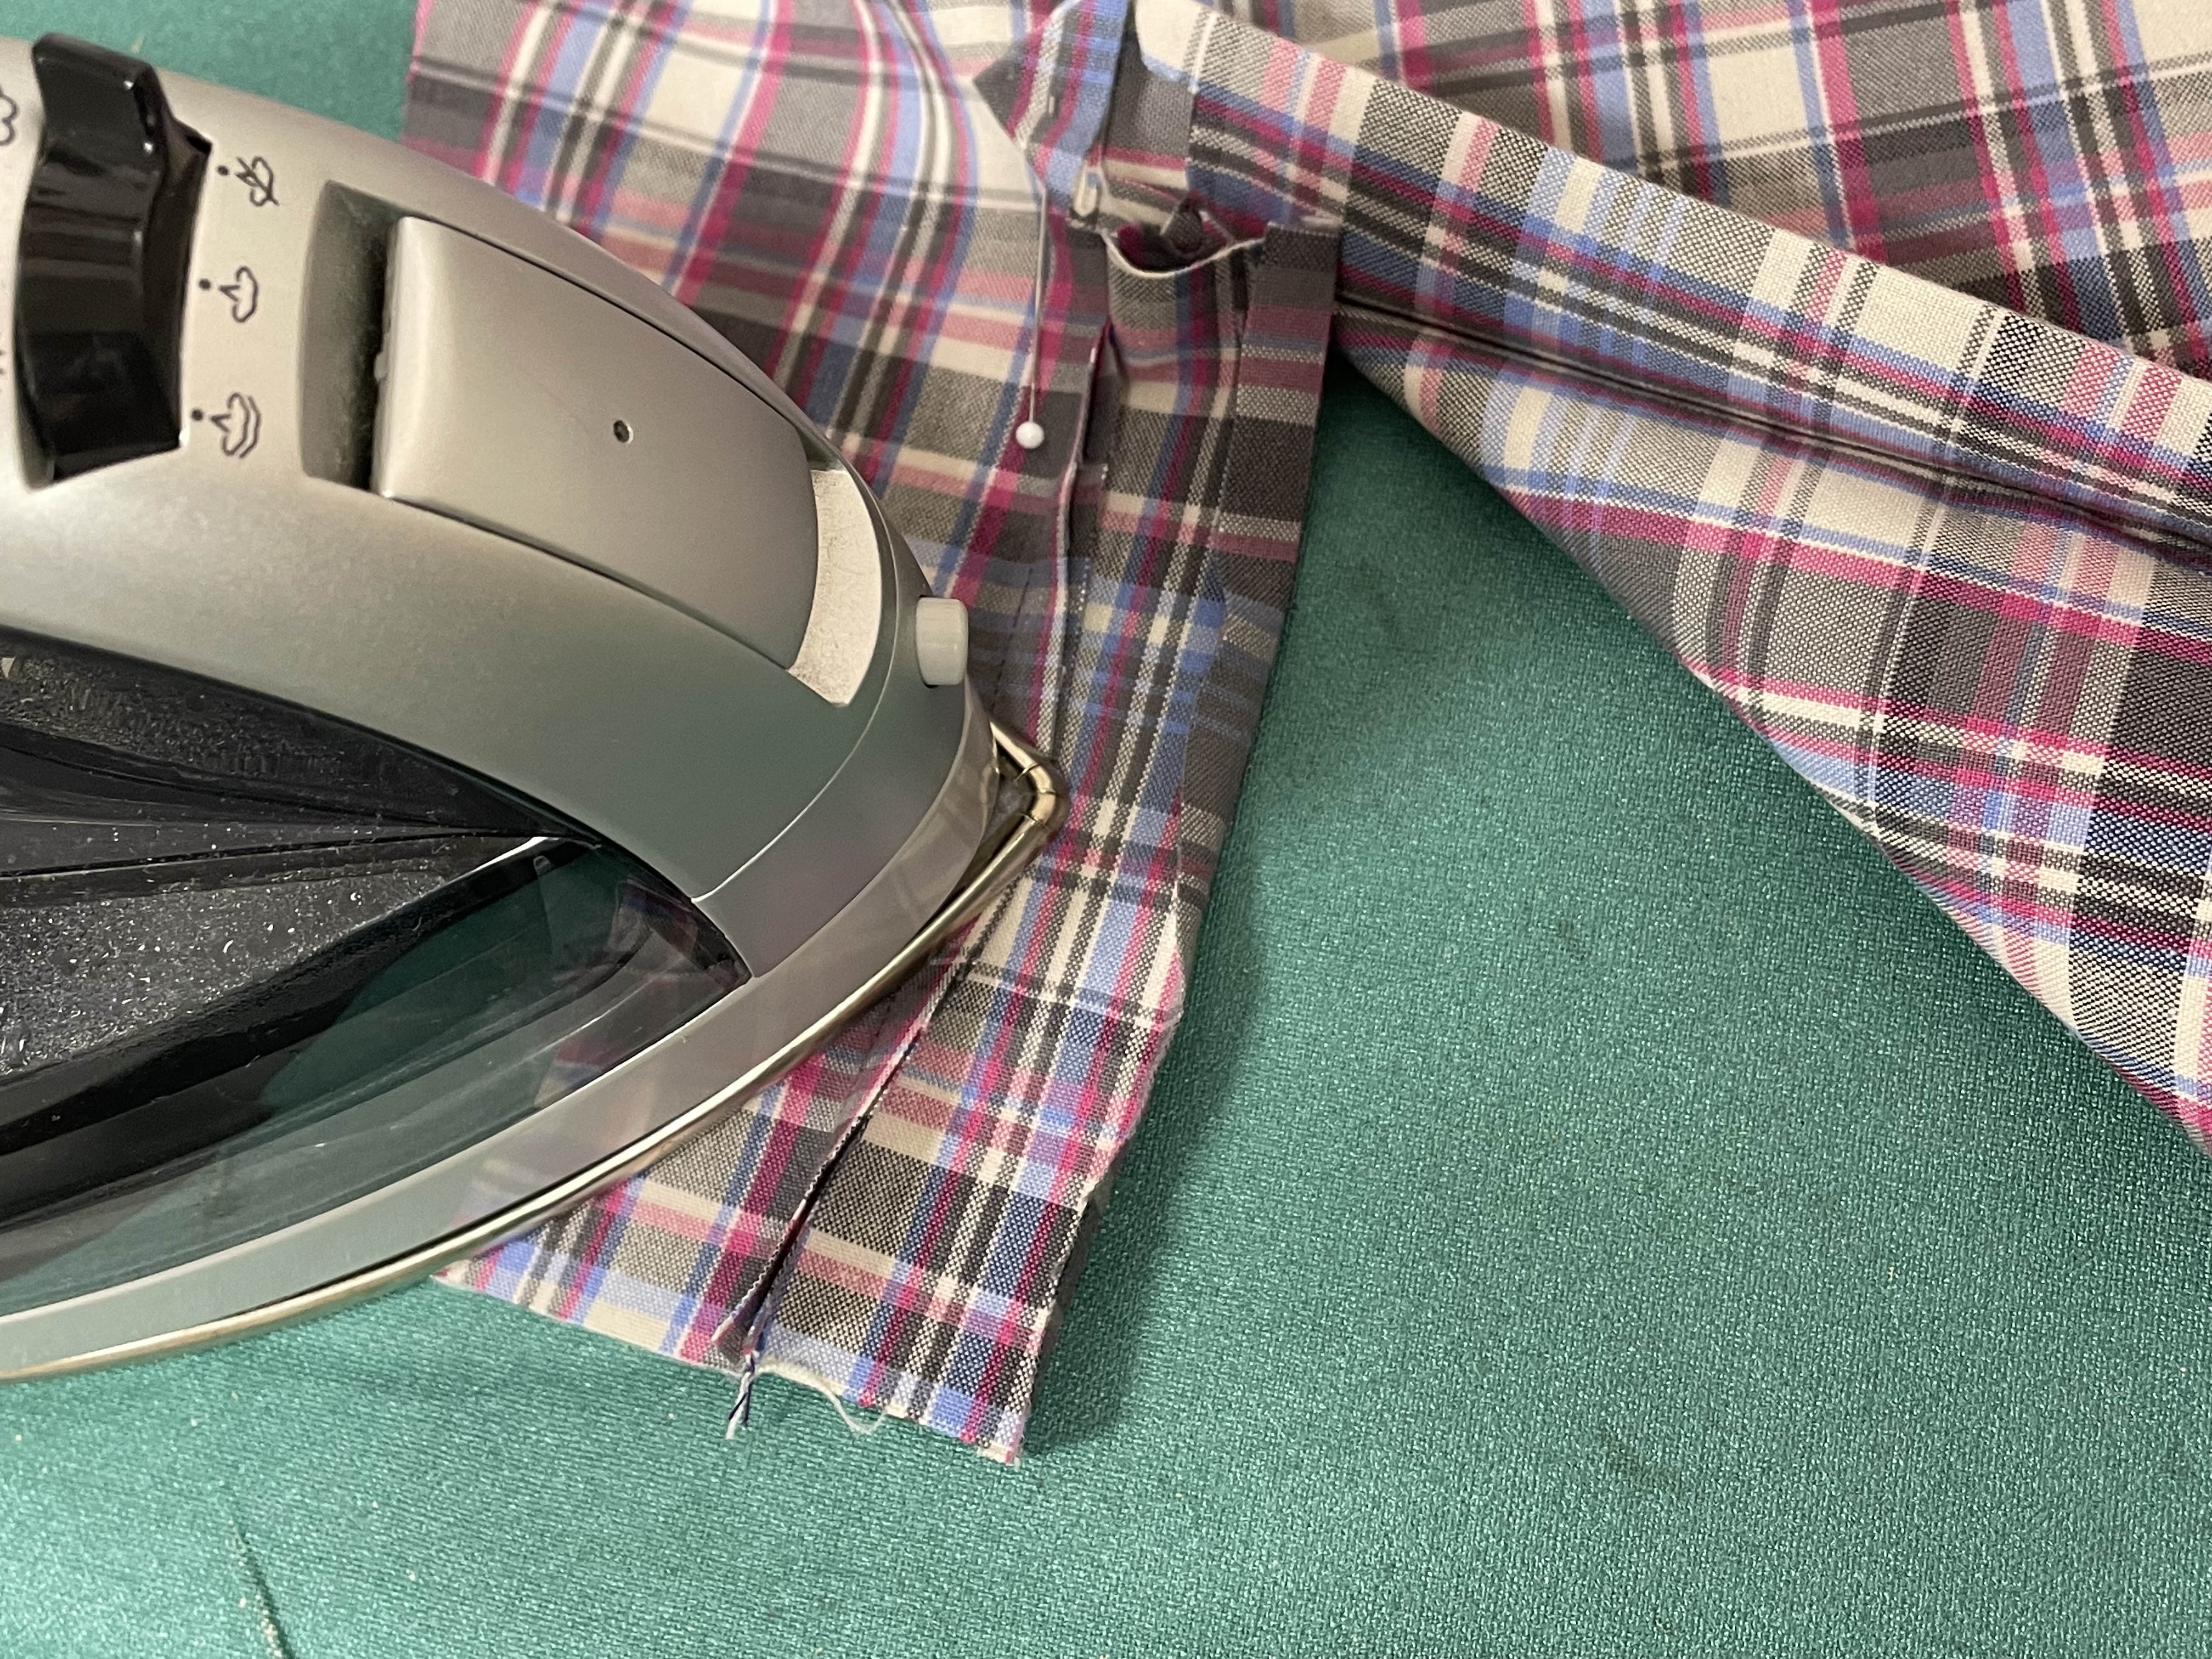
Once finished stitching, open up shirt and press fold towards the shirt back.
Flip shirt to the wrong side and press side seam and sleeve seam again to eliminate any fabric tucks.
With seam flipped and pressed to the shirt back, stitch again 1/4" away from first stitch line. This will complete the flat fell seam.
Once you sew into the sleeve, you may need to turn the sleeve inside out or create a "window" where the presser foot can stitch for a few inches before readjusting the fabric.
If starting on the sleeve side, you may need to manuever the fabric to create a "window" of space to stitch in. Slowing move your fabric forward and keep the fabric smooth to prevent puckers as you stitch. Keep both stitching lines parallel to each other.
Do the same alternative flat fell seam to the other shirt side. On this side, you will need to begin the stitching at the sleeve end and then sew towards the bottom of the shirt. Turn the sleeve inside out to begin.
SEWING THE CUFFS
Find instructions for cutting out the cuffs after the sleeve placket instructions.
Press the cuff in half. (If you have a two-piece cuff, follow your pattern instructions to sew the cuffs together.)
Match up the tower placket with the underlap. Check the bottom raw edges and make sure they are the same length. Trim if necessary.
Pin the right side of the cuff to the right side of the sleeve. Match the vertical plaid lines if the cuff has been cut out to match vertically.
Make sure that there is at least 1/4" cuff fabric extending beyond the edge of the placket on both sides of the cuff.
Sew on the cuff side to be able to follow parallel to a plaid line. Stitch from placket end to placket end. Do not backstitch. Leave thread tails as a marker.
Leave thread tails as a marker.
Pull the cuff down and check to make sure that the vertical plaids match. (optional)
Press over a tailors ham. Press the seam allowance towards the cuff.
Turn sleeve right side together. Check pressing and make sure seam is open.
Sew the cuff sides with the same technique used for the collar stand. With cuff right side up, fold in the edge of the placket and pin in place.
Also pin back the placket underlap.
Fold up the cuff and match up raw edges on the side and top. Pin in place.
Mark the stitching line, keeping it parallel to plaid lines.
Stitch the cuff sides, and
pivot at the corner and stitch over existing stitching for 1".
Do the same with both cuff sides. Before trimming, turn cuff corners right side out and check for accuracy. Fix if necessary.
Trim extra seam allowances to reduce bulk.
If the cuff seam allowances are 5/8" grad seam allowances.
Push out cuff corners.
On inside cuff, turn under raw edges and pin to stitching line.
Slipstitching cuff opening.
Edgestitch on all four sides of cuffs.
Finished cuff.

SHIRT TAIL HEM
Put the shirt fronts together RIGHT sides up and match up the horizontal lines.
Pay attention to the bottom edge. You want horizontal lines to match.
If necessary, trim the bottom raw edges so that both sides will match up with the hem.
Also check the shirt back. The horizontal plaids at center back should be true so trim if necessary.
With shirt WRONG side up, press under hem 1/2" and press.
Concave and convex curves are a little challenging to get even and smooth. Take your time as you measure, pin and fold.
Press on the single fold.
Open up the pressed hem and fold under half the amount, 1/4", and then fold again and pin. The double fold hem will be 1/4".
Press the double fold hem.
When pressed, transfer all the pins to the shirt RIGHT side. It is best to topstitch the hem on the right side. This will allow you to stay parallel to the plaid lines along the straight edges of CF and CB.
Check the center fronts again to make sure the horizontal lines match at the hem fold.
Backstitch at the beginning and stitch all around the hem. Here is a trick to backstitch by going forward. Flip the shirt around so that it is behind the presser foot. Begin stitching forward 1/2" from the edge of the buttonhole band. When you get close to the edge, stop with the needle down and raise the presser foot. Pivot the fabric around and continue to stitch forward around the shirt hem. Do the same when you reach the opposite end. This helps prevent messy backstitching on a very visible area. You may pull your thread tails to the wrong side when finished stitching.
"Backstitching" by stitching forward. No more messy backstitches.
Take your time as you stitch around the curves, taking the pins out as you go. Move needle position if necessary to catch the lip of the hem fold underneath.
Press hem when finished.
BUTTONHOLES
Buttons should be 3/8", 5/16", or 1/2" in size but no bigger. You will need 8-12 buttons.
Mark buttonhole on collar stand at placement marked. This should be at CF. The buttonhole on the collar stand and the cuffs will be horizontal. The buttonholes on the buttonhole band will be vertical.
Mark 6 - 8 vertical buttonholes on the buttonhole band where you want the top of the buttonhole to be. The buttonholes should be centered on the band. The first buttonhole should be 3" from buttonhole on collar stand and the remaining buttonholes should be 3 1/2" apart. You may use the flex tool to evenly space your buttonholes. The buttonholes can end 6-8" from the bottom hem, as long as you have one in the hip area.
Here is a close-up of the buttonhole marking on the collar stand.
On cuff, place button 1/4" in from side edge of the cuff. Place pin in middle of button.
Also place pin in the horizontal center of the cuff. This is where the horizontal buttonhole begins.
On the Bernina 530 model we will use the Bernina 3A buttonhole presser foot. Also thread the bobbin thread through the finger of the bobbin case. This will create a tight bobbin tension and make a smoother satin stitch on the buttonhole needle side.
To determine the length of the buttonholes, add the size (diameter) of the button and the depth of the buttonhole. This will be the length of your buttonholes. On the Bernina 3A foot, move the red arrow to the length of the desired buttonhole.
Using scrap fabric with the same thickness as the buttonhole band, sew some test buttonholes. Cut the buttonholes and slide the button through it. You don't want the buttonhole too loose, but you also don't want it too tight or else it will be stressed when the button goes through it.
Sew all the buttonholes on the shirt. Remember to sew VERTICAL buttonholes on the buttonhole band and HORIZONTAL buttonholes on the collar stand and the two cuffs. I chose to decrease the width of the buttonhole setting to 4.00. This will create a more narrow bead.
Sew all the buttonholes on the shirt.
Sew horizontal buttonhole on the collar stand.
Completed buttonholes.
Matching buttonholes on the two cuffs. If you sewed the longer men's tailored placket, you may want to add a buttonhole in the center of the placket.
There are two ways you can cut open the buttonholes. If you want to use the seam ripper, make sure it is sharp. Put two pins just inside the buttonhole bar tacks to prevent the seam ripper from cutting through the bar tacks.
OR, you could use the buttonhole knife. Use it over a block of wood,
Once the buttonholes are stitched, place the buttonhole band over the button side, lining up the horizontal plaid lines. Pin the layers together to prevent them from slipping. Place a pin through the center of each buttonhole to mark the button placement.
Then peel back the buttonhole band and transfer the pins to the button side.
On the button side of the shirt, place the pins on the center front line.
Line up the two collar stand ends on the CF line. Mark the button placement with a pin through the front end of the buttonhole.
For button placement on the cuffs, line up the tower placket over the underlap, keeping vertical plaid lined up. Mark the button placement with a pin through the front end of the buttonhole.
BUTTONS
Sew on buttons with a thread shank. Make sure that the buttons are sewn on the center front line of the button side.

Congratulations on completing this advanced project!!!
Wear it proudly!!!
*** SEW *** CREATE *** LIVE ***
* * * * *
* * *
*
How to sew a shirt collar, how to sew a shirt cuff, how to sew a shirt band, men's classic shirt, how to sew a tailored sleeve placket, how to sew a plaid shirt, plaid shirt, uneven plaid shirt, plaid fabric, even plaid fabric, even plaid shirt, tailored sleeve placket, sleeve placket, Kwik Sew K3555 collared shirt, Kwik Sew K3555, women's classic shirt


