A lapped zipper is a great zipper application for skirts and dresses, using an all-purpose (not invisible) zipper. The finished zipper has an overlap on the left side of the opening that covers the zipper. On the right side of the opening, the fabric is edge-stitched very close to the zipper teeth. This zipper is great for a center-back opening and a left side skirt zipper closure. There are many techniques to sew a lapped zipper. This method is a quick, painless, and very accurate technique to try.
You will need an all-purpose zipper, a zipper presser foot, and two pieces of fusible interfacing, 1" wide and 1" longer than your zipper.
First press the fusible interfacing to the wrong side of the zipper opening. This will help stabilize the zipper area and give extra support. It is especially helpful for a side hip zipper, as that fabric is on slight bias grain and may stretch.
You may now want to do a seam finish along the raw edges. Do not trim any fabric off as you want to retain the 5/8" seam allowance for the zipper application.
There may be a circle marking on your pattern, indicating where the bottom of the zipper is. If not, measure and mark the position yourself. The zipper top stop should be placed 1" down from the top raw edge. Then mark where the bottom stop is on the fabric. This is where your seam stitching will end.
Put fabric layers right sides together and pin. Stitch from the bottom up to the pin (or circle marking) and backstitch. Do not stitch in the zipper opening.
On the left side of the zipper opening, turn the seam allowance under 1/2" and press. This will create a tiny under-lap at the base of the opening.
On the right side of the zipper opening, turn the seam allowance under 5/8" and press.
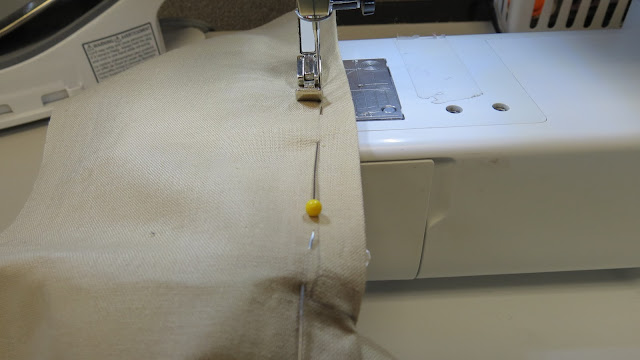
On the left side, pin your zipper in place so that the zipper teeth are just next to the fabric fold. The zipper top stop is 1" down from the top raw edge.
With the zipper foot on, position the needle to the far left. Stitch the zipper in place from the top to the bottom, stitching right on the fold of the fabric.
You may have the zipper open or closed as you stitch. You will want to stop with the needle down and move the zipper slider out of the way. Stitch all the way to the bottom of the opening and backstitch.
Now mark the opposite fabric fold, 3/8" or 1/2" from the fold. You may also mark the stitching line with 1/2" wide tape.
Close the zipper and pin the right side of the opening in place so that the fold just matches the line of edgestitching you just made. Pin the fabric and zipper tape together.

Be sure to line up the top end of the zipper tape. You can do this best by opening the zipper slider a few inches.
Move your needle position to the far right. Once again you will be stitching from the top to the bottom, and then across the bottom to form an "L."
Backstitch at the top and follow your marking or tape all the way to the bottom of the opening. (You can also use the markings on the stitch plate to guide you.) With the needle down, stop and raise the presser foot. Pivot and stitch across the bottom of the zipper to the fabric fold. Do not backstitch.
Leave a thread tail for pulling to the back side. This leaves a more professional looking zipper without messy backstitching.
On the back side, pull the bobbin thread. This will cause the needle thread to loop to the back side.
Catch this loop with a pin and pull it through to the back side.
Tie a knot and use a pin in the loop to guide the knot close to the zipper tape.
Clip your thread tails.
Great job on a professional looking lapped zipper.
* * * * *
* * *
*


