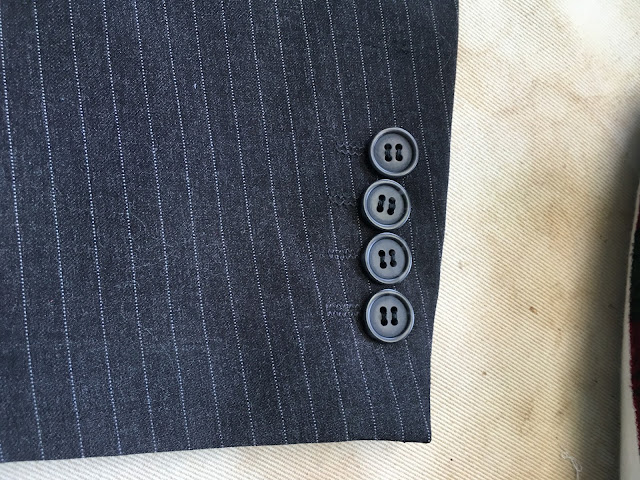
There are many types of tailored sleeves in men's suit coats. The easiest kind to lengthen or shorten are those that have no buttonholes. If the buttonholes are functioning (meaning that they have been cut open), then you cannot lengthen or shorten the sleeves from the bottom hem. These types of sleeves have to be shortened by taking the sleeves off the jacket and cutting down the sleeve cap.
This tutorial will focus on how to lengthen the sleeve with buttons and sewn buttonholes. (Shortening the sleeves will use the same method, except fabric will not need to be added to the sleeve lining.)
As you unpick the sleeves at the hem, pay attention to the details: how close are the buttons to each other, who close are the buttons to the bottom hem, how close are the buttons to the side fold, is there a mitered corner seam at the hem or a seam at the side. As you deconstruct the hem, take notes so that you can put the sleeve hem and lining back in the same way.
Remove the buttons from the sleeves.
Unpick the mitered corners and the lining.
This client was a growing young man and he needed the sleeves lengthened 1". I measured down from the hem fold 1" and marked with pins.
Pin where the new hem will be.
A seam roll is a great tool to use for sleeves. If you do not have this tool, you can roll up a towel tightly and get nearly the same effect.
I use a silk organza pressing cloth to press the new hem and to try to get out the original hem crease. Be sure to take the pins out as you press.
Press all the way around the hem.
Now place the inside of the sleeve hem on the seam roll and press the side fold. Press out the folds of the unpicked mitered corner.
Press out the hem crease on the lining as well.
To create the new mitered corner seam, first mark with chalk lines where the two raw edges meet.
Then open up the hem allowance and mark with chalk where the fold lines meet in the corner.
Now draw a diagonal line across the inside corner, matching your two chalk lines on the outside raw edges.
Here is the diagonal line. This line will become your stitching line for the mitered corner seam. Sometimes this line will be 45 degrees, but many times it will not be.
Fold the fabric in half, with right sides together, matching the stitching line. Pin in place.
Stitch on the chalk line, from the fabric fold to the fabric raw edges, backstitching at both ends.
This is what the stitching will look like when finished.
Put one finger on the inside and one finger on the outside and turn the mitered corner to the outside.
Push out the corner with the point turning tool.
Press mitered corner flat. Use pressing clapper tool for crispness.

Double-check that the sides of the vent still match evenly at the hem bottom.
Next prepare the bottom side of the vent.
Turn the hem right sides together and pin raw edges together. Stitch 1/4" seam.
Turn vent right side out and use point turner tool to open up corner.
Press new seam flat.

Now it is time for the lining. If you were shortening the sleeve, you would be cutting off the excess lining. Since I am lengthening the sleeve, I need to add more lining. First, unpick one of the seam allowances at the bottom to open up the sleeve.
Add a strip of lining fabric. Be sure to include seam allowances to the length.
Now close up sleeve seam. Trim off any excess on the side.
Press seam down.
Because the sleeves were lengthen, new buttonholes need to be stitched and original buttonholes removed.
I marked for two new buttonholes to be stitched. Always test buttonholes to make sure they will be the correct length and will look similar to the old ones. If you can't get them to match, rip out all the old ones and stitch all new ones.
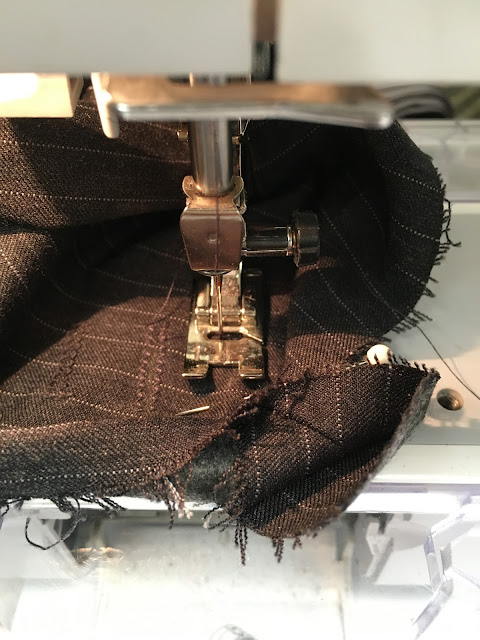
New buttonholes have been stitching using the regular presser foot and an open zigzag stitch to match the original buttonhole stitching.
Here are the two new buttonholes at the bottom.
Unpick the top two buttonholes.
Rub the fabric to hide the stitching holes. Pin the vent in place.
Sew the buttons back on the sleeves.
Here are the finished buttons.
Now temporarily pin the lining to the sleeve jacket to line the layers up to each other and to insure that the sleeve seams line up.
Repin the sleeve lining to the sleeve fabric, matching raw edges. You will not be able to pin through the vent area.
Pin the layers as best you can. It will be a little awkward because it is in a circle.
Stitch the lining to the sleeve fabric. You will begin at one side of the vent and end at the other side of the vent.
This is what it looks like from the inside.
Pull sleeve right side out.
On the sleeve seam opposite of the vent, pin at the seam area. It is time to anchor this seam since you will not be doing a true sleeve hem.
Turn the sleeve inside out again and find where the seam is pinned. Now pin the seam allowances together.
Stitch in the seam allowance area to "anchor" the sleeve hem.
Turn sleeve right side out again. Create a 1/2" lip fold with the sleeve lining. This should be about 1/2" from the bottom of the hem. This will give the lining some "ease." Pin in place.
From the bottom hem, measure up 6" and pin the sleeve layers together again in the seam allowance area.
Do the same at the sleeve vent area.
Turn sleeve inside out once again and pin the layers together in the seam allowance.
Sew the sleeve lining to the sleeve fabric, within the seam allowance, to "anchor" the layers together.
This will give the sleeve lining some ease, but will prevent the sleeve lining from pulling out when taking the jacket off.
With sleeve lining right side out, place seam roll inside the sleeve and press tuck in the sleeve lining.
If there is still an old crease from the original hem, press again.

Use a pressing cloth and the clapper tool. Allow the fabric to cool under the clapper before moving.
Much better!
Turn sleeve inside out and pin lining opening.
Edgestitch opening to close it.
Nice, professional job with the sleeves! This alteration job was for a young man with very long arms!
SEW *** CREATE *** LIVE
*** *** ***
***
*
Tailored jacket sleeve, jacket sleeve, lengthen jacket sleeve, shorten jacket sleeve, shorten tailored jacket sleeve, lengthen jacket sleeve


