

First decide what type of bottom hem, sleeve hem, and neck ribbing style you would like. Hem choices are: ribbing cuff, double needle hem, lettuce edge hem. Ribbing choices are: plain ribbing, lettuce edge ribbing, collar ribbing, crossed ribbing.
If doing a double needle hem, first fold up your hem allowance for the shirt front and shirt back, wrong sides together. Then open up the pressed amount.
Next pin shirt front to shirt back, right sides together. Pin the shoulder seams. Serge the shoulder seams with a 1/4" seam allowance. Be sure to remove pins as you serge.

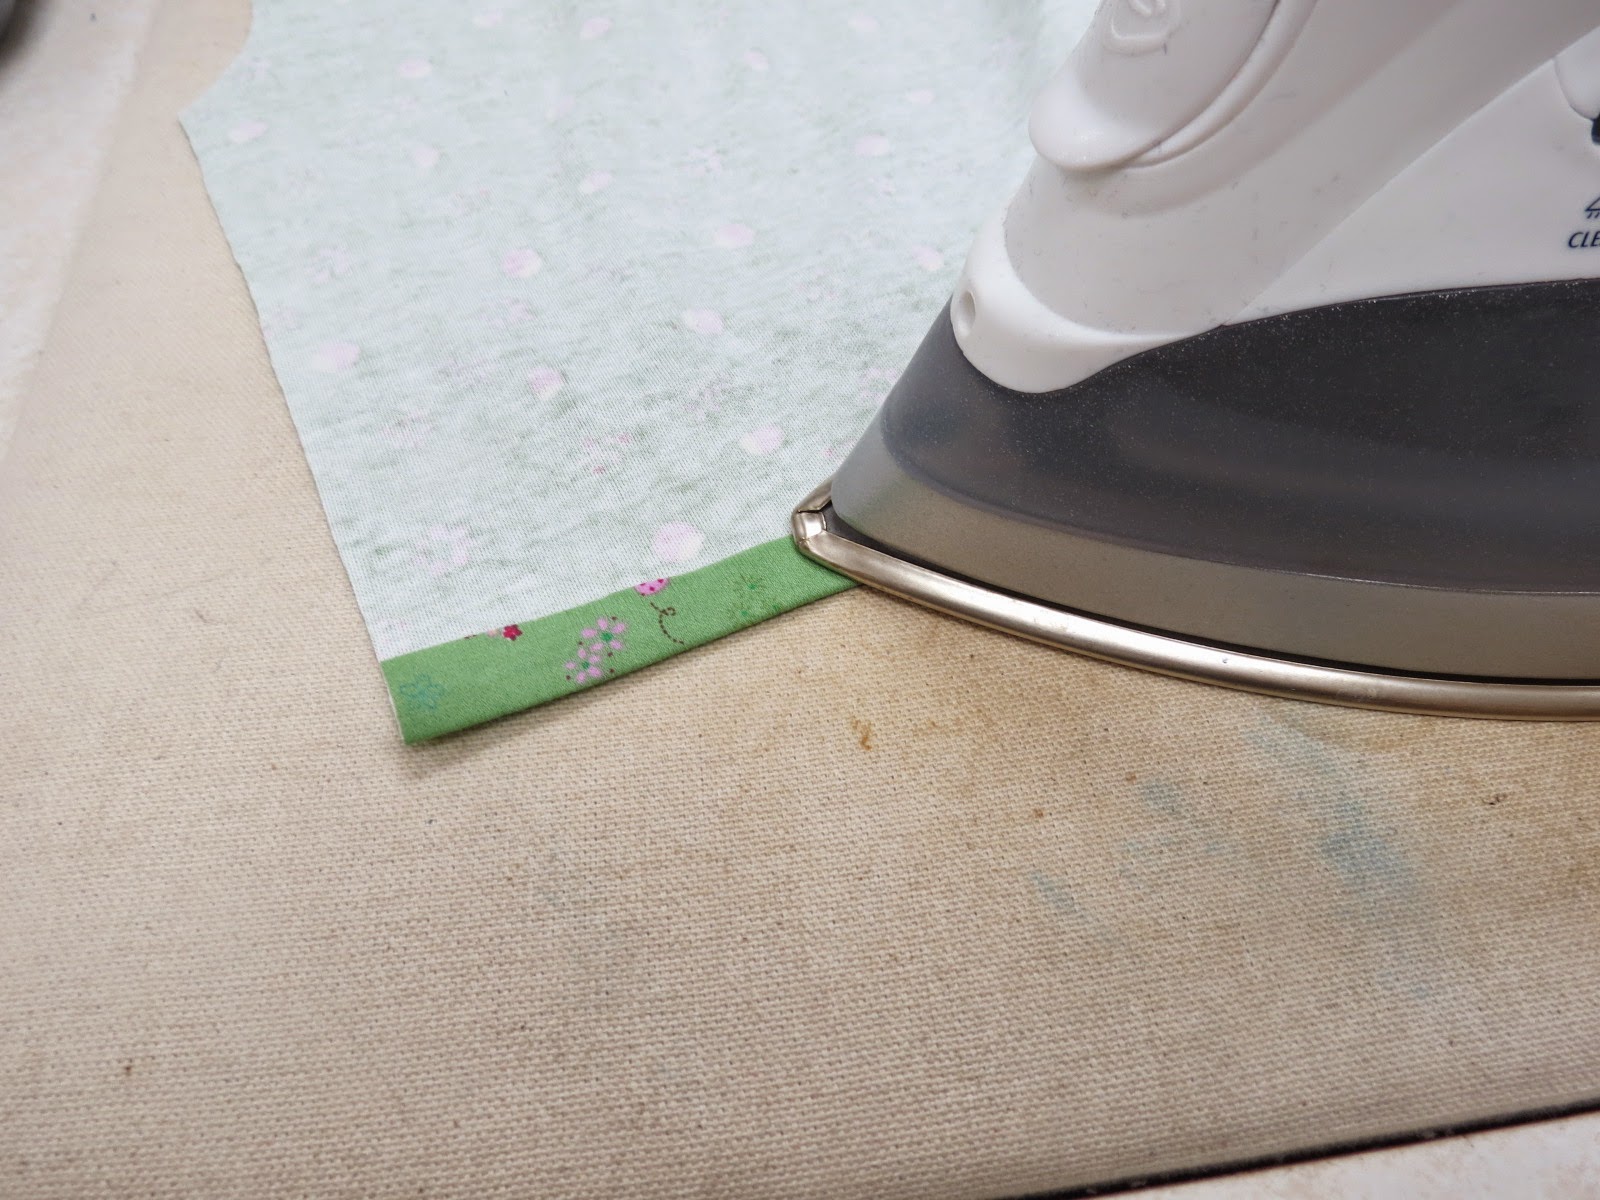
Now press up the hem allowance of the sleeves, wrong sides together, if doing the double needle or lettuce edge hem.

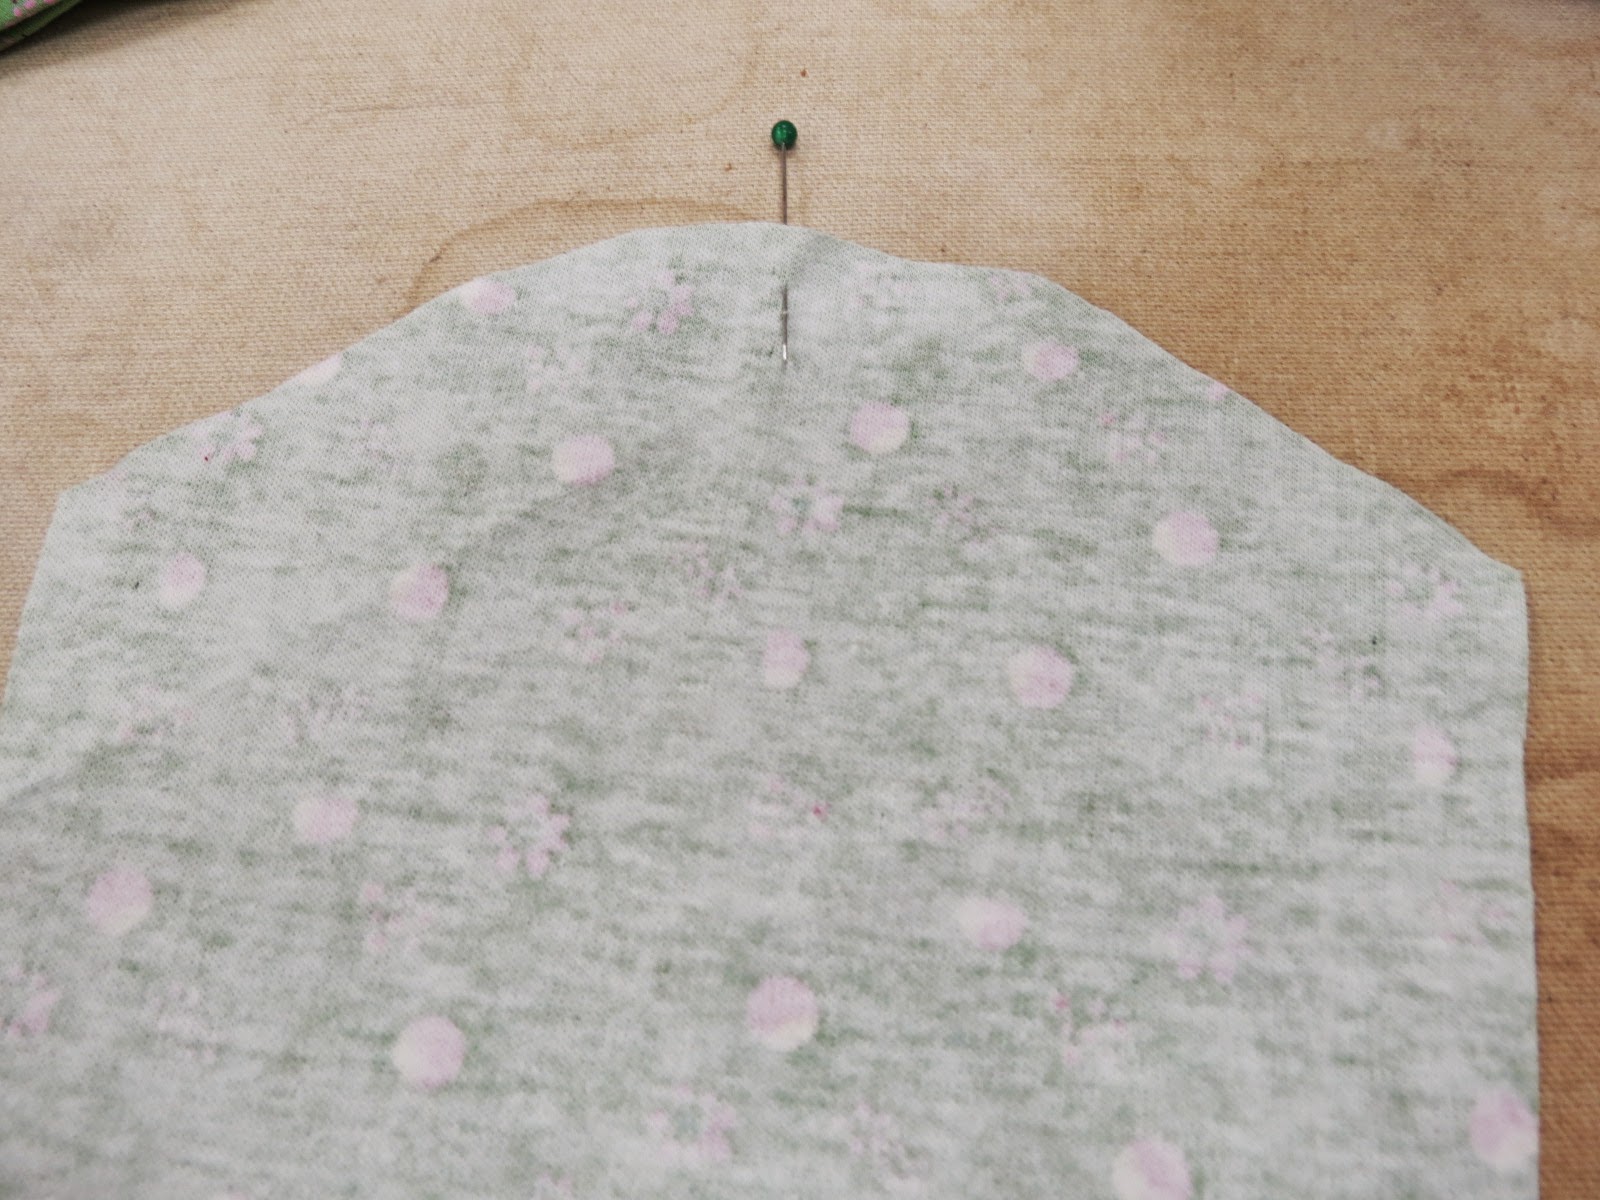
Lay the sleeves on the counter with the right sides up. Fold each sleeve in helf and mark the center of the rounded side with a pin or a small dot with a fabric marking pen.
Match the cener dot of the sleeve with the shoulder seam with the right sides together. Pin. Notice that the pieces don't look like they will fit together. Pin the edges of the sleeves with the edges of the shirt.

Serge, using 1/4" seam allowance, stretching as you go.

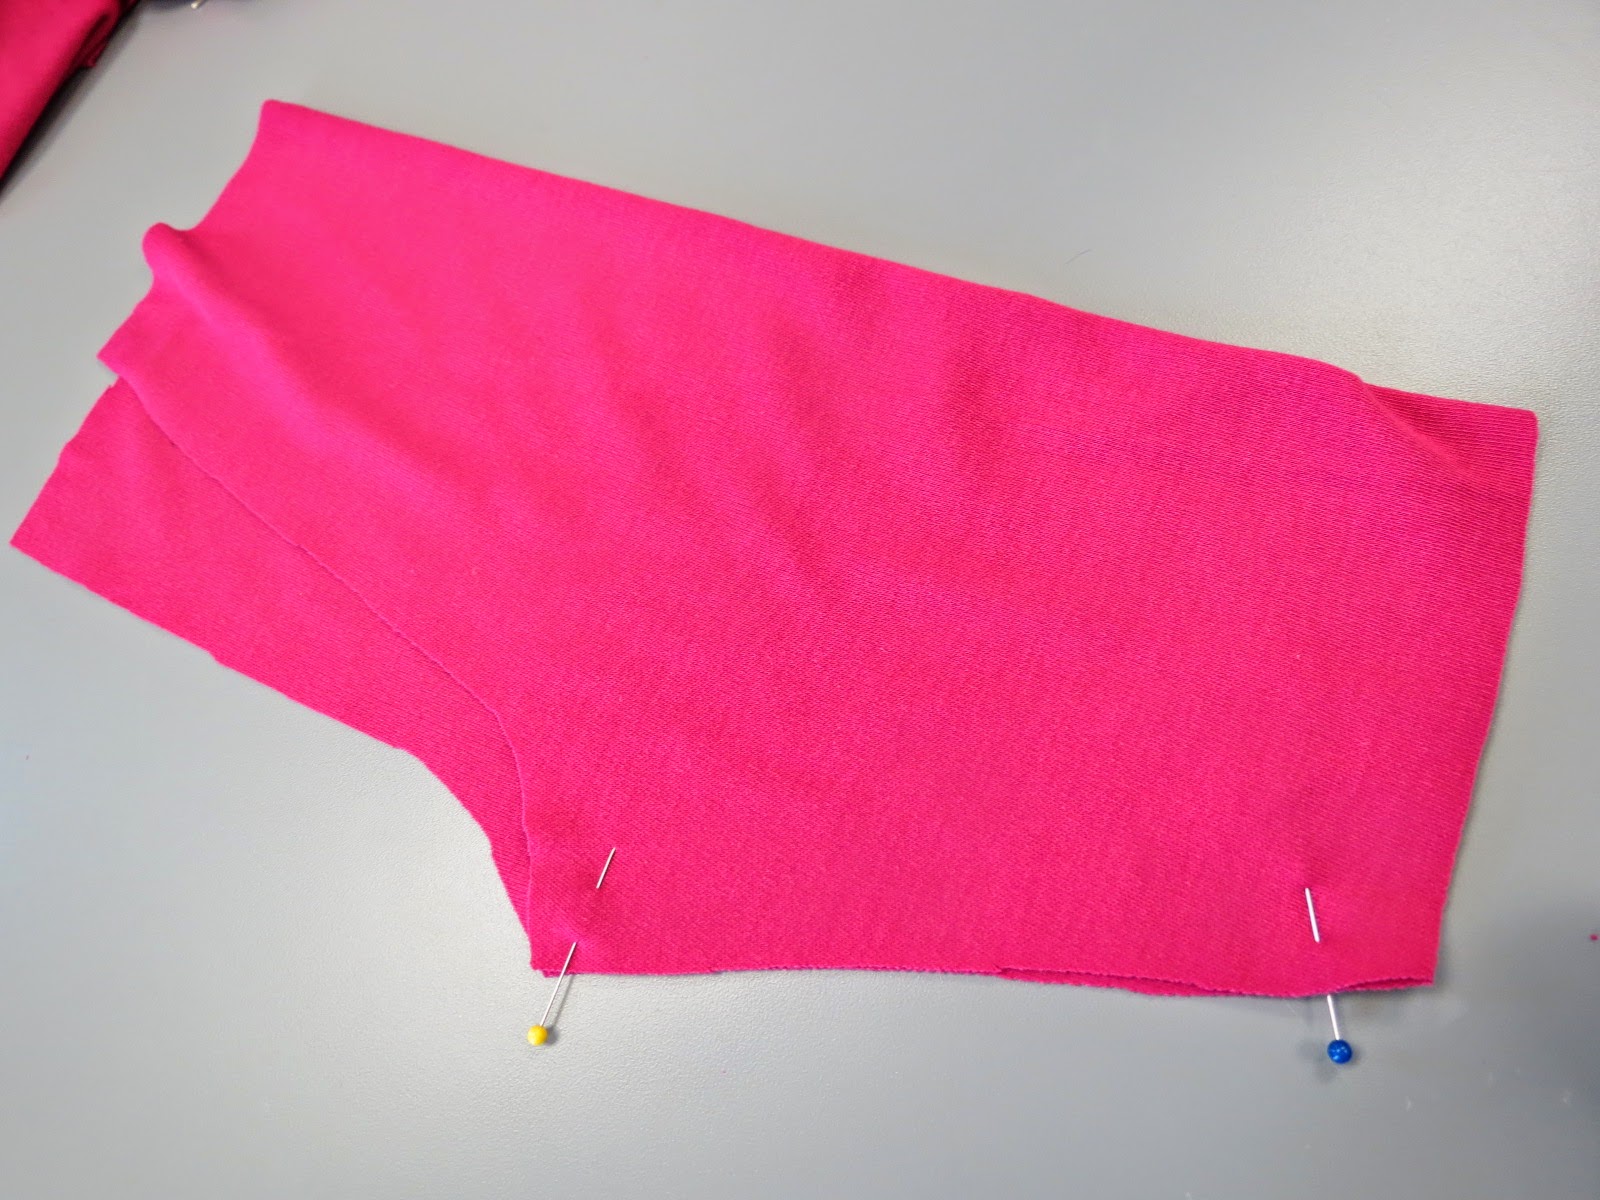
Pin the front to the back, right sides together. Put one pin at the bottom hem area of the shirt and another pin at the bottom hem area of the sleeve. Put a pin at the underarm seam so that the seam aligns exactly.

Serge the side seam and the sleeve seam. As you sew the seam pull the fabric into a straight line so the serger doesn't cut into the shirt body as you turn the corner at the underarm.

Unchain the serger chain stitch.

Using a tapestry needle, insert the thread tails up into the looper stitch.

Cut off remaining thread tails.

Measure the neck circumference. Cut the ribbing so that it measures 3/4 the length of the neck measurement plus 1/2". The width of the ribbing should be 2 - 3" wide. Fold the ribbing in half, right sides together, and sew 1/4" seam allowance on the end. Press seam open.

Divide the neck edge of the shirt into fourths, marking each fourth with a pin or pen marking. Fold the ribbing in half, wrong sides together. Divide the ribbing in fourths as follows: Mark the center back (which is the seam line) and center front with a pin or a small dot with a fabric marking pen. Fold the ribbing in half again so the two pins lie on top of each other. Mark the other two folds with a pin or a small dot with a fabric marking pen.

With the shirt wrong side out, insert the ribbing inside the shirt neck edge area, with the right sides together and all raw edges matching up. Match the center back seam of the ribbing with the center back marking of the shirt. Match the center front pin of the ribbing with the center front pin of the shirt. Match the other pins of the ribbing with the other pins in the shirt. Add more pins as needed, stretching the ribbing between pins.
 |

Serge all the way around the neck opening to the place where you started. Continue serging about one inch, overlapping the first row of stitching. (You will have two rows of stitching on top of each other for about one inch.) Be sure NOT to cut off any of the stitches from the first row. Remember the blade will cut off anything to the RIGHT side of the metal plate. (You could turn the blade knob to LOCK.) After over-stitching about one inch, gently angle the fabric to the left out of the way of the blade and needles. Soon there won't be any fabric feeding under the needles. Continue to stitch until a three inch tail forms. Cut the thread leaving the three inch tail attached to the bib. (Be sure to leave about one inch tail still attached to the needles of the serger. Otherwise the serger will come unthreaded.)
Unchain the serger chain. Tie the ends in a square knot.
Pull the thread tails through the looper threads on the neck opening with a needle.
Child's Pants
Trace off the pattern and all the markings. Notice that the stretch grain (crosswise grain) needs to go across the pattern. Cut two of the pant pattern.
After cutting, lay the pants on the counter with the right sides up. Be sure you have a right and left piece. Mark the center back seam area with a pin or a small dot with a fabric marking pen. The center back seam is higher than the center front seam. Putting a piece of tape on the wrong side of the fabric will help identify the right and left leg.

TIP: Before sewing leg inseam, turn pant leg wrong side up and press up hem allowance. Press up scant 1/4" for lettuce edge hem or 1/2" - 3/4" hem allowance for double needle hem.

Fold each pant leg in half, with the right side of the fabric on the inside. Be sure you have a right and left leg. Flip down the pressed hem before serging.

Serge the inside leg seam on each pant leg using 1/4" seam allowance. You will barely shave a sliver of fabric off.

Turn one pant leg, right side out. Place it inside the other pant leg which is wrong side out. Match the inside leg seam of both pant legs. Pin the center back seam, the center front seam, and the crotch seam. Be sure the right sides are together.

Serge around the crotch seam using 1/4" seam allowance.

Now serge around the waist area of the pants.

Turn the pants right side out. Using a seam gauge, fold the waistband down (inside the pants) 1 1/8". Pin.

Put a double needle in the sewing machine.

Starting near the center back seam, stitch using a double needle about 1 inch from the top fold of the waistband. Stitch on the right side of the pants. Be sure to catch the serged edge as you stitch. Stop sewing about one inch from the beginning of the double needle stitch line. You want to leave an opening to thread the elastic.


Use a safety pin to thread 3/4" wide elastic into the casing formed with the double needle stitching. Make certain the elastic doesn't curl or roll.

The elastic should be snug around the waist of the child, but not too tight.

Overlap the ends of the elastic and stitch securely.

Elastic joining should look like one of these.

Finish stitching the waistband area with the double needle, backstitching 1-2 stitches and aligning the stitches exactly with the row of stitches already sewn.
Lettuce Edge Hem
Use regular presser foot and select zigzag stitch #2. Stitch width: 3, stitch length: 2 or 3 below #1. Hem has already been pressed under 1/4". Best if the thread color matches the color of the fabric. Remember a constrasting thread color shows every flaw. Position the fabric so the zigzag stitch will "zig" on the left side of the fabric and "zag" off the right edge of the fabric. Stretch the fabric as much as possible while stitching. The more the fabric is stretched the more "ruffley" will be the edge. If the fabric won't stretch, do not use this hem. Adjust the stitch width and stitch length to achieve the desired results. Practice on a sample before hemming the project.


Double Needle Hem
Serge around the hem edge. Press the hem up at least 3/4".
Replace the sewing machine needle with a 4.0/75 stretch twin needle. Thread the machine with two spools of thread--one for each needle. The thread should match the color of the fabric.
Use the presser foot or the markings on the needle plate as a guide to keep the stitch line absolutely straight and even. Starting near the inside leg seam, stitch about 3/8-1/2" from the fold line of the hem. Backstitch 2-3 stitches at the seam. Stitch on the right side of the fabric. Be sure to catch the serged edge as you stitch. Do not stretch the fabric while sewing.