


Cut out four tie patterns on the fold, two of each print color.

Lay them out and put opposite prints right sides together, forming two ties.

Pin together, right sides together.

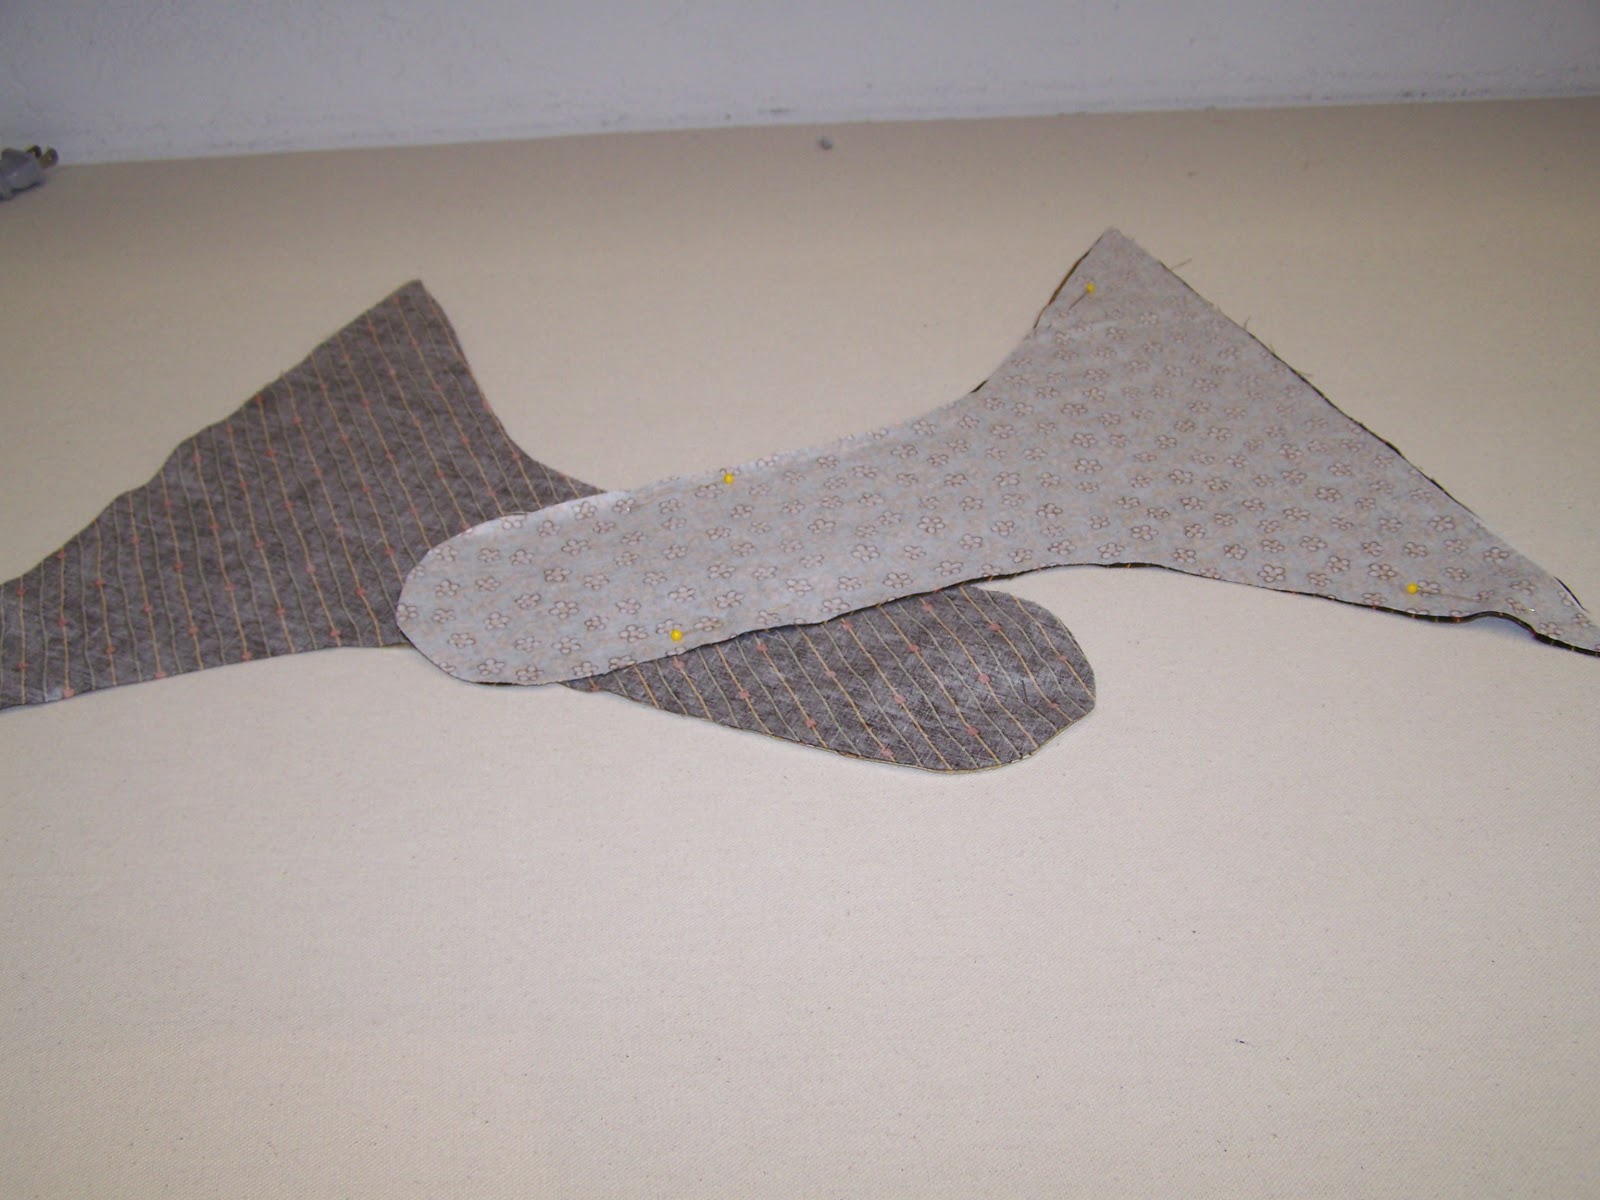
Stitch around tie with 1/4" seam allowance. Use the edge of your presser foot as your guide. Leave the straight edge open. Go slowly around the curve to keep the stitches even.

Clip the concave curves, 1/2" apart, being careful not to cut your stitches. This will help to open up the curve when turned right side out.


Notch the convex curve by trimming the seam allowance with pinking shears.

To make it easier to press when right side out, press open the seam allowance on one side.

Turn right side out and pull seam with a pin and press along seam line.

I like to pin the seam edge to the pressing board and then press with the iron.

As you press, use the wood clapper to get a crisp, professional edge. Be careful around the curves. This is bias grain and you do not want to stretch and distort it.

Cut two 14" x 14" squares, one of each print. This will make the pillow reversible. I like to serge around the raw edges without cutting any fabric off, just threads. Then I don't have to do a seam finish after I sew the pillow.

Line up the straight edge of the tie to the edge of the pillow, which is just one pillow layer. You want the contrasting print of the tie to be face side up.


Invisible Zipper
Notice that the invisible zipper coil is opposite a basic dress zipper. On an invisible zipper, the coil is on the back side. This is designed to hide the coil and the zipper. The construction for an invisible zipper is different than a conventional zipper. The zipper is sewn before any seams are sewn, and you stitching from the top down to the bottom of the zipper.


Unzip the zipper and notice that the coil is curled. To prepare the zipper, place it wrong side up. Press with a warm iron to uncurl and relax the coil.

There are many varieties of invisible zipper feet. I have a new favorite style, shown below.
The far left is the snap-on zipper foot, face up. Notice the guide in the front to help keep the coil standing up. The next foot is the same zipper foot, bottom side up to show the two grooves for the coil to feed through. Because this is a snap-on foot, and I have a Bernina machine, I need the low shank snap-on adaptor and the Bernina shank adaptor. The far right foot shows both adaptors attached to the snap-on invisible zipper foot. You really need an invisible zipper foot that has double grooves on the bottom.

Here is a picture of the foot on the machine. It is very important that you make sure the needle is centered right behind the guide in the center of the foot. For my Bernina, that means I move the needle one position to the right. Put your thread through the presser foot and towards the back.

Now pin the zipper to the edge of the fabric, right side zipper tape to right side of fabric. You could choose to place the zipper on a non-tie side. I chose to put the zipper on the tie side. Place the top zipper stop 1" from top edge of fabric. Because we are doing 1/2" seam allowances, place the edge of the zipper tape next to the serged edge. Notice the coil is towards the center of the pillow. Pin with the point towards the top and the ball towards the bottom.


Now side one is finished. Zip it closed and admire your work. Now line the other zipper tape to the pillow top and bottom. Pin at both ends and then open the zipper and finish pinning.

When the second zipper tape is sewn, notice that the coil is in the right groove and the fabric is to the right, on the arm. This is because you will sew from the top to the bottom again. Start at the top stop, backstitch, and stitch to 1" from the bottom and backstitch.


You are now finished using the invisible zipper foot. Switch to the narrow zipper foot. We now stitch a seam above and below the zipper to finish the side seam. When finished, you should not be able to tell the difference from the seam and the zipper, except for the visible pull tab of the zipper.
Pin through fabric layers on near the top stop and the bottom part of the pillow.


The zipper foot allows us to get very close to our previous zipper stitching. The needle position is to the far right. I put the zipper foot right next to my zipper stitching and set the backstitch to continuous so I do not need to hold the backstitch button. That is because I need to hold down the seam allowance (with tweezers or my seam ripper) so that I don't get my fingers too close to the needle. Backstitch and then stitch forward to the end of the pillow and backstitch again. Do the same at the pillow top.

Now we anchor the zipper tape at the bottom to the seam allowance. Continue using the narrow zipper foot but position the needle to the far left. Stitch through the tape and a single seam allowance.

Now continue and do the same thing to the opposite seam allowance at the bottom only. This prevents the tape tail to flip up while zipping the zipper.

After the zipper is sewn, you can now stitch the other three pillow sides. I like to fold in my seam allowances at the corner to hold the bulk while turning right side out. This helps get a nice sharp point in the pillow corners.

After the pillow form is inside, zip the zipper closed and tie to one side or the other, depending what color you prefer. This design can give you two different looks. ENJOY!
** SEW ** CREATE ** LIVE **