
There are five pattern pieces to make the baby sleeper.
- Raglan sleeves, cut 2
- Toe, cut 2
- Crotch piece, cut 1
- Front and back, cut one on fold. Make sure the pattern back edge is on the fold. Do not cut on the fold line.
- Sole, cut 2

Sometimes it is difficult to determine the face and wrong sides of the knit fleece fabric. Tip: put a piece of tape on all the wrong sides so there is no doubting.

There are certain circle markings on the patterns that are important to transfer to your fabric. Stick a pin through the circle and mark with a pencil or fabric marking pen.

Place the sleeper face side up, with the neck towards you and the legs away from you. Place the curved end of the crotch piece face side down, matching the dot at the top of the crotch. Pin in place.

Next finish pinning the crotch piece to the crotch area of the sleeper. The knit fleece will flex and stretch around. Sew around crotch area, 1/4" seam allowance. Use the right edge of the presser foot as your guide.

It will look like this when finished.

Sewing the toes to the foot opening is next. Fold the toe piece in half and pin the less curved side. With sleeper face side up, match the less curved side of the toe piece to the middle of the foot opening area and pin.

Stretch the foot opening around to match the toe piece and pin.

Stitch a 1/4" seam allowance, stretching the curve as you go and keeping the raw edges together.

This is what the toe will look like when finished.

With the sleeper face side up, fold the right leg in half, matching dot markings and the leg seam. Pin to crotch area, then pin crotch piece to leg.

Sew from toe area to top of crotch piece.


Next fold left leg in half. Pin leg seams together. Sew only half up the leg seam and backstitch.

The sleeper will look like this face side up.

Now it is time to sew the sole to the foot. Turn the legs inside out. Fold the sole piece in half and mark the center of the toe and the heel with pins. Fold the foot piece in half and do the same.

Match up the pins of the sole to the foot. Now finish pinning all around the sole, stretching fabric as needed.

Sew all around the sole piece. I like to have the foot side up so that I can see the seams so that I can keep them open. Take your time sewing around the curves to be accurate.

Here is one toe right side out and inside out.

Now it is time to prepare the raglan sleeves. Notice that there is a front and a back to the sleeves. This is very important to observe and mark.

Mark the fronts with pins in the neck area or some other marking.


Now fold the sleeves face side together and pin the sleeve seams. You want to end up with a left sleeve and a right sleeve. Don't flip one the wrong direction.

Now stitch the sleeve seam, backstitching at each end.

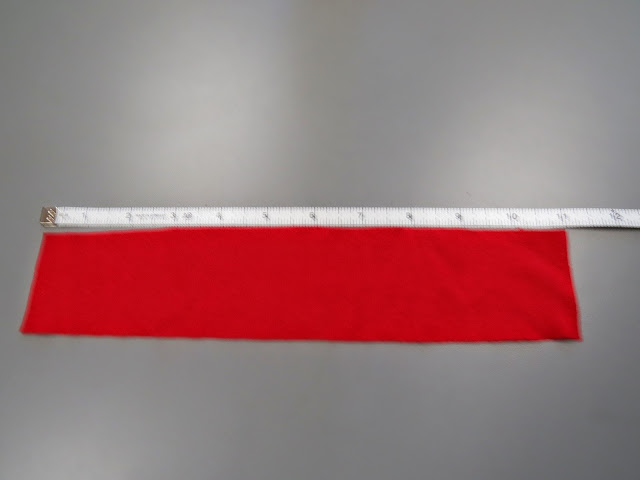
Fold the sleeve ribbing in half and sew seam.

Divide the sleeve cuff area in half and place a pin at the half mark. Fold the cuff in half with wrong sides together, keeping the seam allowance pressed open. Place a pin in cuff at the half mark.

With sleeve inside out, place the cuff inside the sleeve with raw edges matching the edge of the sleeve cuff area. Matching the seams, pin in place. Stretch ribbing as you pin all around the sleeve cuff area.

Sew the inside of the circle, with the ribbing side up, stretching the ribbing as you stitch all around the circle.

Here is the sleeve with the ribbing attached.

Now it is time to attach the sleeves to the sleeper.

With face sides together, match right sleeve with right side of sleeper and left sleeve with left side of sleeper. Pin first at the neck edge, and then at the bottom. Then finish pinning all around

Stitch all around the sleeve opening.

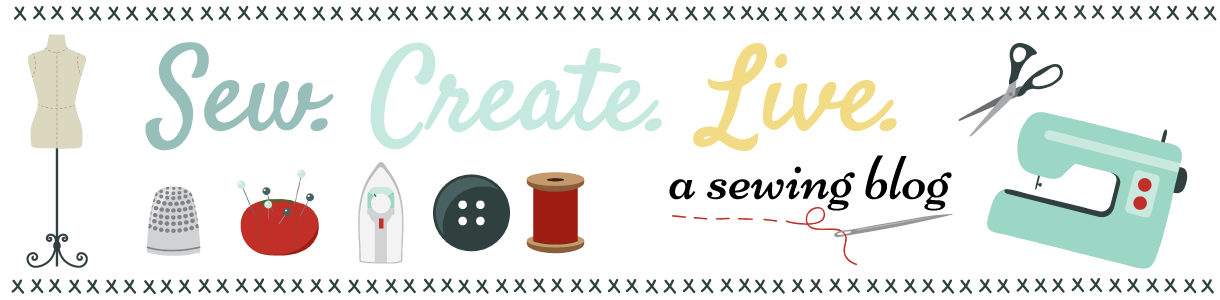
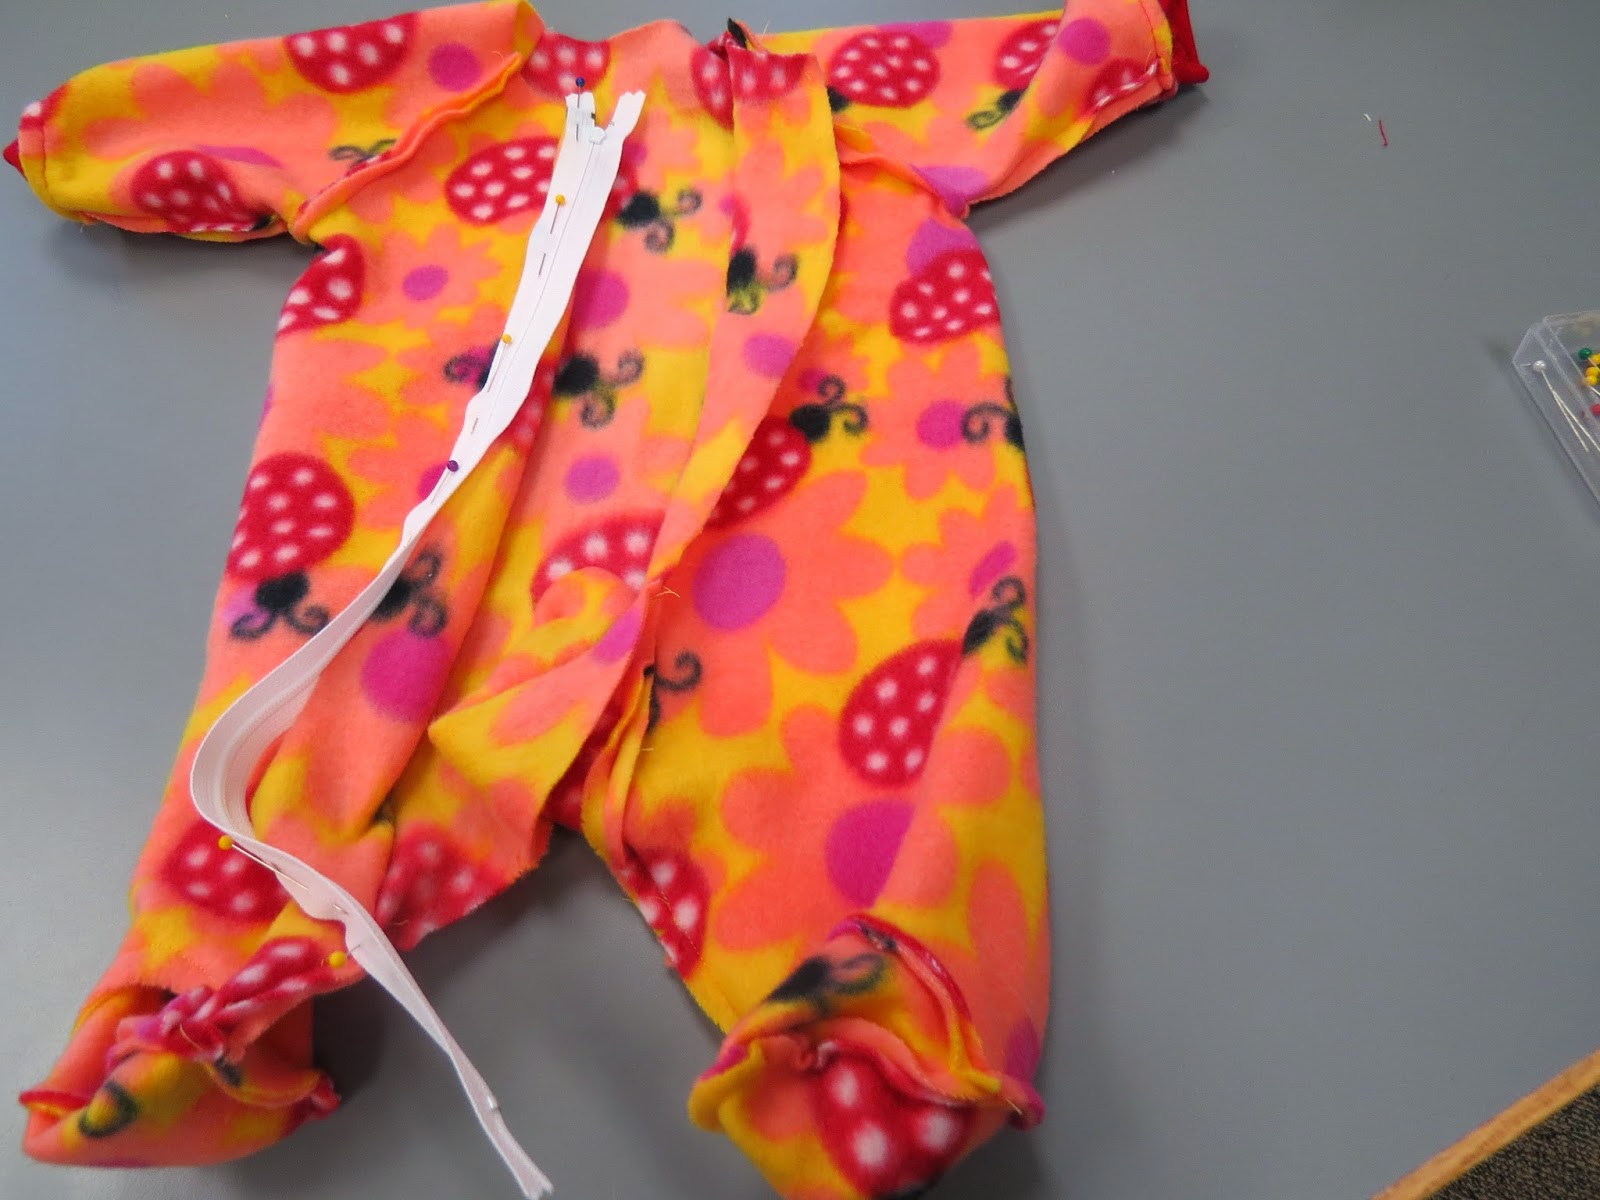
Now it is time for the zipper.

You will use the Bernina zipper foot #4.

Notice that the needle will either need to be to the far right or the far left. If you leave the needle in the center position the needle will break.

If the zipper is too long at the bottom, after the zipper is sewn in you can anchor stitch at the bottom and cut the remainder off.

When you sew the zipper, be sure to stitch from the bottom of the zipper to the top of the zipper on both sides. The edge of the presser foot will line up with the edge of the zipper tape.


When you get close to the top, stop with the needle in the down position.

Raise the presser foot and push the slider down (open the zipper 2"). Then continue stitching to the top and backstitch.

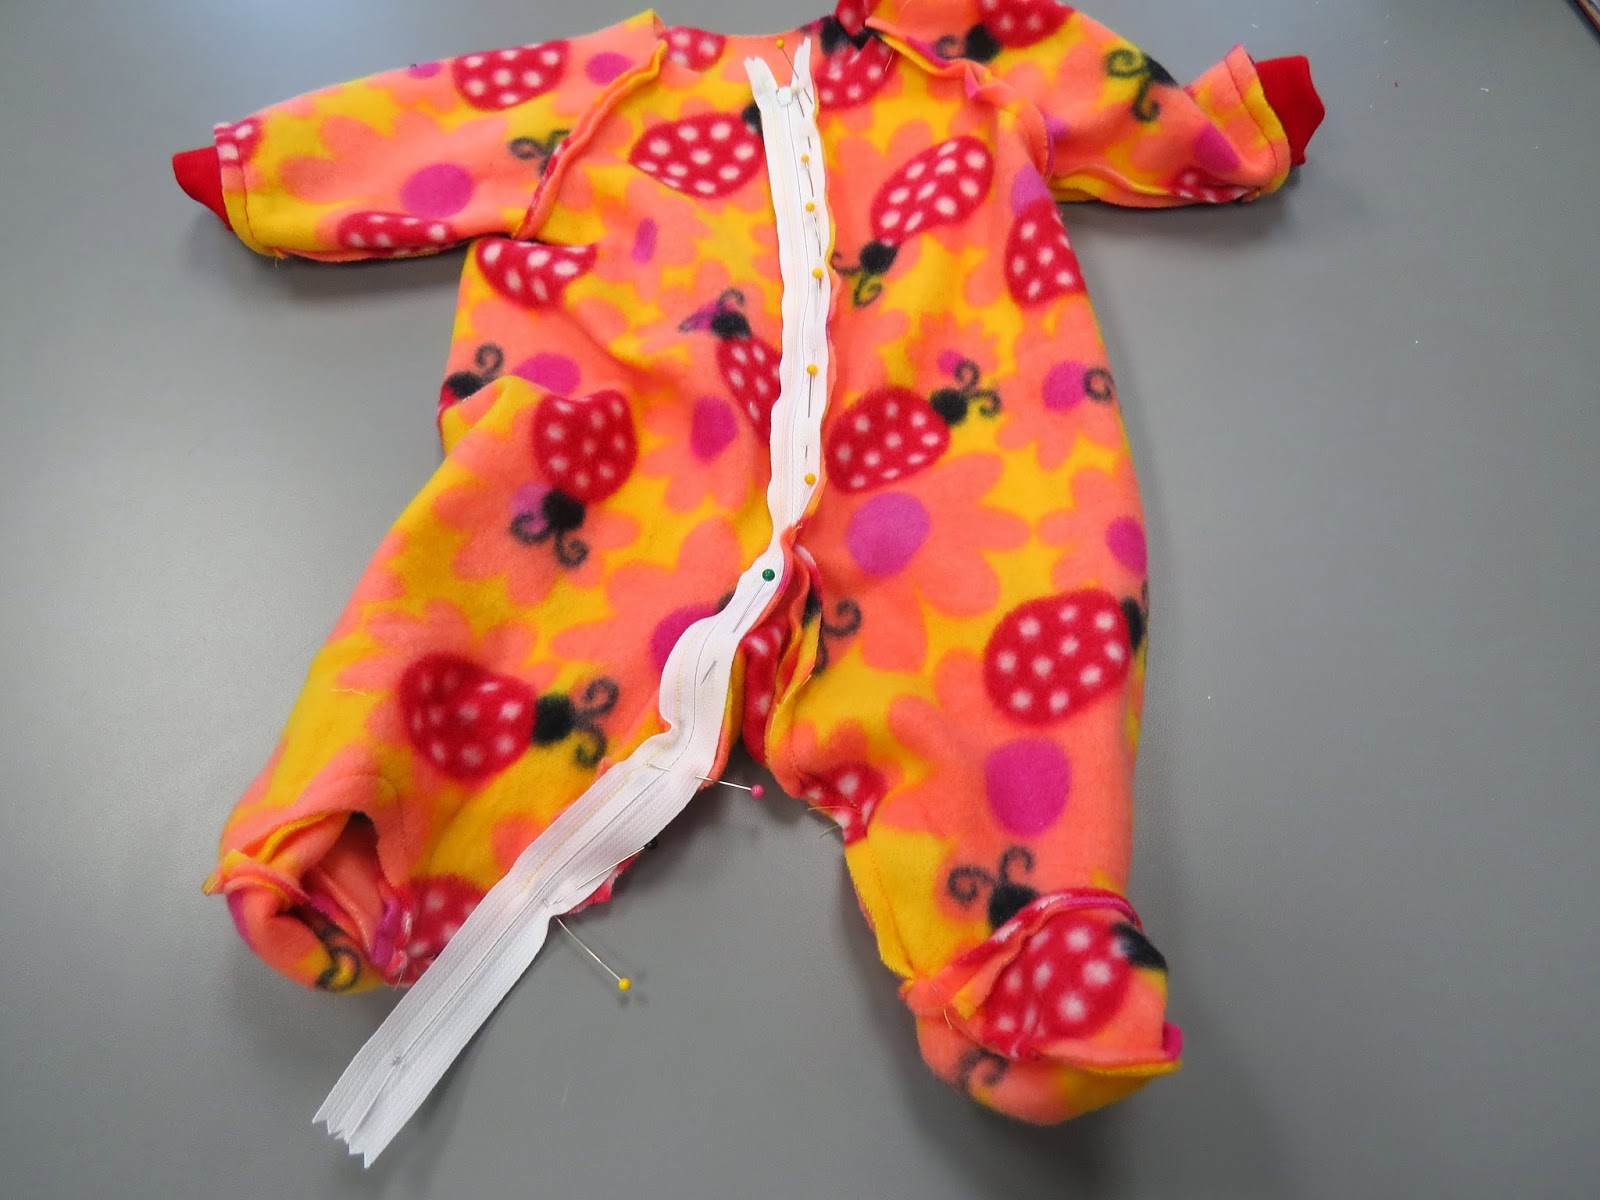
Now pin the other zipper tape to the other zipper side, right side of zipper tape to right side of fabric.

Move needle position so it is closest to zipper coil and stitch close to zipper coil.
Once again, when you approach the zipper slider, stop with needle in down position, raise presser foot, and unzip zipper so slider is behind presser foot. Continue stitching to top of zipper.

Here is what it looks like on the right side out. You are almost finished!!

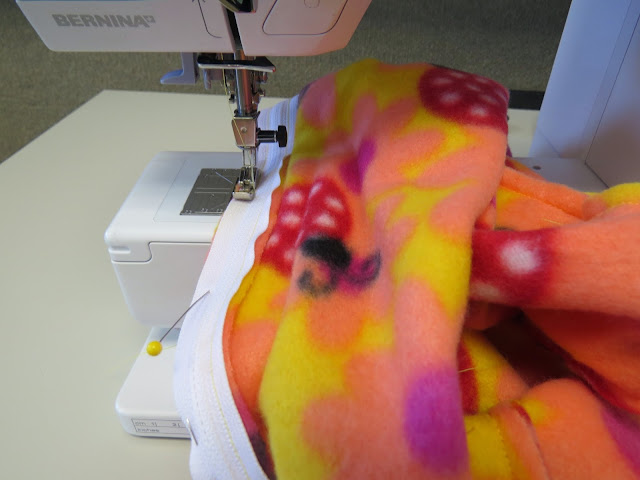
Now measure your total neck opening.

Cut the ribbing so that it measures 3/4 the length of the neck measurement plus 1/2". The width of the ribbing should be 2" to 3". I prefer 2 1/2" width.

There are two ways to sew on the neck ribbing: Straight or curved. The curved method is more difficult but looks nicer. There are three methods explained below. For the Children's Clothing students, choose the third method.
Method 1. Here are instructions for the straight method. The curved instructions are below.
Fold the ribbing in half lengthwise with right sides together. Sew each end using 1/4" seam allowance. Turn right side out. Poke the corners out. Then pin the ribbing into fourths.

Next, pin the neck edge of the body into fourths.
Pin the ribbing to the body with the right sides together. Match the center back pin of the body with the center pin of the ribbing. Match the rest of the pins in the body with the other pins in the ribbing. Sew, using 1/4" seam allowance and stretching the ribbing to fit the neck edge. Keep the needle in the down position while sewing.

Press the ribbing seam over a pressing ham, pressing the seam allowance down into the sleeper.

Now with the clapper pressing tool, hold it on the seam to "train" the fabric to lay down. This will give the neck edge a professional look.

Method 2. The curved ribbing method:
The ribbing has been cut 3/4 the length of the neck measurement plus 1/2".
Fold the ribbing in half, wrong sides together. Measure in 2" from each outside edge and trim the bottom cut edges curved up to the corner, leaving about 3/8" uncut.


Next, pin the neck edge of the body into fourths.

As you pin the ribbing front to the zipper tape, curve the ribbing so that you can be sure you will have at least 1/4" ribbing in the seam allowance.

Sew, using 1/4" seam allowance and stretching the ribbing to fit the neck edge. Keep the needle in the down position while sewing.

Press the ribbing seam over a pressing ham, pressing the seam allowance down into the sleeper.
Now with the clapper pressing tool, hold it on the seam to "train" the fabric to lay down. This will give the neck edge a professional look.
You may need to tack down the ribbing seam allowance to the zipper tape if it tries to flip up.

Method 3. Curved neck ribbing with wrapped seam:
Fold sleeper neckline in half and put a pin at center back.

Fold the ribbing in half, the long way. Trim the corners of the ribbing front ends about 2" in from edge, ending at 1/4" at the fold end.

Fold the folded ribbing in half to find center back. The pins close to the center front are just to hold the ribbing together.

Matching pins at center back, start pinning ribbing to right side of neckline, raw edges all together. Stretch the ribbing and continue pinning until you get to the zipper at center front. Turn up the ribbing slightly so that the FOLD edge matches the edge of the zipper coil and pin in place.


Here is the neckline completely stretched and pinned to neckline. Excuse the picture being upside down.

Now wrap the zipper and seam allowance around to cover up the ribbing end. This is called a wrapped seam. Pin through all layers. Stitching through the wrapped seam will be bulky so take your time.
Start stitching at center front, through the wrapped seam, 1/4" seam allowance, and continue stitching to other center front. After stitching, zigzag the raw edges together.

When you sew the zipper, be sure to stitch from the bottom of the zipper to the top of the zipper on both sides. The edge of the presser foot will line up with the edge of the zipper tape.


When you get close to the top, stop with the needle in the down position.

Raise the presser foot and push the slider down (open the zipper 2"). Then continue stitching to the top and backstitch.

Now pin the other zipper tape to the other zipper side, right side of zipper tape to right side of fabric.
Move needle position so it is closest to zipper coil and stitch close to zipper coil.

Once again, when you approach the zipper slider, stop with needle in down position, raise presser foot, and unzip zipper so slider is behind presser foot. Continue stitching to top of zipper.

Here is what it looks like on the right side out. You are almost finished!!


Cut the ribbing so that it measures 3/4 the length of the neck measurement plus 1/2". The width of the ribbing should be 2" to 3". I prefer 2 1/2" width.

There are two ways to sew on the neck ribbing: Straight or curved. The curved method is more difficult but looks nicer. There are three methods explained below. For the Children's Clothing students, choose the third method.
Method 1. Here are instructions for the straight method. The curved instructions are below.
Fold the ribbing in half lengthwise with right sides together. Sew each end using 1/4" seam allowance. Turn right side out. Poke the corners out. Then pin the ribbing into fourths.

Next, pin the neck edge of the body into fourths.
Pin the ribbing to the body with the right sides together. Match the center back pin of the body with the center pin of the ribbing. Match the rest of the pins in the body with the other pins in the ribbing. Sew, using 1/4" seam allowance and stretching the ribbing to fit the neck edge. Keep the needle in the down position while sewing.

Press the ribbing seam over a pressing ham, pressing the seam allowance down into the sleeper.

Now with the clapper pressing tool, hold it on the seam to "train" the fabric to lay down. This will give the neck edge a professional look.

Method 2. The curved ribbing method:
The ribbing has been cut 3/4 the length of the neck measurement plus 1/2".

Fold the ribbing in half, wrong sides together. Measure in 2" from each outside edge and trim the bottom cut edges curved up to the corner, leaving about 3/8" uncut.

Divide the ribbing into fourths and pin for markings.

Next, pin the neck edge of the body into fourths.
Pin the ribbing to the body with the right sides together. Match the
center back pin of the body with the center pin of the ribbing. Match
the rest of the pins in the body with the other pins in the ribbing.

As you pin the ribbing front to the zipper tape, curve the ribbing so that you can be sure you will have at least 1/4" ribbing in the seam allowance.

Sew, using 1/4" seam allowance and stretching the ribbing to fit the neck edge. Keep the needle in the down position while sewing.

Press the ribbing seam over a pressing ham, pressing the seam allowance down into the sleeper.
Now with the clapper pressing tool, hold it on the seam to "train" the fabric to lay down. This will give the neck edge a professional look.
You may need to tack down the ribbing seam allowance to the zipper tape if it tries to flip up.

Method 3. Curved neck ribbing with wrapped seam:
Fold sleeper neckline in half and put a pin at center back.

Fold the ribbing in half, the long way. Trim the corners of the ribbing front ends about 2" in from edge, ending at 1/4" at the fold end.

Fold the folded ribbing in half to find center back. The pins close to the center front are just to hold the ribbing together.

Matching pins at center back, start pinning ribbing to right side of neckline, raw edges all together. Stretch the ribbing and continue pinning until you get to the zipper at center front. Turn up the ribbing slightly so that the FOLD edge matches the edge of the zipper coil and pin in place.


Here is the neckline completely stretched and pinned to neckline. Excuse the picture being upside down.

Now wrap the zipper and seam allowance around to cover up the ribbing end. This is called a wrapped seam. Pin through all layers. Stitching through the wrapped seam will be bulky so take your time.

Start stitching at center front, through the wrapped seam, 1/4" seam allowance, and continue stitching to other center front. After stitching, zigzag the raw edges together.

Great job on the sleeper! Happy Sewing!
SEW* * *CREATE* * *LIVE
* * *
*
Tag words: baby sleeper, fleece sleeper, raglan sleeve sleeper, child sleeper, baby interlock sleeper)