CUTTING OUT THE FABRIC
Find your pattern pieces: one front, one back, one sleeve, one collar, and optional pocket. Fit the pattern and look for any alteration needs: bust, waist, hip, and length. Do any necessary pattern alterations.
Get fabric on grain and fold in half, wrong sides together. Place pattern pieces on fabric and measure each pattern grainline to make sure it is placed on grain, measuring the grainline to the selvage edge at the top and bottom of each pattern.
TIPS: If you have a nap fabric, or a one-way print fabric, make sure all your pattern pieces are going the same direction. If your fabric looks the same on both sides, put a piece of tape on the wrong side of all your cut fabric pieces.


TIP: Your collar pattern may be a full collar pattern. If not, trace your collar pattern to make a full collar pattern. This way you can cut the whole collar out once, instead of putting the half collar pattern on the fabric fold twice.

Remember to cut out the cap sleeve twice because the sleeves are lined. You will end up with four fabric sleeves.

TIP: Here is another way to cut out the back and the four, lined, cap sleeves. Offset the fold of the fabric so that it is wide enough for just the back pattern piece. Place back pattern on the foldline. Then cut out the four cap sleeves, having the pattern face up on two and face down on two. This way you will get a mirror image of the sleeves and it will ensure that you have two sleeves for the left arm and two sleeves for the right arm.


TRANSFERRING YOUR PATTERN MARKINGS
Once the blouse is cut out, you need to transfer all pattern markings to the fabric. I make as many markings on the outside cut edge as I can, snipping 1/8" into the cut edge. For the darts, I use chalk tracing paper (unless your fabric is cream or white). Insert the two layers of chalk paper, chalk side out, between the two layers of fabric, wrong sides facing each other. Be sure to do this on a hard surface.
TIP: You may be able to find disappearing ink tracing paper that could serve the same purpose.

Trace the darts with a tracing wheel, stopping often so that the pattern paper does not bubble or tear.

This will transfer an outline of the dart to the wrong side of the fabric, shown faintly below.

Staystitch both front and back necklines, 1/2" from raw edge. This is a stitch on a single layer of fabric, not a seam. Start at the shoulder, and stitch to the neck center. Cut threads, flip fabric over, and stitch again from opposite shoulder, meeting in the center again. This is called stitch direction and helps prevent distortion to the bias grainline.


INTERFACING
Next, cut out the interfacing. For this particular pattern, you will cut out two front facings and one complete collar. The facing pattern is attached to the front blouse pattern. Notice two vertical lines labeled fold line and center front line. It also says cut interfacing to this line in the facing area. I fold the fusible interfacing in half, with the straight edges together. Then I place the fold line of the pattern directly on this interfacing straight edge, with the pattern facing area over the interfacing. Cut on these outside lines to cut out your two interfacing pieces at the same time.

Cut out the interfacing collar piece, either on the fold, or

single layer of interfacing with complete collar, as shown below.

Trim interfacing. On front facing pieces, trim 1/4" off the long side curve. Cut off 1/2" on the shoulder, neck, and hem. Do not trim the long straight edge at all.

Trim collar 1/2" around all sides.

I also trim the collar points off.

Prepare front facing for the interfacing by folding attached facing on the fold line, wrong sides together. Press a crease on this fold line.


Press under long curved edge of facing 1/4" towards interfacing. Now edgestitch on this fold to give the facing edge a clean finish.

DARTS
There are shaped darts in both the shirt front and shirt back. These are contour, vertical darts with two points. Fold fabric in half, with right sides together, and pin darts in place, matching dart markings.

A shaped dart is stitched in two steps: 1. Begin stitching in the middle of the dart and stitch toward one point. When you are within 1/2" of the point, shorten stitch length to 1.5 and continue to stitch, with your last two stitches exactly on the fold. Never backstitch the point of the dart. 2. Remember to return your stitch length back to 2.5. Repeat step one, going the opposite direction.
Leave a thread tail and tie a double knot. These darts do not need to be clipped, as you will be using medium-weight fabric.


If your pattern has bust darts, stitch those darts now. They will be pressed down.

POCKETS (Optional)
Fold wrong sides together on top hem 1 1/4" and press. Then open up hem and press under raw edge 1/4". Next, fold hem right sides together on fold line and pin. Stitch outside hem edges 5/8" and backstitch.

Trim seam allowances down to 1/4" on both pocket seams.

Turn pockets right side out and open corners with point turning tool.

Press under all raw edges 5/8".

Do the same to both pockets. Place pockets together to make sure they are both the same size.

Topstitch upper hem edge and backstitch on both ends.

Place pockets over markings on blouse fronts. Pin in place and topstitch pockets.


Lay down the back blouse, right side up. Lay the front pieces on top, right side down, matching the shoulder seams to the back. Pin shoulder fronts to shoulder backs. There is a triangle marking near the neckline. Stitch 5/8" seam allowance on shoulder, beginning 1" from neckline and backstitch towards neckline. At 1/2" from neckline (at the point of the triangle marking) begin stitching forward and stitch towards the armhole, finishing your seam with a backstitch.


Press shoulder seams open. I like pressing over the pressing ham.

COLLAR
Place trimmed interfacing (fusible side down) on wrong side of collar and press, beginning at the center and pressing out to the sides.

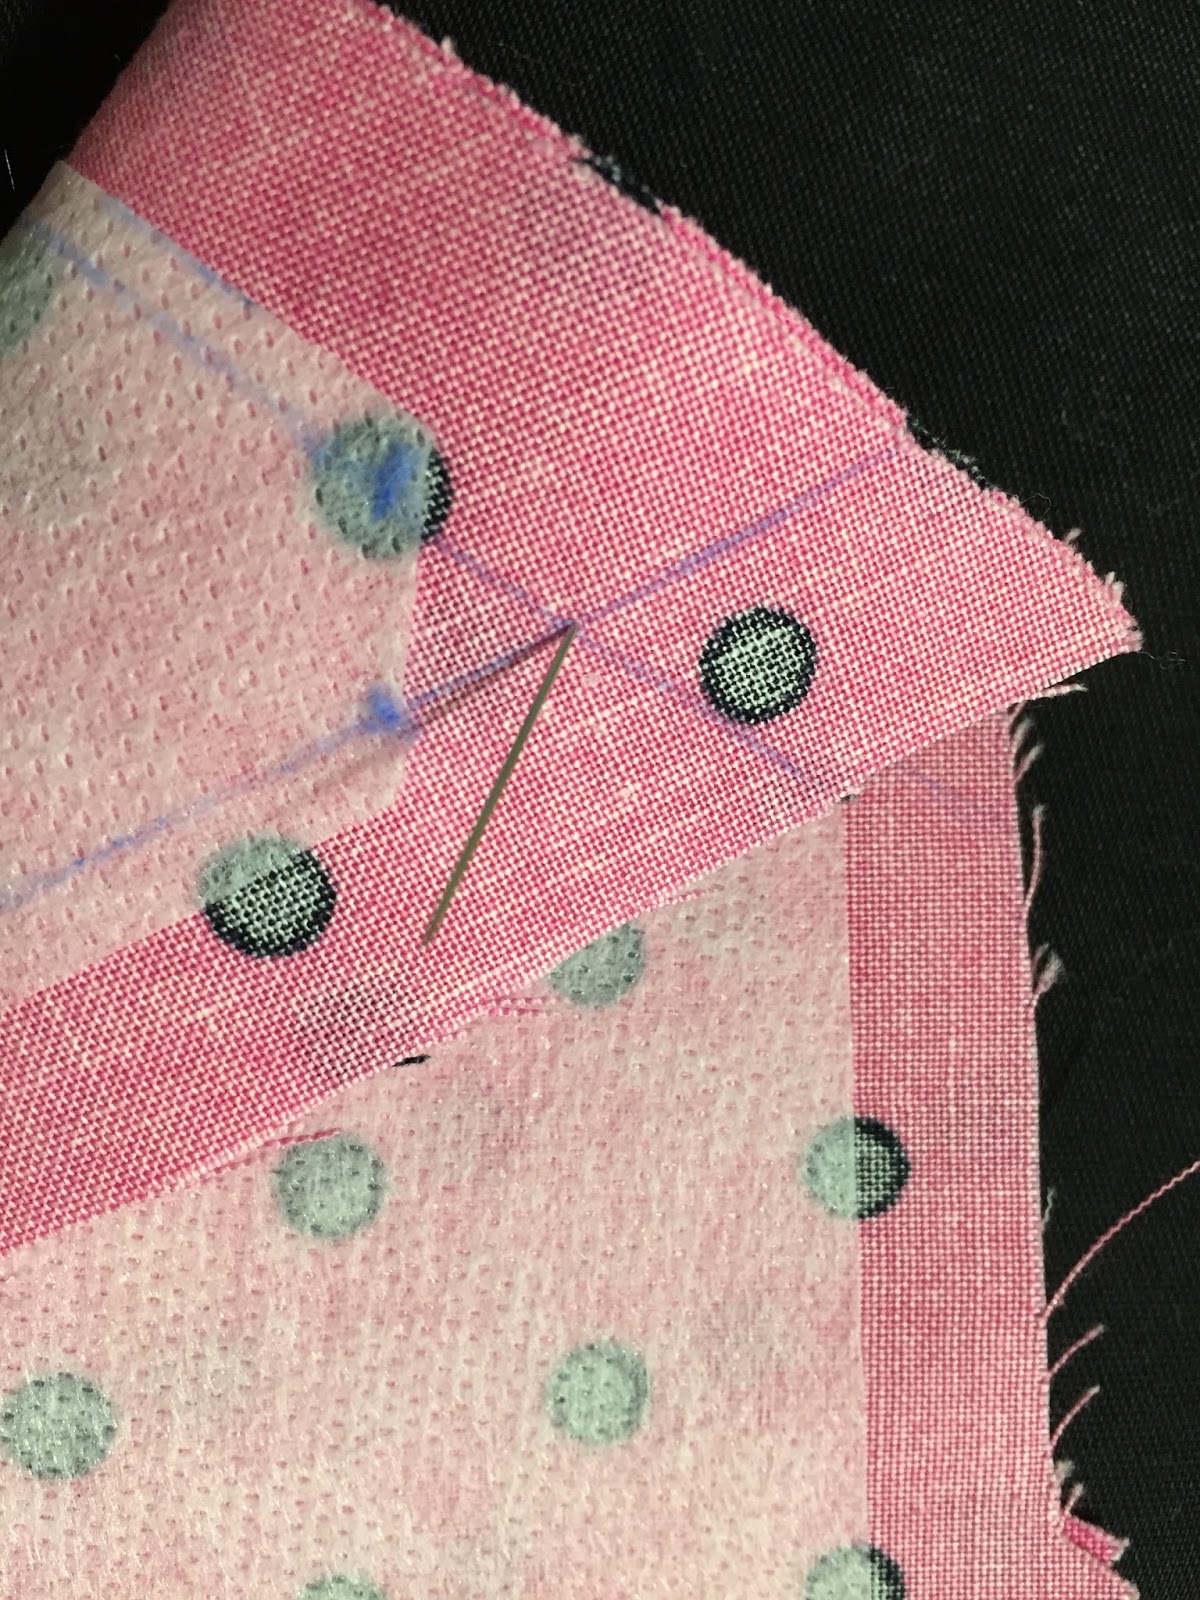
Measure in 5/8" from collar edges with a ruler and draw a chalk line. The pivot point is where lines intersect.

Fold collar in half to match collar points. Put a pin through pivot point to match pivot point on opposite collar point.
Sew a reinforced stitch 5/8" from the raw edge through the triangle markings on the collar,
about an inch in length.

Watch the following video for professional tips for sewing the collar with perfect collar points.
http://www.threadsmagazine.com/item/36425/video-sew-perfect-collar-points
Pin upper collar to under collar, right sides together. Begin stitchin the collar side and then shorten stitch length to 1.5 when 1/2" from the pivot point. This will reinforce the corner when trimming and grading the seam allowance later. Continue stitching to just before the pivot point, then put the needle in the down position. Sew 2-3 diagonal stitches right before the pivot point. Pivot after the diagonal stitches, continuing on the style edge of the collar. Stitch for another 1/2" before returning your stitch length back to 2.5. Continue stitching until you come to within 1/2" of the other pivot point and repeat the steps for the corner, stitching the other collar side.

Press collar seam allowances flat, then press open on point pressing tool.

Grade collar seam allowance. Remember "Widest to the World." This means the seam allowance that faces the "world" is the widest seam allowance. On the collar, this would mean the upper collar, (the collar with the interfacing.) Trim extra close at the collar points.

Press long collar seam, pressing both seam allowances to the under collar side.

Before turning the collar right side out, understitch through the under collar and both seam allowances. This will hold the under collar down and prevent it from showing on the upper collar side. You will not be able to stitch from point to point, but get as close as you can and backstitch at both ends. Stitch 1/8" away from seam line.

Turn collar right side out. Use point turner tool up inside collar to push out point.

You can also use a pin to gently pull out the point. Be careful not to overdo it or you will pull out your seam allowance.

The important thing is to have both collar points look the same.

Put under collar towards you and press collar flat. Don't let any of the under collar show to the upper collar side.

Optional: Baste collar sides together 1/2" from raw edge, from collar end to triangle marking. Do this to both collar ends.

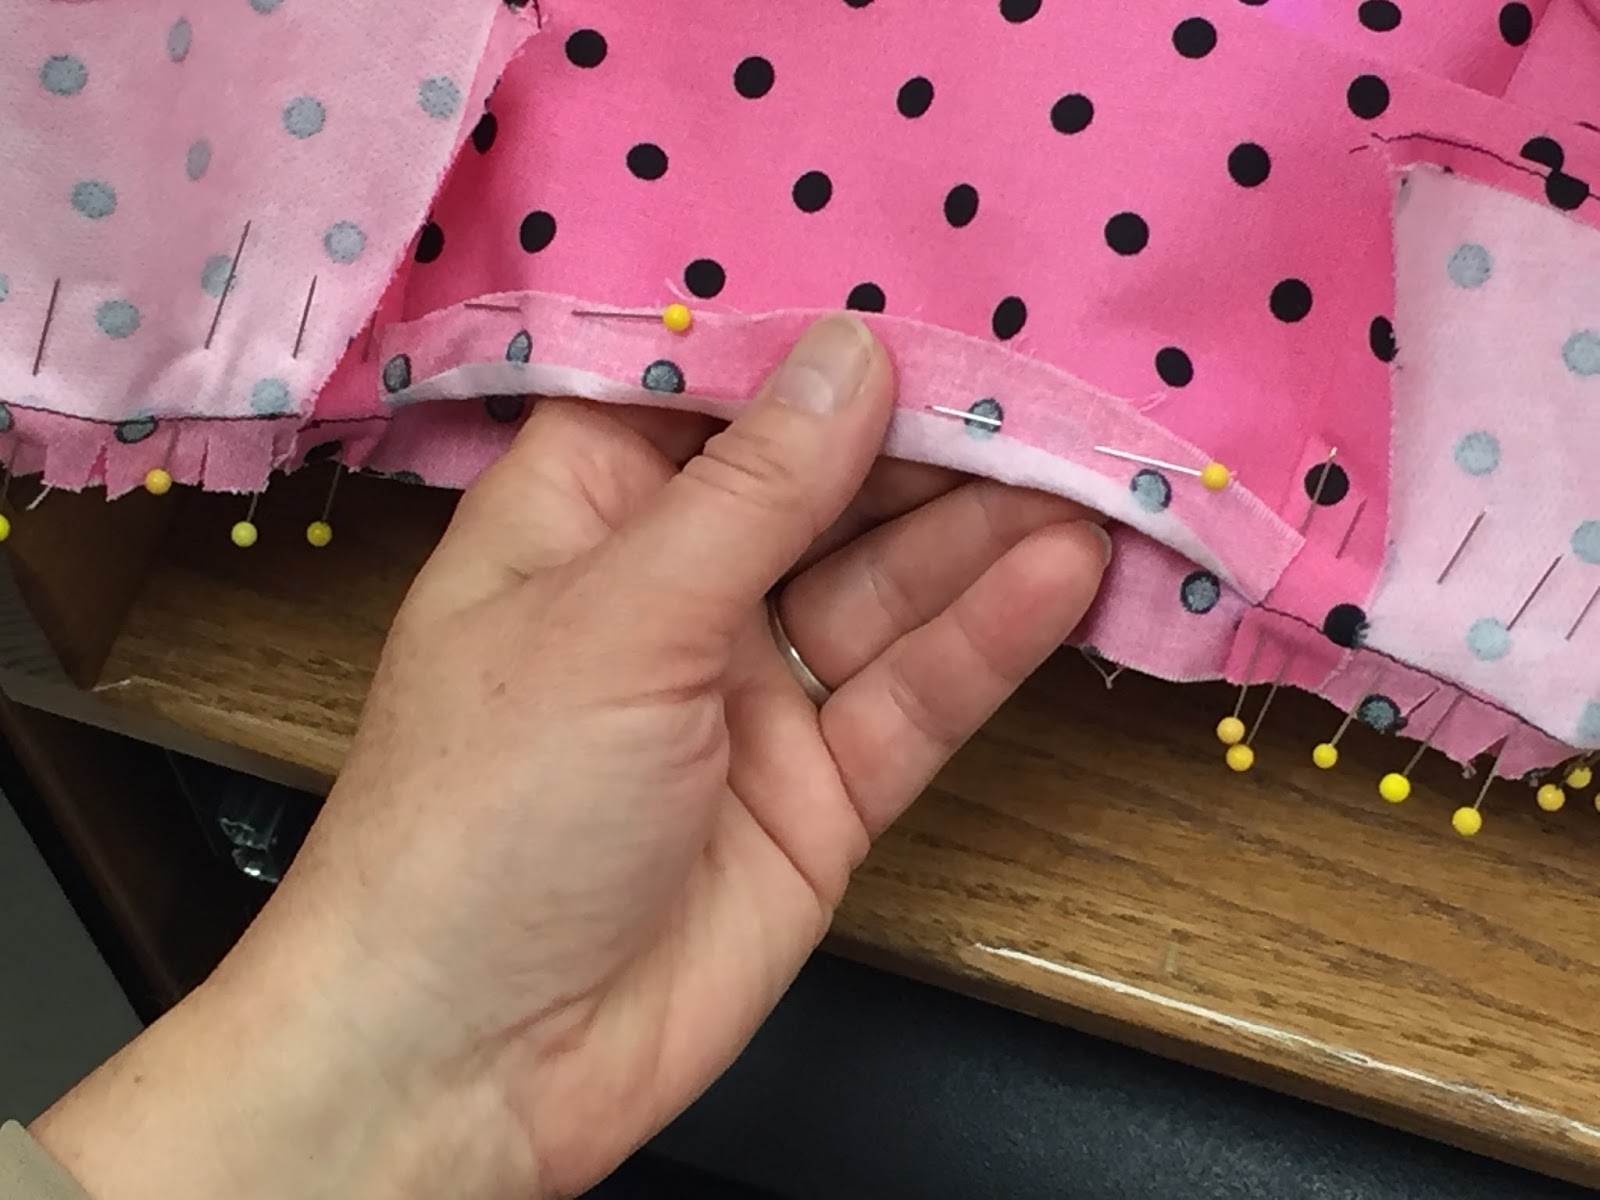
Lay blouse right side up and begin pinning collar to neckline. Undercollar should be next to blouse and upper collar should be towards you. Match circles, notches and triangles. First match triangle to shoulder seam, adding two pins to seam allowance. Next match notches. Then match circles, which are on the center front line. Measure so that both collar ends will be the same distance from the front foldline. Start clipping neckline to open up concave curve.

Fold over self facing on fold line. Match circles and notches. At shoulder seam, fold back facing 5/8" and match fold to shoulder seam. Clip curve of facing to smooth fabric. Add pins.

Do the same to other facing.

Now prepare back neckline.

Take one pin out on shoulder seam and clip 5/8" through upper collar (only top layer) next to facing fold.

Clip 5/8" through upper collar at opposite facing as well.

Here is a final checkpoint for making sure that the distance between the fold line and the collar end are the same distance for both left and right fronts. You can't see it in this picture, but I am comparing the two together to make sure they match.

Fold back upper collar and pin to keep out of place.
Pin back neckline to under collar, clipping neckline where necessary.
This is what the pinned collar will look like.

Stitch 5/8" across neckline and collar, stopping to take out pins and to smooth fabric on top and underneath to prevent puckers. Be sure to keep upper collar unstitched between shoulder seams.


Clip under collar at the neck seam allowance at ends of self facings, at triangle markings (shoulder seams). This will release the fabric so that you can press seam allowance into collar.

Roll collar as though it was around your neck (called the "turn of cloth"). I do this over a pressing ham.

Trim and grade neck seam allowance from shoulder to shoulder.

Then press graded seam allowance up into collar.

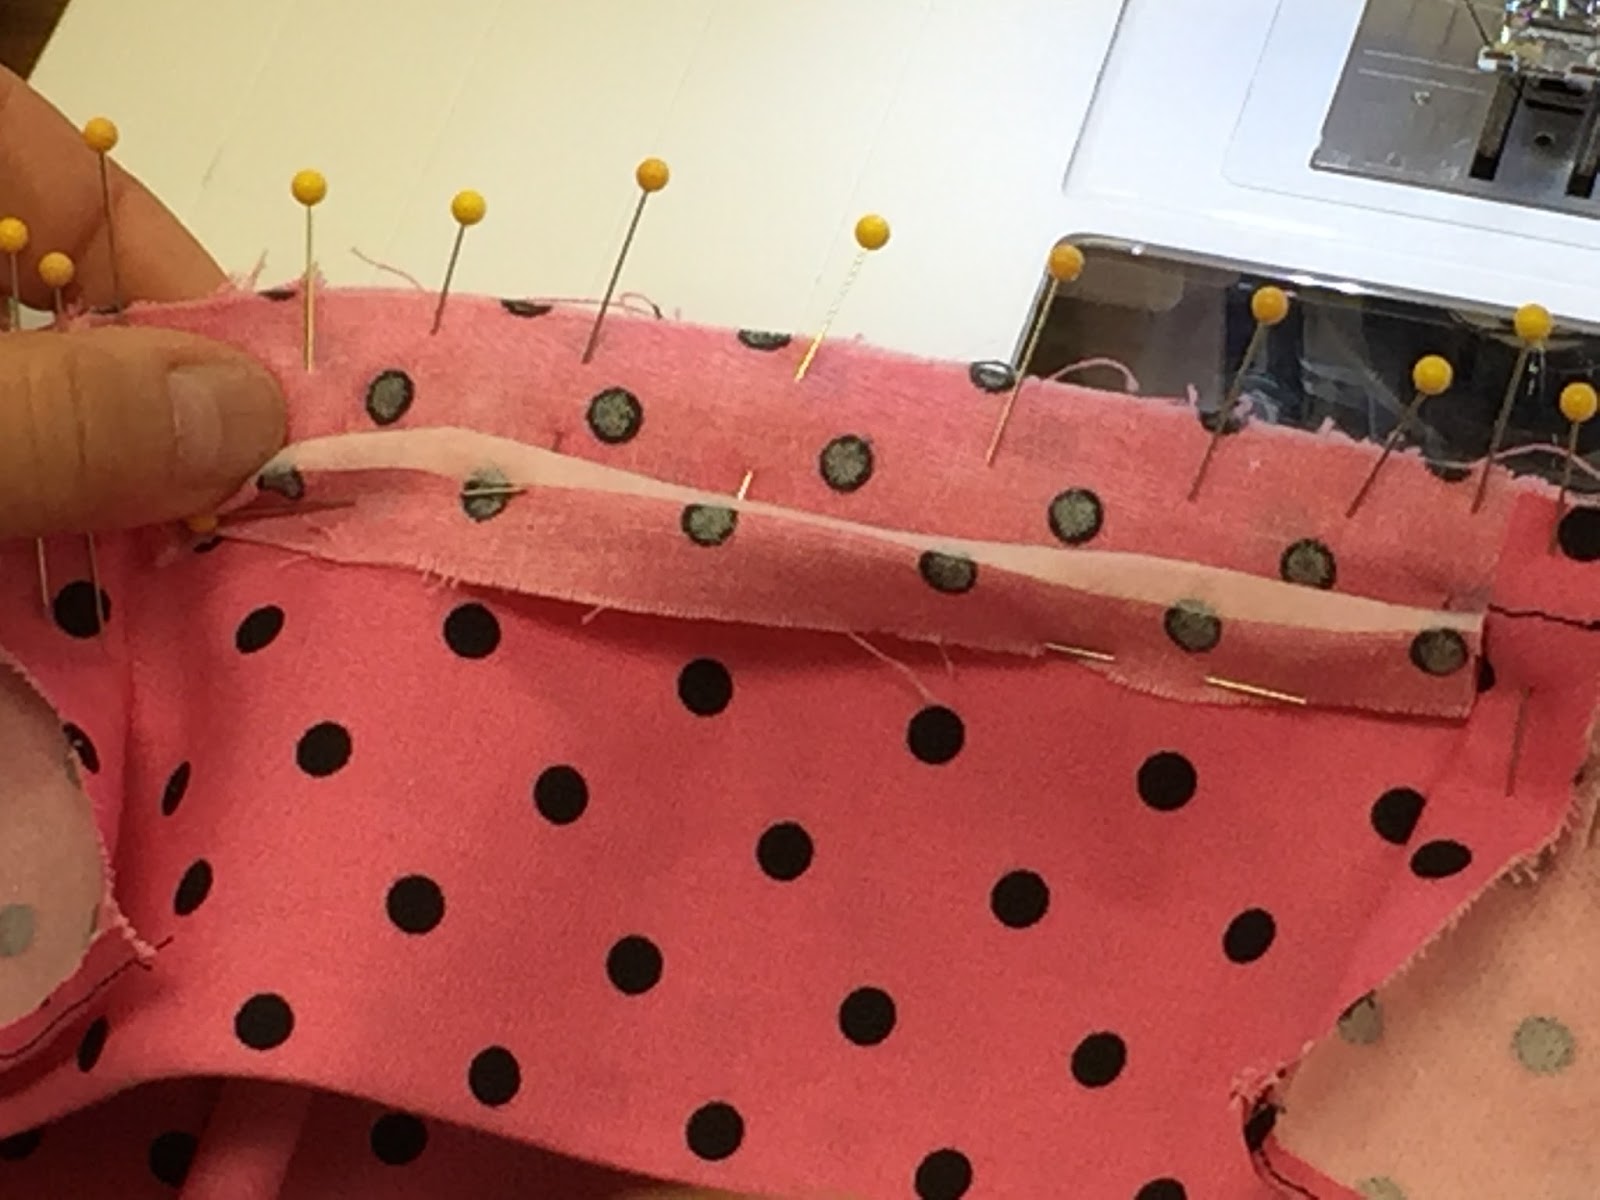
Turn upper collar raw edge under so that fold matches neck seamline and pin in place.

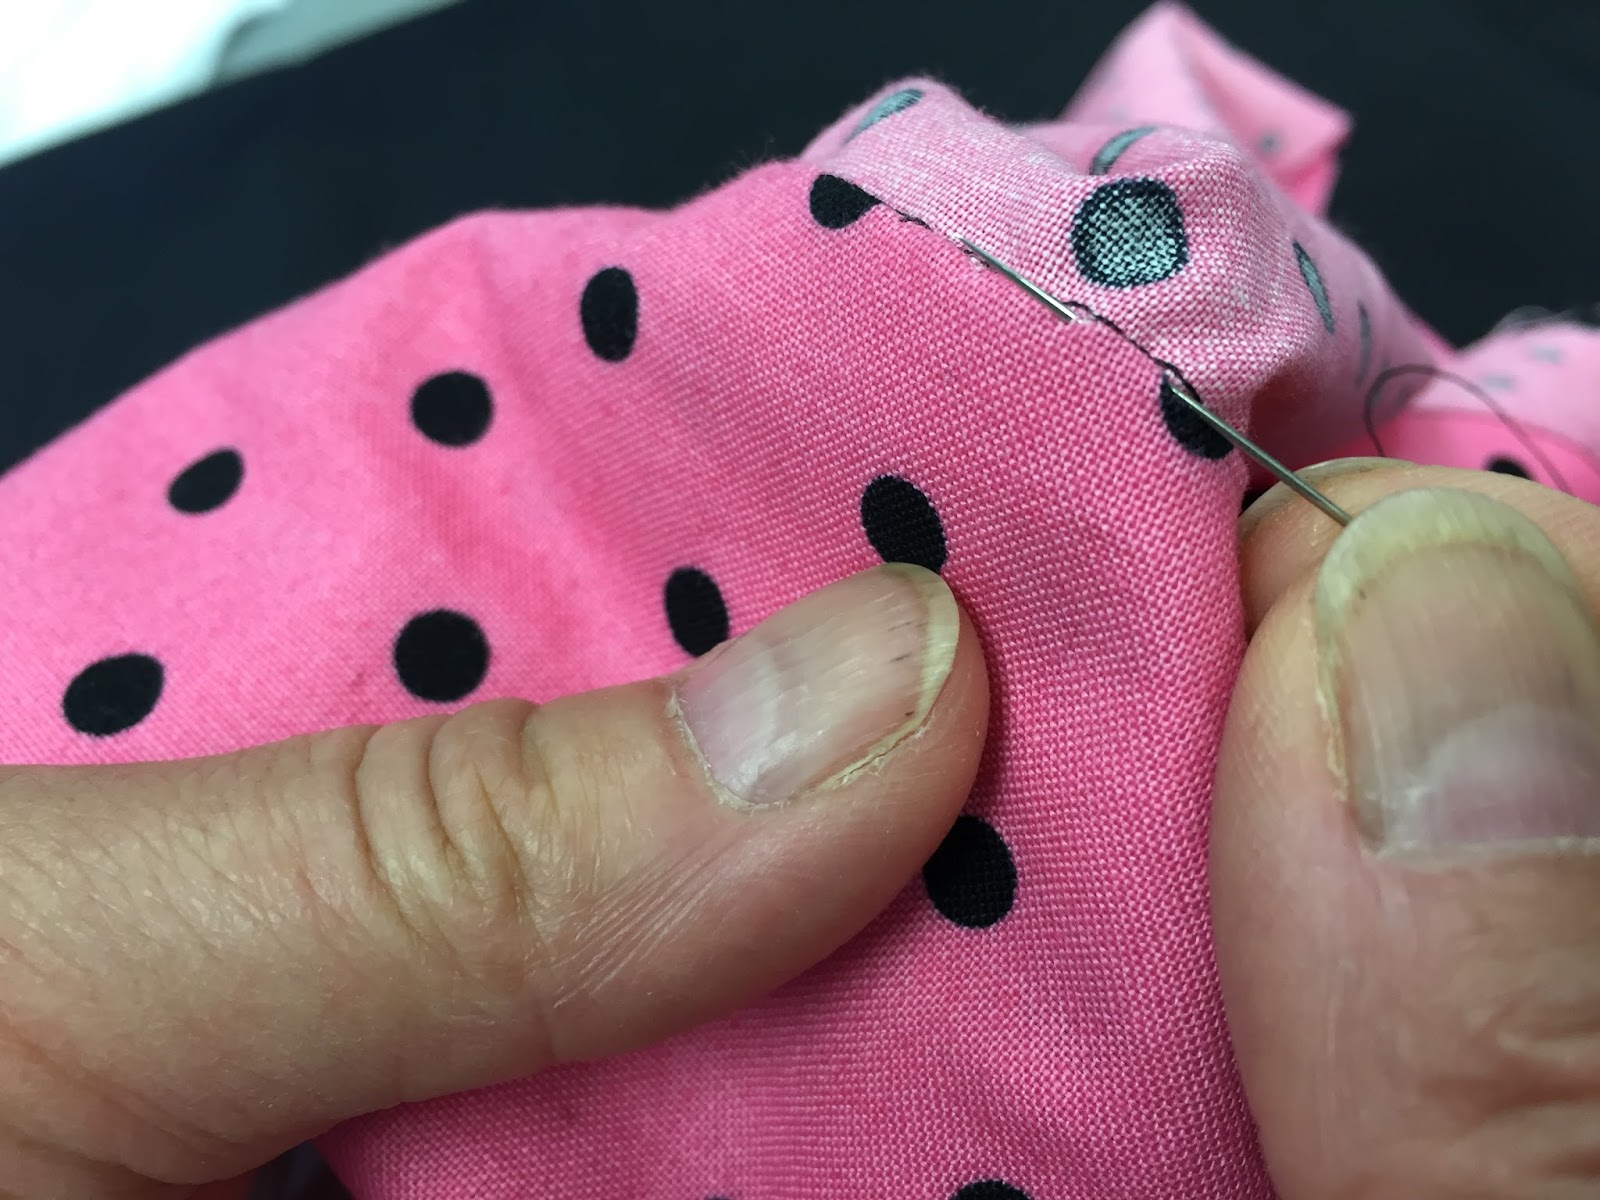
Do not allow your stitching to go through to the right side of the blouse.

This is what your stitching should look like when you are finished.

FITTING THE SIDE SEAMS
With the blouse right side out, pin the side seams with the pins on the 5/8" seam line. Try on the blouse, matching center fronts and pin together down the front of the blouse. This pattern curves quite a bit at the hipline. If your body does not curve this way, adjust the pins to fit you. Then mark with chalk on the wrong side of the fabric where your pins are. You may want to draw in the complete stitching line if it does not stay on 5/8". Make both sides match. Pin with right sides together. Sew side seams. Press seams open and sew seam finish of your choice.
NOTE: If you are doing the side slits, stop stitching the side seams when you get to the circle marking. End the seam finish at this mark also.
Also, if you have taken in the seam allowance more than 5/8" at the armscye, remember to do the same to your sleeve seam at the armscye when you sew your sleeves.

CUFF SLEEVE VIEW A, B, C
The hem fold on this sleeve pattern is 4 1/2".

Place sleeve wrong side up and press up hem allowance 4 1/2" and press.


With pressed hem open, turn sleeve right sides together and pin sleeve seam. Notice that the seam is angled. This is for the shaped cuff hem.

Open up the fold at the bottom and stitch 5/8" seam allowance all the way down. Be sure to pivot at the angles. REMEMBER, if you sewed your blouse side seams more than 5/8" at the armscye, you will need to have the same seam allowance at the armscye of your sleeve. Then taper your sleeve seam allowance down to 5/8".

Sew seam finish. Press sleeve seam allowance open using a seam roll pressing tool. Fold 1/4" crease back in place.

Fold hem up on fold line. Pin in place. You may topstitch this hem or slipstich. Here is the topstitch on the wrong side.

Here is the topstitch on the right side.

Here is the slipstitch hem on the wrong side.

Now fold up the 2" cuff and press. You may hand tack the cuff in place at the sleeve seam, or you may machine stitch at the sleeve seam which is called a "stitch in the ditch." This will hold the cuff in place.

LINED CAP SLEEVE VIEW D
You have four cut cap sleeves. Fold right sides together and pin sleeve seam. You will do this to all four sleeves. Sew the four seams. REMEMBER, if you sewed your blouse side seams more than 5/8" at the armscye, you will need to have the same seam allowance at the armscye of your sleeve. With this short sleeve, you will not be able to taper the seam back to 5/8".

Press seam open. Seam finish is NOT necessary.

For each sleeve, put right sides together, pin two sleeves together, having raw edges even at lower edge. Have seam pressed open and match seamline. Pin on both sides of seam allowance. Make sure that your notches match at sleeve cap, with single notch matching and double notch matching. VERY IMPORTANT: This will make sure that you have two left sleeves together and two right sleeves together. The single notch indicates the sleeve front and the double notch indicates the sleeve back. Your notches will be cut out.

Stitch 5/8" all around the sleeve. If your sewing machine has a small arm, take table off your sewing machine and place sleeve bottom edge around machine arm.

Trim seam allowance to 1/4".

Insert seam roll pressing tool inside sleeve and press trimmed seam allowance to one side.

If you do not want to topstitch sleeve, understitch on undersleeve, close to seamline. First make sure that you have a left sleeve and a right sleeve (mirror image).

Press lower edge of sleeve, rolling sleeve lining under slightly so that it doesn't show on upper sleeve

Pin cap of sleeve, keeping sleeve flat and fabric smooth. The cap raw edges may not meet exactly but this is okay because of the "turn of cloth" from your understitching. Easestitch sleeve cap between notches. Leave thread tails and DO NOT BACKSTITCH. An easestitch is 3.5 - 4 stitch length. Stitch once at 3/4" from edge and once 1/2"" from edge.

SETTING IN THE SLEEVE
With the sleeve finished, you are ready to sew the sleeve into the armscye. Begin by turning both sleeves right side out. Start pulling slightly on your bobbin threads of the ease stitch to create a slight shape to the sleeve cap. Determine which sleeve is the right sleeve and which sleeve is the left sleeve. Remember, the double notch marking is the back of the sleeve.

Turn the blouse inside out. Insert the sleeve into the armscye and match up markings:
*circle to shoulder seam
*sleeve seam to side seam, match seam lines
*front notch to front notch
*back notch to back notch
Adjust the ease stitch so that it is evenly distributed on the 5/8" line. Use lots of pins. If you pull up too much ease, the armscye will now be bigger and you will get puckers. Keep the easing smooth and evenly distributed.

When sewing, you will be stitching on the sleeve side. You will not be able to use the sleeve arm on the machine. Go slowly, stopping to move the fabric towards you as you stitch forward. Stitch at 5/8" stitch line, which will be between your two rows of easestitching.

After sewing the sleeves in, check for any puckers and fix if necessary. Take out any of the ease stitch that is showing on the right side. Then stitch again on the 5/8" line from notch to notch in the underarm area. Trim seam allowance to 1/4" between notches at underarm only. Zigzag the raw edges together all around the sleeve. In the cap area, coax the seam allowance towards the sleeve.

Here is another picture showing the trimmed armscye with the zigzag seam finish.

Line up both blouse fronts together from the top notch to the bottom raw edges. Make sure both sides are the same length. Trim one at the bottom edge, if necessary, so that they are the same length.

Fold self facing back, right side to right side, on the fold line. Pin and stitch lower edge at 5/8".


HEM
With blouse wrong side up, use seam gauge to measure 5/8" and press up lower edge of hem. If you have the side slits, press the slits wrong side to wrong side 5/8".

Now open up the pressed fold and fold and press raw edge under 1/4". Then fold up to produce the double fold hem and press all across lower edge of blouse.

Pin pressed hem. You may topstitch on wrong side of blouse, next to the inner fold, but stitching on the right side of the blouse shows the needle stitching, which is a prettier stitch. Lengthen the stitch length to 2.5 - 3 when topstitching. The topstiching will be next to the inner fold, as learned in the double fold hem sample. Keep your topstitching even distance from the bottom hem fold.

Stitch bottom hem.

If you have the side slits, stop 1/4" from the corner with the needle down. Raise the presser foot and pivot to stitch up and around the slit. If you stitch the fronts and the collar, you may do it continuously, pivoting at each corner.

BUTTONHOLES
Try the blouse on and mark with a pin where your bust point is. Then roll the collar back to show the lapel, and place a pin where you want the top button to be. This will determine the distance between all your buttonholes. The buttonholes should be between 2" - 3" apart.

You may use the Simflex Expanding Gauge to evenly space each buttonhole, marking with pins. If you don't have this gauge, use your seam gauge to mark the buttonholes. Make sure the buttonholes are sewn on the front right side of blouse, as though you were wearing it. The buttonholes should end at least 4" from the bottom hem to allow ease for sitting.

Prepare your machine by threading the bobbin thread through the finger of the bobbin case. This will tighten the bobbin tension and create a pretty satin stitch on the needle side. If you do not have a finger on your bobbin case, disregard this step.
If your machine does not have an automatic buttonhole stitch, you will need to sew manual buttonholes. Refer to the videos provided.

To determine the buttonhole length, measure the length of your button and add the button depth. This will be the buttonhole length needed for a good fit. For a 1/2" button, the buttonhole should be 5/8" long.

This is the Bernina buttonhole presser foot. Measure from the red line and adjust the red arrow for the correct length. Then put the foot on the machine.

Always do a test buttonhole first, through two fabric layers with interfacing in between. Then cut it open and test the button through it. You want a good fit; not too loose and not too tight.

You may make your own template using a sticky note. This will help you get perfectly placed buttonholes. For this pattern, the buttonholes are to start 3/8" from the fold. Start with the bottom buttonhole, and by the time you get to the top buttonhole, you will be a PRO. You can use the seam gauge to make the 3/8" mark.

Cut the buttonholes using the buttonhole cutter (using a block of wood underneath), or a sharp seam ripper. If using a seam ripper, first put a pin just inside each bar tack to prevent the seam ripper from cutting through the bar tack.

BUTTONS
Place both blouse fronts together. Put a pin through each buttonhole to mark where the button will be sewn.

Then transfer your pins to the button side (the left side of your blouse), 1/2" from the fold. When you sew on the buttons, the center of the button will be centered on the center front line, which is 1/2" for this pattern.

Sew a thread-shank button on your blouse. Do this by placing a toothpick or pin/needle on top of the button while sewing through the button. Then remove the toothpick and pull up on the button, and the extra thread will be between the button and the fabric. Then wrap the needle and thread around the sewn button a few times and pull tight. Then finish with a double knot under the button. Then insert the needle between the fabric layers and cut the thread tail. This thread shank will elevate the button and prevent the fabric from pulling and puckering when buttoned.

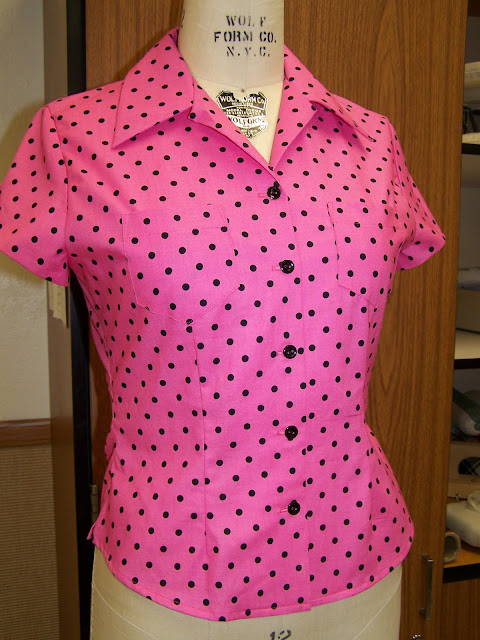
GREAT JOB! THIS IS A MAJOR ACCOMPLISHMENT AND GREATLY INCREASES YOUR DRESSMAKING SKILLS.
ENJOY WEARING YOUR NEW BLOUSE!
ENJOY WEARING YOUR NEW BLOUSE!
** SEW ** CREATE ** LIVE **